Saturday 31 December 2011

Bad Blogger!

I've been a bad, inconsistent blogger these past few weeks. Christmas did get in the way a tad but if I'm honest blogging just lost its interest for a while. That one threw me I can tell you because I usually love adding to my blog. I don't know what happened but I'm over it now and am looking forward to 2012 and lots more blogging. In fact I'm looking forward to showing you guys my garden creations and card creations as well as any furniture creations I do AND I just cannot wait to get a decent photo of the 8ft tall Wishing well I built from scratch with scrap wood all by myself! It's awesome even if I do say so myself.
I'm going to be making garden planters, bird tables, bird houses and heaps heaps more - roll on Spring and Summer!

But for now I've picked out just one of my projects that i'm particularly proud of for 2011. I was going to feature some of my favourite blogs for 2011 but I've been featuring on 'Wotcha Wednesday' for a while now and I just don't have the time to decide on a couple of favourites above all others right now!

So my favourite project for 2011 is

Scrap Wood Lamp.


I love this because it was so easy to make and it still looks as awesome as it did from the day I finished it! Plus it's different!

HAPPY NEW YEAR to all you guys that have made my blogging journey such a joy and Thank you to each and every one of you that has inspired me and taken the time to comment on my blog or email me.


So it's Goodbye 2011 from me and Goodbye 2011 from Huntly

Wednesday 28 December 2011

New Year, New You?

With the Christmas festivities all but over and the New Year looming have you settled on your New Year resolutions? Do you even bother with them?

I haven't bothered over the last couple of years because they all ended up the same way - broken and failed!
Don't get me wrong, I would start out with every intention of following them no matter how ridiculously unatainable some of them were. Determination was going to see them through!
BUT determination can be fleeting and hard to reaquire once you lose it, so I figured I would be better off not putting myself through the depression of failure in the first place. Now, if I'd given myself a goal that was actually realisitic and not as difficult as taking a star from the sky then who knows.............

Fast forward to this New Years. I've decided my attitude toward these 'resolutions' has been my biggest downfall, negativity doesn't actually breed success does it!
So my 'resolutions' have turned into 'goals' - see how much more positive even the word change is!
A 'resolution' can be broken on day 2 if you fail to stick to that diet, or fail to be more positive or fail at whatever other aim you've given yourself, but a 'goal' is simply that - a 'goal'. It merely states something you want to achieve and cannot be broken by one relapse because you can still achieve that goal.

So, my goals for 2012 are simple and achievable and because they're 'goals' I have the entire year to achieve them.
1) Lose weight. I lost 1 1/2 stone this year (though I suspect I have eaten that loss over xmas) and I am going to go back to Slimming World and lose the rest of my 'excess' weight.
2) Running. Back in 2009 I ran my first ever 10k - The Castle of Mey 10k - in a ridiculous time. I hadn't been running long (a few months) but even so, I expected a better time that 1hr 16mins. I then ran The Loch Ness 10k that year in a slower time. Negative mental attitude and all that. This year I want to run The Castle of Mey 10k in 1hr 06mins. My main problem is that I am not a natural runner. I was not born with grace (that went to my little sister). In fact I have as much grace as an elephant in a tutu and to make matters worse I don't like running! I like it when I'm doing it but the thought of it just makes me shiver and quiver so I guess I better get started.
3) Make time to transform my garden. After 8 years of not being able to do anything due to building etc I need to get the garden looking half decent.
4) Make a few crafting goodies to sell. This has no plan to it at the moment so I need to get googling some research.

And that's it! All doable and attainable. Though perhaps I should have added good mental attitude to that list as I am very much a cup half empty kind of girl.

So what do you guys have planned, if anything?

Wednesday 21 December 2011

Wotcha Wednesday

So I managed to miss last weeks Wotcha Wednesday but it would seem I can't for the life of me remember why! I'm sure there must have been a good reason (probably just came round too quick again) and it very nearly happened again this week - I simply forgot it was Wednesday! Which is pretty hard considering today is my husbands birthday!
Anyway Happy Birthday to Wayne and also Happy Birthday to my blogging friend Dana. Having birthdays this time of year can be particularly hard especially as youngsters because they tend to get moulded in with Christmas and maybe a little forgotten about so I just wanted to wish Wayne & Dana a very Happy Birthday here on my blog!

This weeks Wotcha Wednesday features blogs that are new to me but which I think hold much crafty goodiness for one and all!


'Sj's Little Musings'
I love this blog. It's so full of inspiration for various crafts.


The free templates for these cute mini houses is over at Sj's.


I think that is a brilliant idea and the personalised prints can be ordered over at Sj's. You're not limited to just Family Nicknames though, others are available!


These advent boxes are brilliant aren't they! At first I thought they were made from milk cartons but they are free downloads designed for Papercraft Inspirations!

There is much more to see over at Sj's so take a mosey on over and fill your boots!


'Sugar Nellie'
I admit that the name is what first drew me to this blog. How could anyone not take a little peek with a name like Sugar Nellie!
Once there though it didn't take me long to get hooked.

How ruddy adorable is that! I need say no more!


I could look at this all day. I just love all the embellishments and tags and absolutely love the tones in the image.


Cute isn't it! And quite generic really!

Hope this has given you a wee taster of what's on offer over at Sugar Nellies. If you like what you've seen so far then why not saunter on over and prepare to be hooked.


'The Shabby Shoppe'
I am prepared to be spending a serious amount of time next year on blogs such as this because I will be creating a digi scrapbook for each of my twin daughters.
When I found this site I was amazed at its contents and then found the link on it to 'shabby princess' which is full of FREE downloadable scrapbook kits - how cool is that!


One of the many free downloadable kits available at 'Shabby Princess'.


Recipe cards! Lovely idea and what's more they're downloadable and FREE over at The Shabby Shoppe.


Scrapbook pages galore over at The Shabby Shoppe.


I hope that has shown you guys a little of what is available on this awesome blog. If you want to see more the head on over to The Shabby Shoppe or Shabby Princess.


Well, that's another Wotcha Wednesday comeplete. I hope you like this weeks features. Thank you to all the blog owners mentioned who I am looking forward to gaining inspiration from in the coming year.

Thank you also to you guys for reading this blog. Leave a comment if you fancy it, I do try to reply to all comments one way or another.

Take care and Merry Christmas to one and all!


Tuesday 20 December 2011

Bailey the dog gets an overhaul!

A couple of years of ago my Great Dane dog died suddenly while he was playing and I was left heartbroken. Bailey really was my shadow.  I loved showing him whether it be local shows or championship shows and he was the first dog to qualify us for Crufts where he got second in his class.
A few weeks after he died my hubby took me to the one and only garden centre we have up here in an attempt to cheer me up (I love gardening and plants are usually the way to my heart). This particular time though I found no cheer in any of the shrubs or flowers I would usually be slathering over and was all for leaving until I came across an iron garden ornament that somehow reminded me of Bailey!
This statue bought such a smile to my face that hubby snatched it up and paid for it and once we got it  home Bailey got pride of place near the TV (not outside in the garden where it was designed to go) and there he stayed, frightening all the other dogs. (amazing how supposedly 'intelligent' animals can be fearful of an inanimate object huh)
Fast forward a couple of years and we've finally moved into our new house and I decided that Bailey would be promoted from TV guardsdog to Stairs guardsdog!
After a few weeks though I figured Bailey needed a makeover (Ok actually I was hooked on distressing everything and wondered if it would work on Bailey) and so off to the workshop he went.


 metal dog, iron dog, great dane statue, dog makeover

That's Bailey the statue in his former glory! Originally he had a sign attached to those hanging chains that said 'Welcome' but I found that a tad too cheesy so I took the sign away and left the chains to symbolise the Great Danes most endearing feature - slobber!


That's him after his spray job - a lovely cream colour!
Please excuse the state of the dog sitting with him. Kasa the Shih Tzu enjoys our mini lake (as do all the dogs) hence the filthy, wet look she has going on.


Here he is all sanded and distressed - I love the look!


Bailey at his new post of guarding the stairs - though I'm not sure what from! Oh yes, to stop that messy dirty Kasa legging it up there to share her dirt with my cream carpets.


Bailey dressed up for Christmas!


Bailey the original! My best friend and shadow!

Hope you have all enjoyed my garden dog ornament makeover. Thanks for popping by!


Linked to:

'Not just a housewife'
'Cherished Bliss' 
'Creative Itch' 
'Sassy Sites' 
'Sew can do' 
'Restore Interiors' 
'The Southern Institute' 
'Blue Cricket design' 
'Ginger snap crafts' 
'We are THAT family' 
'Sew much ado'

Saturday 17 December 2011

Xmas tree ruffle skirt

With no real projects even remotely finished I thought maybe I would recycle some old ones. This is a mas tree ruffle skirt I made last year and looks just as awesome this year :)


Well I've been absent from the blog for a wee while due to a stinkin cold and a cough, lucky for me though I have a caring hubby that happily made sure I was warm, cooked meals and helped with the housework. Hmmmmm or maybe he did all that out of guilt because it was him that passed the bug on to me! Whatever the reason I was veeery grateful lol.

So, I'm all better now and to make myself feel better about not managing to make quite as many xmas cards as I'd hoped I decided to have a go at one of those gorgeous ruffle xmas tree skirts that are all over blogland at the moment.

This is what the finished project looks like:

Ruffles, ruffles everywhere.

Although there are a few mistakes in the skirt overall it looks quite pretty and I'm chuffed with it.

To cheat and make life easier for me (we're all for that huh!) I used our original tree skirt and just attached the ruffles to it.

Erm......what was I thinking?


Cute when we bought it many moons ago but a bit out dated and gruesome now isn't it!
I'd been looking for a new skirt for the last couple of years but couldn't find anything I liked. I know, I know pretty much anything would have to better than the monstrosity above but still.......

I have quite a bit of fabric stashed away that's come from many places including charity shops, giveaways of old showroom fabric, fabric sample books, old curtains and quite a bit from my mum.
I decided to use some quite thick cream fabric and had intended to use the glue gun to attach the ruffles but as usual I changed my plans!
I didn't want the frayed edge look to my ruffles cos I'd just be at them all the time with scissors to neaten them so once I'd cut enough strips for ruffles I hemmed the bottoms and the edges.
Then I figured that as I had the sewing machine out anyways I may as well just sew the ruffles on as well. I may have worked briefly as an overlock machinist and a bar tack machinist but I am no seamstress. I hate pinning stuff and measuring things just isn't in my vocabulary.
So I pleated the ruffles to the skirt base as I went - not something I would recommend. The end result was OK on the bottom layers because that's where the base is widest but once I got to the shorter areas at the neck of the skirt base I made some real whopper mistakes.
Once I'd readjusted though I just added some ties and that was it. In all it took me about 4 hours, it may have been quicker with a glue gun but I suspect I would now be nursing burnt fingers!

Easy Peasy tree skirt.


Thanks for taking a looksee, pop by again soon.


Linked to:

;Funky Junk Interiors'
'Family ever after' 
'TLHayden' 
'shabbynest' 
'My romantic home' 
'Thirty handmade days'

Monday 12 December 2011

Xmas goodies

Xmas decorations (or rather the making of) are taking over my life right now. Just as I finish one project another just pops into my head - usually because I appear to be addicted to googling 'making xmas decorations' and a multitude of similar searches - and I suddenly have yet another project filed away.
Are y'all this bad? Is it normal for us crafters to have a hundred projects on the go and a further hundred filed away to start probably before any current ones are actually finished?
I'm thinking I need to learn to get this under control, maybe I'll even make it one of my dreaded 'New years resolutions'!!!!

Anyway here's a few projects for xmas I've been messing with. They're not brilliant and I'm aware of many faults on all of them and loads of things I either should change or should have done differently BUT in my defence this is my first year making all this stuff so I'm hoping improvements will be made as time goes on.
Maybe if I didn't leave them all till the last minute my projects wouldn't look so rushed.......

Let it snow sign.

I found the inspiration for this via google but I cannot for the life of me find the blog again so I must apologise to the original poster for that.
I found an old wooden bread board out in my workshop shed. It had seen better days and was obviously covered in grooves from blunt knives but it was just the right size and meant I didn't have to go in search of something else.
I gave it a quick sand down and then a coat of Blue Acrylic paint (I mixed my own) and once it was dry I stuck some snowflake shapes to the board and spray painted haphazardly in White.
Then I removed the snowflakes to reveal the original blue underneath only it didn't work and you really have to look hard to see the Blue - oh well!
Finally I used a Silver Pilot Pen to write Let it snow, added a ribbon and bow and stuck on some white snowflakes. Easy peasy!


Poinsettia posy.


I've had a load of white Poinsettias for years. I usually stick them in the soil of my Peace lillies but I'd used a load on wreaths this year so what I had left I mixed with these Red ones to make a posy.
Then I spray pained an old bottle with Gold, made a 3d tag, added a bow and some twirlies and put the whole lot together. Seeeeemples!!!!


Xmas table centrepiece.


This is a table centrepiece made from xmas scraps I had left over. The circle is actually a garland that I took apart and joined as a circle.
Then I just attached Baubles, cones, ribbon and berries with wire and a few other bits with hot glue and shoved 3 candles in the middle. Voila!


Xmas card tree.


These things are all over the net at the moment and originally I was going to get some branch twigs and spray them gold.
Instead I used some Cornus cuttings and left them natural as they're a gorgeous Red colour. Then I simply wedged them into a square vase, wrapped the vase in Red fabric, added one of those cheesy wrapping bows (I've run out of wire ribbon) and attached some of our cards to the twigs with craft pegs.
It honestly looks so much better in the flesh - this picture makes it look real naff but it isn't....honest!


Baileys Xmas attire.

Here's Bailey, you'll see more of him pretty soon because he started out life as a Brown, yup Brown doggie.
But for now he's just popping up to show you his Xmas attire - namely some cheap tinsel and a 99p hat - cheap as chips but doesn't he look cool as he guards our stairs!


Xmas wreath.


Finally, a wreath. It started out as a plain green garland so I made a circle of it and added bits and bobs with wire and hot glue. Then I made 3 bows with wire ribbon, stuck all 3 together and attached to the garland with wire. Job done!

There, all done! for now anyway! I have loads more going on but I'll have to put them on later. I hope you enjoyed these little projects and hope you get some inspiration form them especially if you're short on time as each one took a minimal amount of it!

Thank you for staying this far, pop back again soon or leave a comment if ya like.


Linked to:

'You had me at craft'
'Craft-O-Maniac' 
'Crafts keep me sane' 
'A world of crafts' 
'My 1929 Charmer' 
'Marvelously Messy' 
'Fingerprints on the Fridge' 
'Not just a housewife' 
'Sassy sites' 
'Todays creative Blog' 
'cherished Bliss'

Wednesday 7 December 2011

Wotcha Wednesday

I say it every week but time flies!
I've been busy with xmas decorations this week and still haven't managed to get a wreath made. I have access to so many goodies such as Willow, Holly etc etc so I'm determined to finally give it a go this year but I suspect that by the time I get one done it'll be time to take them all back down again!

This weeks Wotcha Wednesday is featuring some of the card blogs I love, simply because I have spent more time on these sites over the last few days than anything else!
I love making my own cards and after 8 years of having no room to do it I have been so looking forward to getting stuck in now I have a dedicated room for it.
However,,,,,,,, every attempt so far has resulted in disaster. I don't have stashes of all the new fandangled toppers and papers and my Cricut machine is on the blink because the carriage drags and cuts the paper in the wrong place. The nice people at Cricut have suggested I buy a new one - complete machine that is, not just a new carriage! Wouldn't mind but this machine isn't even all that old.
Anyway, I digress, again! (I have a habit of doing that. So much going round in my head that it comes out all bojangled!)
So I've been scouting blogs to cheat for inspiration. So far I've found heaps of that but still haven't produced one decent card.
Today is the day though, I can feel it in my waters! And I'll blog the results when they're done!

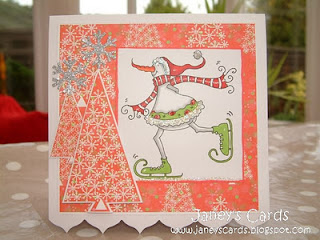
'Janey's cards'

Soooo love this one!

This is what i wish I could produce.

For something other than xmas - lookit!


I know you'll agree those samples are gorgeous so if you want to see more you know what to do. Head on over to Janey's cards where she has collections of cards all categorised for easy looking and so much more besides.


'Cute card Thursday'

This blog is more of a place where card makers / crafters go to show off their amazing talents in a challenges, because of this it is full to the brim with ideas and inspiration to get you going!

By 'Kathrin'


By ' Kathrin'
                                                    
By 'Wynneth'

Gorgeous huh! Well mosey on over to Cute Card Thursday and be prepared to be A.mazed!

'Rainy days Creations'

Susan is a true paper crafting addict (to quote herself lol)

Such a professional finish.

I never would have thought to use background papers like that! See I have no imagination!

Simple but gorgeous!

Susan has many how to's for the alot of the cards she has made so if you lack inspiration like me saunter on over to Rainy Day creations and learn from Susan.

Thank you to each blogger I have featured. Your blogs have seriously inspired me and will continue to do so over the coming New Year - who knows maybe I'll even enter a few challenges next year!

Thank you to those of you taking the time to check out my blog. I hope you were inspired by this weeks 'Wotcha Wednesday' and happy card making to you all!


Saturday 3 December 2011

Noel

So for the first time in god only knows how many years we have decided to get the tree and decs up now rather that 3 days before xmas day. The reason? Well we're kind of settled in our new home now and have so much more room than we've been used to these past 8 years so we figured it will be nice to make a bit more of the holiday season and spirit. Heck even hubby has done all his shopping! Not only that but he's wrapped everything too! Not bad considering he normally leaves it till xmas eve eh! His wrapping would be rushed and a disaster and if he bothered to put a tag on it it would simply say 'Linda'. Not very inspiring is it! Hence why I am very impressed with him this year, though I do draw the line at putting the pressies under the tree - I'm left alone here far too much to resist that temptation!

Look at that, I've managed to digress from a xmas tree to my pressies!

Anyway like I said I've been putting up the tree and decs today and what would normally have taken me a few hours has so far taken me the best part of a day and they're still not finished.

What I have managed to get finished though are some xmas blocks I recently made. They're not brilliant I'll admit because although I have the lettering down (finally) I'm not too hot on adding embellishments.
Here's the Noel blocks:

 wooden blocks, scrapwood, noel, painted blocks, christmas diy

These were so easy to make. I simply cut out square blocks from any scrap wood, sanded the edges and corners and then lightly sanded the fronts and backs.
2 of the blocks were painted using Laura Ashleys 'Summer Pudding' and the other 2 were painted with Crowns Metallic 'Striking'. All 4 were given a good 2 coats.
Next is the bit I always look forward to and enjoy - the lettering.
I always seem to prefer opening up CS5 (though you could use any word document) and then typing the letters and playing with the fonts.
Once I have the font I want and have stretched it to the size I want I trace them onto paper from the laptop using the backlight as a sort of lightbox. I only do this because I'm having printer problems but I find it pretty easy and quick.
Once I had them on paper I turned the paper over and traced the image on the back from the front and then it's just a case of lining each letter up correctly on the block and scribbling over the letter to produce a vague outline to follow later.
With that done I nicked my daughters Calligraphy ink again (Eek) in Black and using one of her artists brushes I traced over the N & E outlines and filled in where needed.
The O & L were traced and filled in with a gold Pilot pen.
Finally I added a bow (albeit tacky one) and some strands to the N & E, glueing them on using a hot glue gun.
For the O & L I attempted to replicate snow but it kinda went wrong!

Next I finished these blocks:

 noel, wooden blocks, painted blocks, scrapwood diy


These were mega easy to make also, using the exact same method as above.
The only difference is that I traced the letters from a book I have and the Black & Gold are both calligraphy inks and were used with a glass calligraphy pen (it's more of a glass stick TBH).
The top of these ones are simply some fake Holly leaves I found with some fake berries attached, hot glued on with some squirly ribbon.
Like I said, neither are perfect but still look pretty cool!

So thanks for taking a look. I'll be posting wreaths etc I've made soon and I've been enjoying checking out all your own Xmas crafts.
Happy Xmas crafting y'all.


Linked to:

'Finding Fabulous Frugalicious Friday
'Shabby Nest'
'Sassy sites' 
'youngancrafty' 
'I heart Nap Time' 
'Fingerprints on the fridge' 
'Not just a housewife' 
'Cherished Bliss' 
'Sugar Bee Crafts' 
'The Southern Institute' 
'Marvelously Messy' 
'Craft junkie too'

Thursday 1 December 2011

Family name sign

I started this project ages ago but the busier I got with other projects the more this one was set aside.
Originally I had included our family name within a piece of Typography as wall art, but that piece of wall art bugged the hell out of me because no one could actually read what it said and I got sick of having to clarify it. Plus I really did not like the way it had turned out anyhow, looking back I rushed it because my mum was staying for a while and I wanted it finished.
Every time I came across the thing it really irritated me, not only did people struggle to read it but the letters were all over the place and just didn't look right, also the script was just soo squirly.
OK, here's the link, just please don't judge me, it honestly wasn't my fault. Ok it was my fault but at least I can admit when I've made a complete farce of something.

Anyway where am I leading with this? Weeeeeell basically I redid that awful Typography and it's sooooo much better now (I'll repost it soon) but this time I put more thought into word placement  and omitted the family name part.
So I needed to make a new family name plate didn't I!

I really wanted to use a drawer front as I wanted a smooth finish with chamferred edges but I'd used up all my stash on other crap projects.
I then decided I could use some old wooden fence boards (as ya do) and convinced myself I really didn't mind the sanding involved.
This board was seriously grotty. I mean seeeeeeriously grotty!. It was extremely weathered, green and covered in pretty disgusting moss, plus it smelt a bit funky too!

Very weathered!
This beauty took some serious sanding I can tell you. But I'm too lazy to get out the electric sander so I did it all by hand - the smell was something else!
Once I'd got it looking presentable I gave it one coat of Patio Paints in Wrought Iron Black and then one coat of undercoat purely because I'd ran out of White paint and this undercoat was White (ya gotta learn how to get round these things huh!)
Once it had dried it was then that I decided I didn't want the naff rough look of this wood and that the split that had appeared from the left hand edge meant the project was a disaster.  So I shelved it!
Weeks later I came back to it and figured I'd give it a go, finish it and see what I thought of it then.
So I gave it 2 coats of Cream Emulsion paint and then went at it with the sand paper, sanding just enough to bring the black paint through as well as the White.
Guess what! I loved it! This rough wood gave it a whole different effect from smooth wood and that split just added to the effect - how chuffed was I!
As for the Typography I just did my usual trick - opened up CS5, typed the words, jiggled with fonts, traced from the back lit screen of the laptop, turned the tracing over and copied the front to the back and then  scribbled over the words on the front of the sign.
Then all I had to do was go over the letters with a Sharpie! BUT, I'm sick of Sharpie because they tend not to like this paint and just won't work properly. But I had no Black Pilot pen to hand so I then got stroppy! Once I'd had my hissy fit followed by a Nanny Nap I remembered my daughter storing her inks of many colours in my craft room. Why do that if you don't want to share right?
So I borrowed a bottle of her Black Calligraphy ink and a very thin artist brush too (Eek!) and traced the letters. Sorted!
This is now my favourite way of going over traced letters, it's so easy and so much better than a Sharpie.


Sorry it's a crappy angle but it's not actually situated where I wanted it. It was supposed to be propped up on my newly finished hallway table BUT hubby decided that was stupid! Yes, he did use those words!!! And figured it was better on the wall which I begrudgingly had to admit was probably a better place as it looks quite good there.
However I aint a tall girlie and I'm too lazy to get a chair or something else to stand on so I used the staircase but this meant the angles squiffy!

Thanks for popping by and taking a peek at my projects. have a scout around if you have time, if not then pop by again some time and/or leave a comment - I love getting them and do try to return mail to all.


Linked to:

'I Heart Nap Time'
'Fingerprints on the fridge'

Wednesday 30 November 2011

Wotcha Wednesday

Don't you think that the weeks are just flying by now? Is it old age that makes these things seem quicker?
I can't believe it was a week ago already that I did the last Wotcha Wednesday, it literally seems like yesterday!
Mind you I have been busy so maybe that's what's done it! I (like many many others) have been dragging out the christmas decorations and trying to decide what's reuseable and what isn't.
As this is our first Christmas in our new house we decided to scrap all the old knackered baubles - this is going to be a year of fresh memories.
However as a crafter I kind of find it difficult to throw stuff out just to make way for new similar stuff, so I've repurposed loads of stuff. I've made wreaths (fake ones mind, I am going to have a go at fresh ones soon), garlands, table centrepieces and the odd vase with baubles inside and all from stuff we were going to throw out - now that makes a happy crafter huh?

Anyway, onto this weeks Wotcha Wednesday which is my chance to feature 2 or 3 blogs that I love or I follow or that follow me.
This weeks features are as follows:

'Shabby Story'
You are going to love this blog, it's so shabbyesque and the site is so fresh and welcoming. I love it and and did feature one of Lynns Christmas decorations a few weeks ago but I'm featuring her blog here again as there is just so much inspiration there. Enjoy!


Birdhouses painted white, add a clock face & Voila! Christmas dec.

White washed cement urn with Burlap rose. cool!

Tins, Sheet music and a fabric rose makes a tree dec.


Gorgeous huh? But take a look at this craft room. I'm soooo jealous!

So organised.

 Next up we have
'4 the love of wood'
I love the Typography on this blog and Kristy has included some tutorials.

My daughter would love this pouffe!

Typography stools.

Wood signs are a fave of mine at the moment.


Take a mosey on over to Kristys blog, I know you'll love what you find.

'Redefining C'

I've followed this blog for a while now and still manage to find new things on there that I had missed last time round - it's full of gorgeous creations.

It's just around the corner so why not get making a sign like this.

Carri gives a great tutorial for this sign.

So adaptable. Love it.


There's so much more over at Carri's blog so take an amble over there and recieve your fill of inspiration.

So there you have it. 3 amazing blogs that you will garner heaps of ideas from.
Thanks for taking a peek, hope you enjoy!