Showing posts with label fabric. Show all posts

Tuesday, 20 September 2011

Love 'n' handmade silk flowers

It's the middle of September guys, where has this year gone? Did I sleep through the summer cos I sure as hell missed it!
Seriously we've hardly been able to string together one week of nice warm days over the last few months here in the Highlands. I am desperate for some warmth and with Xmas only round the corner I don't fancy my chances of getting any  - there's only so much these coastal views make up for - I need a holiday somewhere warm, preferably the Carribbean!

Anyway with the weather being so damp it's taking my furniture much longer to dry and cure. Unfortunately my workshop has but one piddly window and that faces North so we get no sun in there and the wind has blown in every direction except the one I need - typical.
I simply refuse to give up on the outdoor projects and stay indoors doing all manner of crafty goodness (remind me exactly why I am refusing this), I'm just having to learn a bit of patience (and 'a bit' is as far as I've gotten) and let nature take its course -though I am considering giving it a helping hand by wheeling a big dryer into the workshop. There's no way I can work like this for much longer.

Righto I must stop this whining.
I have at least managed to finish one project! yay! A tad small though and really should only have taken a day or so but with the damp air......... there I go whining again.

I found this cute 'Love' sign at our local  factory shop (local to me is 20 miles away) and whipped it up for £3 bargain!


The first thing I did was trace the letters onto some MDF, never know when I may need another one!
Initially I had planned to paint the back and decoupage the front of the letters in something to match our bedroom. In fact this was one of the rare times that I actually did  'plan', but in typical 'me' fashion I  changed my mind mid paint and completely deviated from the plan. And that is why I don't usually plan!
I painted it cream as per 'plan' and then sponged the edges as per' plan' ready to let it dry and decoupage it.
However, it looked like this


Yuk! This is the first thing I've ever sponged the edges of and so I wasn't really brave doing it but even so........
I them decided to paint it the purply plum colour I've used on other furniture for the bedroom and see what that looked like.
Once it had dried though I didn't like seeing the brush strokes in the paint so I started to gently sand it down - I say 'gently sand it' however when the sand paper you use is high grit it kinda defeats the purpose, but oh well.
As the edges became worn with the sanding I found I really liked the effect so decided to keep it that way.
This is what it looks like now


Not everyones cup of tea but I 'love' it!


Most of you know that we recently moved into a brand new home, every bit of it built by my husband with as much help as myself, Stacey & Leanne could muster and I really wanted as much of the inside to be hand made or renovated by myself as possible - my contribution if you like!
When it came to our bedroom I had bought the bed linen months in advance - a range called 'Rosina' by Catherine Lansfield - I fell in love with this range for 2 reasons - 1), it's sooooooo pweety and 2),Rosina is my middle name.
Anyway when it came to the curtains I wanted to stay within the same design range because there are too many variations of 'Plum' and I wanted to ensure the curtains matched. Problem was that for full lengths curtains I was looking at alot of money for two windows, so I decided I'd buy one set of curtains at 90" x 90" giving me the full length I wanted but would also be able to halve each curtain therefore giving me two pairs of full length, lined curtains (and saving a packet).
But I was halfway through sewing up the final curtain when I realised I'd only have one set of tiebacks - duh!
Having never made tiebacks before I was dubious about trying but I had some cream fabric that matched the cream in the curtains beautifully and actually managed to produce 4 tiebacks.
This left me  looking at the lovely Plum satin type material that the  original tiebacks were made of and trying to come up with something I could make that would enhance the new tie backs I'd made.

Ta da!

Fiddly but definitely doable and worth it.
I cut each tie back into 4 strips and singed one of the raw edges over a candle. This not only seals the raw edge from fraying but gives it that darker edge too, plus singeing with candles is reeeeally therapuetic.
I then ran the other edge of each piece up the sewing machine on a long straight stitch and then gathered the strip by pulling on the end of the thread, as each flower uses two strips I gathered the one to be used first a little tighter as it would form the centre of the flower.
I wrapped the first strip round a piece of wire, gathering it as I went and added pleats or folds as necessary and then the second strip was added much more loosely. Once at the end I wrapped it tightly with masking tape and took it off the wire. I then added another strip of cream in the same fashion as the others because I wanted a bigger flower than I was getting with just the Plum strips.
Once I had fluffed each flower to my liking I attached them to the tiebacks  by cutting a slit in the top piece of fabric (these tiebacks are 2 layered) next to the hook and inserted the taped end of the flower and set it in there using 'Fixsal' glue.


These tiebacks really do look lovely and for a first attempt I'm really chuffed with them.

Now I shall give you a little peek at what I'm working on at the moment:
I fell in love with this chest of drawers at a charity shop in town. Going for £20 I was too tight fisted to buy it at the time but soon regreted it and talked hubby into taking me back the next day to buy it.
I spent the entire journey there praying no one had bought it and kicking myself for not snapping up in the first place.


Don't like the handles or those plastic feet but it's well built and is going to look fabulous with a transformation.

A few days later in the same charity shop (a rarity for me as I hardly ever go out let alone into town) I spotted a side unit. Bit funky looking and I hate the sliding glass doors but I know exactly what I want to do with it and where it's going to go. well actually I bought it for the dining room but it's now going in the living room - once it's been transformed of course!


And only £5!

I've been wanting to make a couple of coat hooks for a while now and what I really wanted was some Iron hooks mounted onto wood but the cost of iron hooks is ridiculous, especially for a back hallway never to be seen. So for £1 each I got these


Ugly huh? Have some faith though, they're gonna look great!

I'm also working on a really old wardrobe which has so far in this current makeover changed colour 4 times - no wonder it's taking so long. But there's been good reason for it and I will share the whole sorry saga with you once it's finished.
Plus I'll introduce you to Lita - be prepared to be cutified by her cutiness.

Thanks for popping by and come back soon.


xx

This post is linked to

'Tip Junkie - Tip Me Tusday'
'not just a housewife'
'Ginger Snap Crafts'
'I'm Topsy Turvy'
'Funky Polka Dot Giraffe'
'Nifty Thrifty things' 
'The Creative Institute' 
'JAQS studio'

Saturday, 10 September 2011

Cube seat all covered and matching - just how I like it!

Remember the dressing table I made from the old computer station - 'this one'?
And remember the matching seat I promised was on its way?

Well here it is, a cube seat:-


The best bit is that it was so easy to make and cost me nothing more than my time.

So if you'd like to find out how I did it then continue reading, if not then feel free to check out my other posts, links or leave a comment or two, I love to get them and always try to reply.

Alrighty, the cube seat was made from a small chest of drawers I had kept when moving from the old place into our new home. The drawers and the runners had already been salvaged and used in the 'Computer desk to dressing table' project so the basic skeleton was all that was left of it and I have to say that for a cheap piece of old Argos furniture it was suprisingly well made, though very beaten up:-


Originally I was going to take those awful Grey plastic feet off the bottom but then I decided they'd make less of an indent on the bedroom carpet than the wood frame would so they stayed on.
The frame as it stood was too tall for what I needed so I took it apart, cleaned each piece and then measured the height I wanted on the long side pieces and went at them with my Dewalt Jigsaw (Ladies, if you don't already use power tools make a point of trying them out. My OH has always encouraged me to use them and I wouldn't be without them now).


The top and bottom pieces of wood had a bowed effect to them so I had to cut them both straight with the Dewalt Jigsaw to give me straight edges.
I then reassembled the pieces using all the original fixings. As I said this was suprisingly well made. It was easy to dismantle and easy to put back together.
Finally I cut the backboard to fit the new dimensions (only the height of the piece had changed) and used the original tacks to fix it back on.


That's how simple the construction was. I wasn't worried about sanding the piece or painting it because it's going to be covered.
Next to get it indoors and get out my fabulous sewing machine:-


I love this sewing machine. My OH bought it for me after I'd watched it for several months on 'Ideal world'. It'a Silver Viscount 9300e and to me it's the bee's knees. I've never spent quite so much on a sewing machine but this bit of kit is well worth every penny!

Anyway, I digress, I didn't have to hunt around searching for and choosing fabric because I knew exactly which fabric I was going to use.
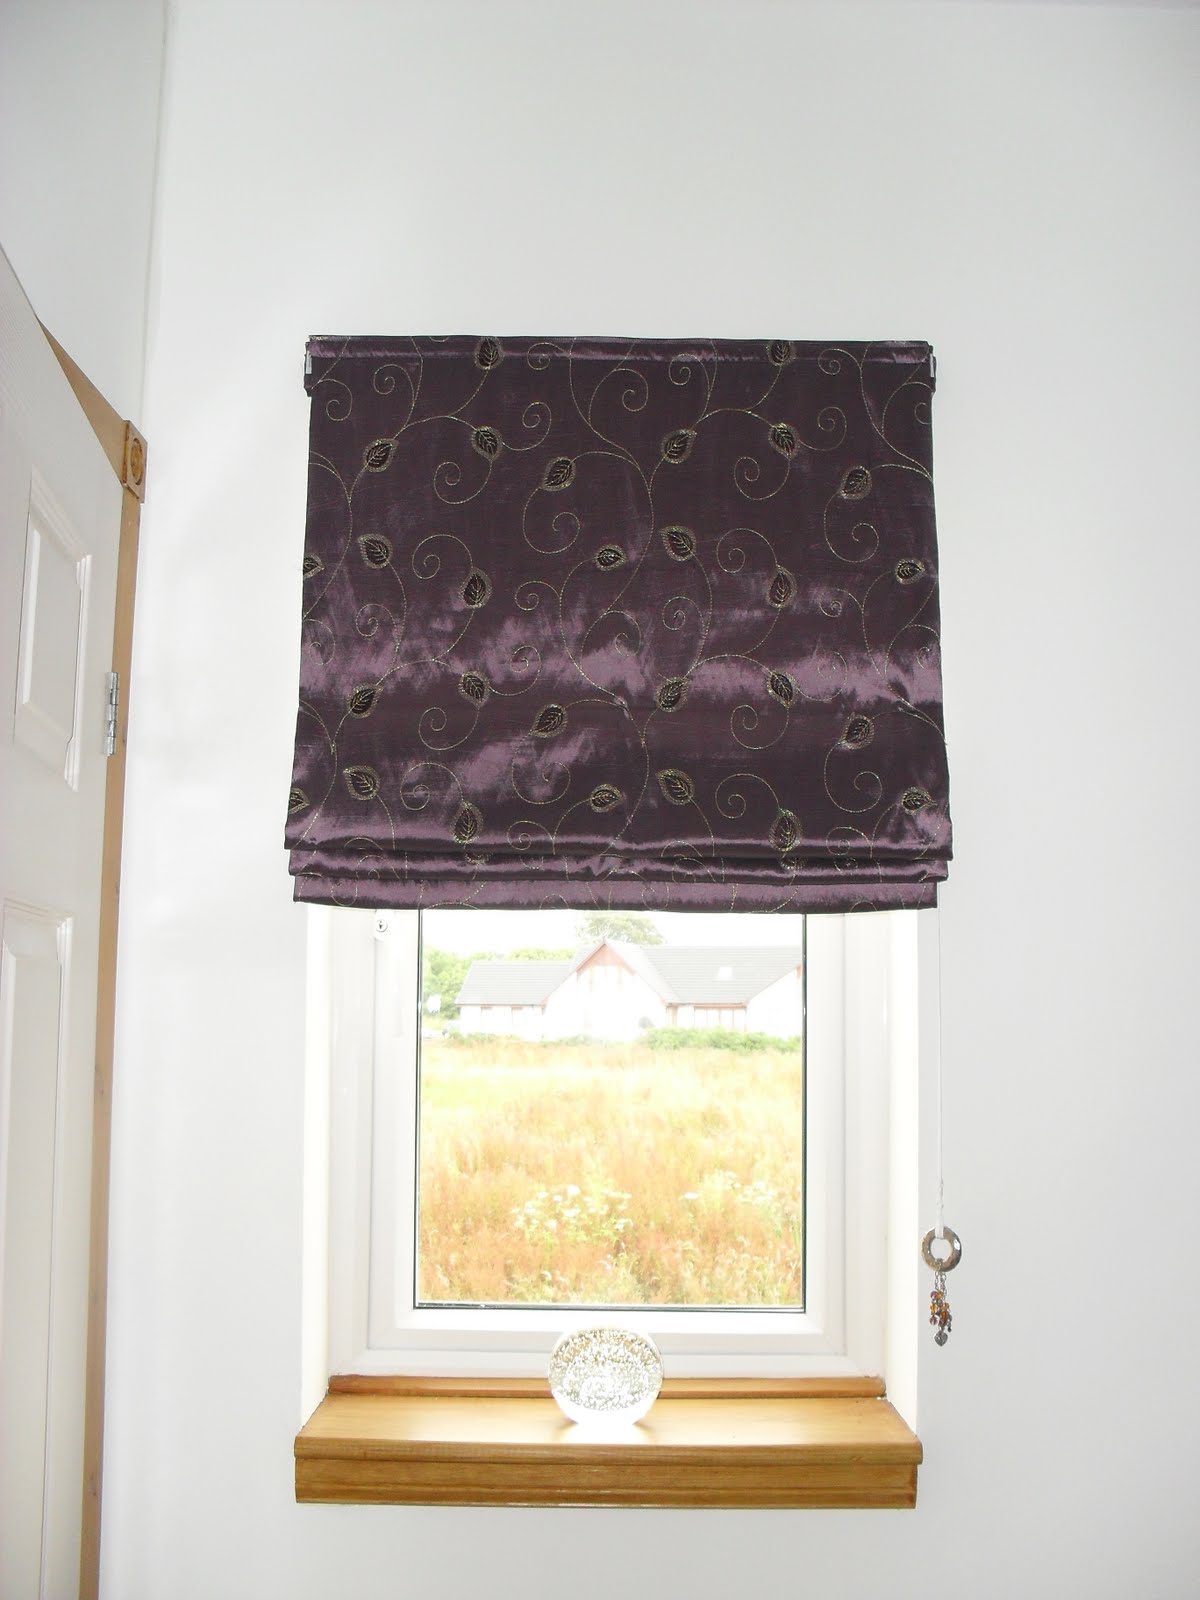
The base cover was a simple cotton fabric in a very pale Cream colour and the cushion cover would be a lovely Plum Satin type fabric I had purchased from EBay to make these 'Roman Blinds' for my bedroom.

As much as I love sewing I am not the most patient of sewers. If I know a project is going to take a few days then I can take my time no probs but if I know a project is a quickie then I tend to not be as careful as I should be and my biggest, biggest downfall is that I hardly ever pre plan (a condition I must rid myself of).
I basically measured the top (yep, actually used a tape measure ) and cut a square to fit making sure to add a 1/2" seam allowance to all sides.
Then I measured the sides, cut the squares and added 1/2" seam allowance. For some reason it has dawned on me literally while writing this blog that I didn't need to cut and sew individual squares for the sides - DUH!!!!! It would have been so much easier to have sewn one entire piece to the top fabric! I can't believe I did it the way I did!!

Anyway I did it the hard way but after adding a hem to the side pieces (something I didn't allow for in the measurement because I didn't preplan), I sewed it to the top piece and voila - a cover for the cube seat.
Now for the cushion: Well I used what was left of a body pillow for the cushion itself (I say what was left because I've gradually stripped it over time) and made an envelope cover for it.
I have to admit that this part included no measuring, I simply placed the cushion on the fabric and kind of guessed where to sew - didn't even use a pin!
I'm guessing that sewing a double hem to the envelope parts without pinning and/or ironing first is not the way to go however I folded as I went and hey ho, it's ruddy straight if I do say so myself!
So that's it, my cube seat and cushion made from the skeleton of an old set of drawers:-


This is it all tucked away. Just to prove it fits! and those drawers on the dresser, they're the ones salvaged from the piece I made this cube seat from. Cool eh!

And here's Oakley my 'Charlie Bear' posing and checking it out:


I heart Charlie Bears!

I have linked this post to:-

It's a Blog Party


”DearCreatives”

http://sumossweetstuff.blogspot.com/


Photobucket


Photobucket

Thursday, 25 August 2011

Easy to make Roman Blinds

I found this tutorial for Roman Blinds and figured I'd give it a go for our new home.
I needed at least 4 Roman Blinds and to get them made to measure would have been amazingly costly, however I'd never made anything like these before and was a bit worried I'd mess it all up.
Not so! - Terrell Designs have fabulous step by step instructions on their website and absolutely everything was there to make Blinds that look pretty amazing.

This is the first set I made.

 roman blinds, diy blinds, fixsall glue,fabric blinds

Strangely this first set was the easiest and the better ones, I guess I really took my time to get the measurements perfect and may have got a bit slack with the others. I made these from a set of curtains I bought from EBay, in fact I made alot of stuff from this one set of curtains: Firstly I took one curtain, cut it into two, sewed up the edges and made a pair of hallway curtains. Then I used the other curtain to make the Roman Blind (curtains were lined so I didn't even have to buy extra lining). I also covered 3 canvases with some of the fabric to hang in the hallway upstairs and I also managed to get 4 cushion covers too. All from one pair of lined curtains - thrifty or what!
The little tab you see hanging on the top left of them actually hides the runners from being seen from the side.

This was the next one I made.

fabric blinds, roman blinds, diy blinds, fixsall glue

I found this a little harder as the fabric was so sheer and lightweight. Terrell advises to use Gemtack glue or similar for the internal battens but I found the glue rubbish to say the least. On these ones I actually stitched the batten to the front rather than glued, I just made sure that the stitches were tiny so as not to show up.
I did put a weight bar (old plastic curtain runner actually) into the hen lining of this Roman Blind (I didn't on any of the others) but this was only because of the fabric being so lightweight. I found it didn't always roll up properly without the weight.
The pull cord is simply an old earring with beads attached.

Finally I made 2 of these.

cheap blinds, roman blinds, fixsall, diy roman blinds

These ones were more fiddly due to the size and my measurements aren't perfect but they are still fabulous and work perfectly.
The pull cords were some wooden finial ends from an old curtain pole. I simply drilled a hole through the middle from the top, painted them black and voila!
These were also made from one pair of 90x90 lined curtains acquired via EBay.

Terrell Roman Blinds are so easy to make, believe me if I can do it then anyone can and they don't have to cost the earth either. The costliest part of it for me was the runners and the locks but even these weren't expensive.

A NOTE ON GLUE: Terrel advises Gemtack or similar and most people who have replied to her website find the glue fantastic. However I found it terrible and couldn't get along with it so I turned to my favourite glue of all time - Fixsall. This glue is industrial strength and will bond anything. It's NOT a superglue, it's so much better. At some point I will post some info on this glue as I use it for absolutely everything from crafting to fixing MF diggers (seriously. And we're not talking toys either!)

Linked with


Keeping It Simple

'It's a hodgepodge life'
'Aworldofcrafts' 
'Sew happy geek'