Showing posts with label furniture building. Show all posts

Monday, 17 August 2015

Draper pocket hole jig - review so far!

I have wanted a pocket hole jig for quite some time now but I kept putting it off because I basically thought the one I wanted (the Kreg K4MS) was too expensive. Then I decided to do some research and find a good but cheaper alternative - after all a pocket hole jig is a pocket hole jig right? Well not so much, as it turns out!

After much research I decided on the Draper jig and at a cost of £50 it was considerably less than the Kreg K4MS at £96.
Mr CH never understood the theory behind this, as far as he is concerned you buy the product that you want because an alternative is never going to quite live up to your expectations - wise words!

My jig arrived and I was so excited to get going with it on some coffee tables and a sideboard I was making a new top for but when I opened it up it was obvious that the company had sent me a used product - all the parts were loose in the box, some of the pocket hole screws were missing and the part you drill though actually had some damage to it.
It took a few weeks for Draper to send me a replacement because I went away on holiday but I was still excited to get going with the new product when it arrived.

In the box
  • Clamp assembly and base
  • 75mm square recess drilling bit
  • 150mm square recess drilling bit
  • Drilling depth stop collar
  • Drill bit
  • Drilling depth stop collar
  • 2.5mm hex key
  • 5mm hex key
  • Replacement drill bit collars
  • Drill guides
  • Pocket hole screws
  • Instructions


At this point I have to say that the instructions are naff, really seriously naff! If you're an expert with pocket hole jigs then you'll obviously know what you're doing so it won't matter (though I seriously doubt an "expert" would be using this jig) but if you're a complete newbie to them you're gonna have to find your info elsewhere. The problem with that is I scoured the net looking for a tutorial using the Draper Jig and couldn't find anything - the Kreg jig had loads but it isn't relevant to using this Draper jig.
Eventually I figured things out by wasting time and wood and seeing what does and doesn't work and when I eventually got the hang of it I was looking forward to producing professional looking pocket holes!!


I'm not sure what these pocket holes are supposed to look like but to me they looked very rough though it's not a problem because you don't actually see them and yes, the join is exceptionally strong.
Along with naff instructions this jig came with no info on how to figure out where to set the drill stop and it makes no mention of screw sizes and how to work out what to use and what size wood to use for each screw size.
The problem I had that really reaaaaaaally annoyed me is that the clamp kept leaving dents on the good side of the wood. Even when I had the clamp open as much as possible and used only 3/4" wood there were still dents on the good side which are going to take time to get out.
The dents haven't shown up too well in the picture but honestly they are really evident and spoil the finish. The wood I use for my projects is pallet wood so it's never perfect anyway but these dents are really annoying.


The other problem I encountered is that the drill guides kept loosening on the jig plate and it made it harder to drill and the finished drill hole wasn't accurate. It was a simple solution to keep retightening the drill guides but very annoying.
I haven't yet completed a project using this jig because each piece now needs alot of time sanding it to get those darned dents out.
Basically I wish I had followed my husbands advice and just bought the Kreg jig, I really do not like this jig for many reason however I should point out it's good points as well as its bad

PROs

  • Metal construction
  • Cheaper than Kreg
Seriously that is it!

CONs
  • Poor instructions
  • Poor clamp design
  • No versatility
  • Dents on work!
  • Wobbly unstable parts. 


I may learn to like this jig the more I use it but I seriously doubt it and I can actually see me purchasing the Kreg jig I originally wanted and selling this one.


Tuesday, 3 June 2014

Diy pallet wood decking

Pallet wood decking is hardly an original idea nowadays is it, there seem to be many people jumped on that band wagon and the internet is full of different designs and ideas.
I have to admit Mr CH was hardly thrilled at the prospect of a pallet wood deck when I first stated that I would be making one but he humoured me none the less and helped me lay the finished boards once I had levelled and squared up the pallet base.

It didn't look much to behold at this point and I actually did consider giving up


But with a little bit ofpatience and loads of nails we were able to create this with more pallet wood and pallets to act as steps to the french doors


I know alot of peoplewould prefer proper decking and maybe some fancy fandangled rails around it but the cost of this decking was the price of a tub or two of Ronseals decking stain - that makes me very happy.
As for the rails - watch this space.
Incidentally those Purple Adirondack style chairs were pretty easy to make too and guess what - yup, all from pallet wood also.


Linked to:

Show me what you got 
Kammys Korner 
I Gotta Create

Saturday, 12 October 2013

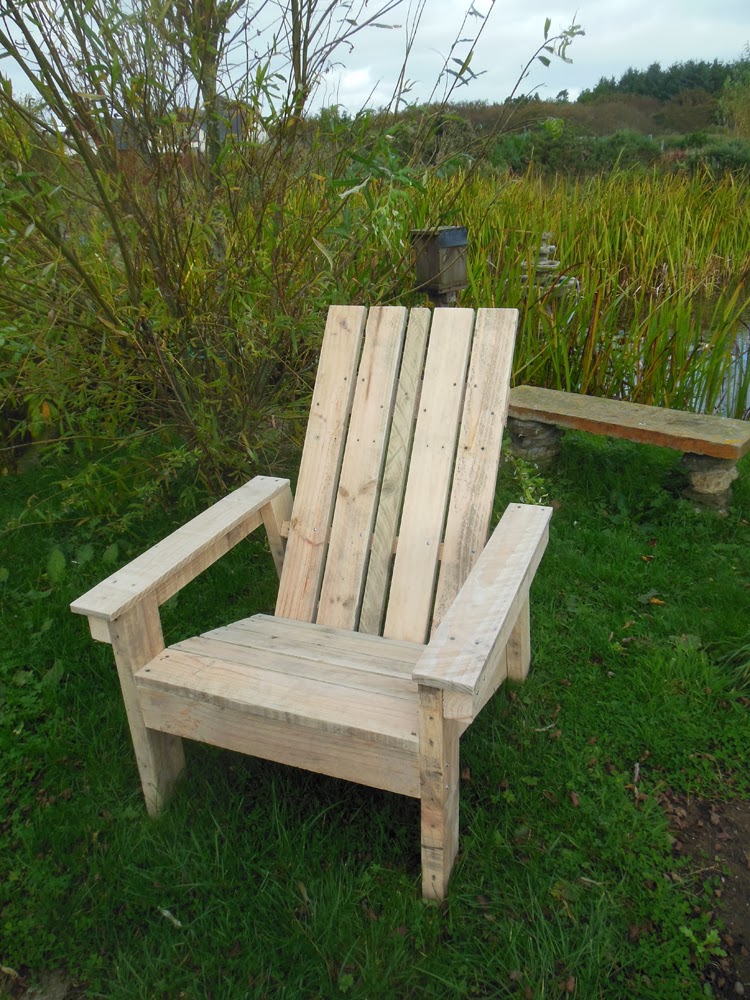
DIY Adirondack chair.

Usually when I build something I devise a plan in my head of what I want the finished item to look like and then I pretty much make it up as I go along, it's just the way I've always been - I've never built anything from plans! Until now that is.

I've wanted to build an Adirondack chair for ages but just haven't had enough scrap wood to even make a start so when hubby had all those pallets delivered I was adding up the projects I could do as I was ripping them apart.
My pallet wood pile is precious to me though so I made the decision to make the chair following plans I found online on the Anna White website.
I have mixed feelings about these plans because while it helped immensely to have the guesswork taken out of dimensions and angles etc I found alot of the measurements inaccurate for the size of wood that was suggested to use. Most of the issues were easy enough to work round but the finished look isn't as per the diagram because I had to use a 2" piece of wood as a back slat instead of the 4" the plans stated - this is because the width of the back support is 19.5" yet the plans tell you to use five 4" slats and secure them to the 19.5" batten leaving a 0.5" gap in between, this totals 21" NOT the 19.5" that the plans state. There were a couple more discrepancies like this and had I been more experienced I would have noticed this before starting but I didn't! The finished chair still looks awesome though especially when you take into account that the wood cost me nothing more than time taking the pallets apart - all I have to do now is decide on a colour.

Adirondack chair, DIY, Pallet wood, Adirondack, Garden furniture

 Garden furniture, DIY garden, adirondack furniture, chair


 adirondack chair, garden DIY, pallet wood

I'm currently making the matching footstool via the same website but I'm having the same issue with inaccurate measurements. The length of the footstool is 23.5" and yet the plans require you to use six 4" slats with the 0.5" gap in between - this totals 27.5" NOT 23.5" so I'm yet again left with a 2" slat at the bottom.
I've checked the website and everyone else that has made the same chair appears to have been able to use the stated amount and sizes of wood so maybe I am doing something wrong, I just can't igure out what.

Monday, 23 January 2012

Inspired.com

OK so I missed 'Showcase Saturday' this week but I honestly have a good excuse - I took my daughters to see 'Warhorse'. That's a good excuse right??
So maybe it wouldn't be ordinarily BUT the nearest cinema here is 2 hours drive away and because the city gets busy and car parking a premium we have to make sure we're there early which means a 7am start out. Plus because we never go to the city due to the distance we tend to arrange a shopping trip so although we started out at 7am the movie didn't start till 2.45pm and then by the time we get out we have a 2hr drive back.
Normally this wouldn't be a problem because hubby and I would share the driving but hubby stayed home so I was the only driver. Also not normally a problem but I have Narcolepsy and although medication has my sudden sleep attacks fully controlled I do have to pay heed to any warning signs of tiredness. Basically if I get tired I have to nap straightaway, if  I don't I will hallucinate, become punch drunky sounding and not be able to concentrate.
We made it home by 7pm though with just one ten minute nap needed by me - yay!

Getting back to my excuse though, the above is the reason I missed saturdays blog, though I have no excuse for not then picking it up Sunday except that I've been busy building a stone wall all by myself and was too knackered basically!

Those excuses sound feasible and acceptable yes?

Anyway I decided to showcase a few blogs today instead because there are a couple of blogs newish to me that I am totally in awe of and want to share.
What makes a blog / site awesome to me? Well content mainly and the style of writing but if I'm honest then freebies are always a winner, so on that note;

'The Coffeshop Blog'

This site is awesome and I so wish I had found it months ago.
I regularly take part in the 'EditMe' challenge and that is how I came to discover this amazing site. It is full to the brim of FREE actions and presets for manipulating your photos and give professional results. It also has a multitude of FREE textures and digital papers to further enhance your images.
No need to worry about knowing how to use them either there are tutorials galore on Coffeshop.
I have downloaded several actions and I have to say they are amazingly easy to download and use.
The tutorials also cover how to use the downloaded actions, presets etc etc and how to get the most from them.
A coupleof my favourites include 'Coffeshop faded daydreams'  and 'Coffeshop vanilla latte action'.
If you have any interest in working with, manipulating or even just enhancing images using most of the current software available then you need to check this site out.
Anything I blog about it will never do it justice, you need to get over there, check out what's available and simply play with them.

'Free Digital Scrapbooking'

Scrapbooking and cardmaking is something I'm hoping to do more of this year and digital scrapbooking has taken my fancy, I've even started with digital stamps that I can then colour with Promarkers (though I've yet to find a bleedproof cardstock).
This site has heaps of awesome, adorable scrapbook kits FREE to download. These kits include everything from background papers to all the embellishments you need.
Easy peasy to download and there is so many different themes to choose from that you will definitely find something you like.
Check it out and enjoy your downloads.

'Sawdust and paper scraps'

I don't remember how I came about finding this blog but I've been hooked on it ever since and regularly spend more time there than is probably strictly healthy.
Sandra is a diy'er, builder of "stuff", house renovator plus a wife and mother to boot and the projects she has completed are nothing less than amazing and very professional looking.
I always like to hear of like minded women who are willing to give power tools a go but Sandra even puts me to shame and I'll use most things cept the dreaded table saw.
Sandra has built an amazing master closet equipped with drawers etc all made by herself. Seriously you need to check the master closet out, any one of us would be sooooooo proud to have built something like that.
Then there's the craft room table, seriously ladies you are soooo gonna slather over it, it's just so amazingly lovely (that's as long as you roll the tongue back in after seeing the entire craft room that is!) And what is even more amazing is that Sandra gives tutorials for that table (which is easier to make than it looks), even the corbels and doors - swoon!
Sandra really is a talented lady and she has inspired me to have a go at making built in units myself. I usually limit myself to furniture makeovers or building small things from scrapwood but I am now going to indulge in actually spending some money on NEW - yes brand spanking new - materials and build the built in bathroom unit and built in bedroom closet that I so want but couldn't afford.
THANKYOU Sandra, you amazing lady!

I wasn't going to add images but hey, I can't resist because I really am so amazed at what Sandra has accomplished.

Told ya! Gorgeous aint it! Stop slathering now ladies.

I soooo want this closet. A lady made this - how ruddy cool is that!

So there you have it. Hope you enjoy those blogs as much as I do.
Thank you for staying this far, leave a comment if you fancy it I do try to email reply to all comments though I can only do that if you're not anonymous!