Showing posts with label tutorial. Show all posts

Friday, 19 April 2013

Toaster holder

I don't remember where I first found this idea as it was a day when I was scouring the net for inspiration. I didn't really take much notice of the idea at first but it must have settled itself somewhere in the part of my brain that actually functions and quite literally from nowhere it suddenly made sense to make one.
It's a simple idea for a tray to hold the toaster so that all those annoying crumbs don't settle all over the worktop and inside the cupboard that houses it.
It was so simple to make from scrap wood.

I cut a square of ply measuring 13" x 13" (I measured the base of my toaster first) and gave it a quick sand.


Next I added some 1" x1" scrap wood all round the base - glued and screwed.


Then I added scrapwood to the sides - glued and screwed - and used a Jigsaw to shape two of the edges and add a handle hole to the same two edges.


I gave it a quick sand down and left it at that. It does the job perfectly - no more crumbs.


Thursday, 11 April 2013

MY DIY recycled wormery with tutorial

The bitingly cold weather appears to be hanging on here and it doesn't make for a happy gardening experience so yesterday I figured I'd spend the day clearing up jobs in the greenhouse and polytunnel. Once I got in there though I suddenly had a whim to build a wormery. I've wanted to build a wormery for a while just to see if it composts down those kitchen scraps quicker than my compost heap but it had to be made using items I could salvage from around here (not buying a thing). I didn't have the tubs I wanted to use last time so gave up on the project, however I now have a surplus of those plastic tubs so I gathered 3 of them and 1 lid and headed off to the greenhouse / workshop.


 I decided I wanted the lid to be black instead of clear to absorb a bit of heat in the winter so I gave it a coat of black paint I bought for the indoor log burner.


Next I had to adapt the bottom bin which would be the one used to collect the liquid from the wormy compost. Alot of the tutorials online suggested placing a brick or two in the bottom so that the next tub wouldn't sit all the way down and the liquid end up drowning the poor worms but even if I did own a brick or two, which I don't (have never even seen a brick here in the Highlands) it's not what I wanted to do.
So I decided in my wisdom to screw a square block to two of the internal sides so that the next tub could sit on those - like this


I did then realise (when I took the time to actually think the process through) that in my "wisdom" I had actually made the liquid tub no longer watertight - duh!
Oh well, I'll just have to empty it regularly won't I!
As for the actual reality of screwing those blocks on, well let's just say I could have kicked the whole thing over the valley because I made a real meal of it. The main problem being that I wouldn't even allow a 1/4" difference between the two because if both sides didn't sit level it would bug the hell out of me.
With the bottom liquid catching tub done I moved on to the next level. This next tub needed teeny tiny holes drilling in the base to allow all the liquid to drip through to the bottom tub (I'm kinda going on blind faith that the worms won't follow suit) and then I drilled air holes all the way around the top of the tub


 This second tub then sat niftily on top of those blocks in the bottom tub


 The final top tub then had the same air holes drilled around the top and holes drilled in the base so that the worms can move on up as they need to.


With the lid on all I needed to do was add the ingredients and the all important worms.
Research told me that I needed to first put some damp cardboard on the base of the middle tub (hopefully this is designed to stop them pesky worms dropping to their watery death below) followed by some damp shredded paper, then some soil with the worms and finally some kitchen waste.
Once all the layers are in place I then simply put more damp cardboard on top of it all and then stack the third tub (with the lid on top) and then wait for those worms to do their thing!
So, where do I get the worms? I remember when I last got a load of horse manure that it was full of the correct Brandling worms but I've not got any recent manure so what to do? Well apparantly the compost heap is very likely to have some so I donned my Marigolds and plunged my hands into the compost heap.
After 10 minutes of rooting I found nothing! Nada! Not only was there no Brandling worms but there were no worms whatsoever - that can't be good can it?
So my newly built wormery is just sitting there because I refuse to buy blinkin worms. I'm just going to have to go and get a trailer load of manure.
Buying worms!!!! Whoever would think of such a thing! Worms!!!!


Friday, 18 January 2013

Quick & easy Leather luggage tags

ON HOLIDAY UNTIL FEBRUARY 10TH


I had planned to make luggage tags for our upcoming holiday ages ago, I was going to be o so organised - yeah right!
Yesterday I realised I still hadn't made any and it was looking pretty much like I was going to have to suffice with those shop bought cardboard printable tags - not so pretty and/or personalised huh!
So, I had some spare time and figured I'd have a go myself but if they took longer than 15mins each to make or the first one looked naff, I'd give up and go with the crappy cardboard ones.
I've done plenty of research over the last few weeks (that's me all over, loads of research but no doing) so I knew basically what I wanted the finished look to be, the problem was that the look I wanted wasn't going to be quick, so after all that research I just made it up as I went along and here's how they turned out:

Luggage tag
Not too shabby huh!
The best bit is that they took 10 mins to make. If I'd had more time and had been in a better mood (and if my craftroom wasn't such a tip right now) there are things I would have done differently but these will do for this holiday.
Here's how I did it:

Decide on fabric. I had some swatches of leather fabric as our friend is an upholsterer and gives me the leftover or out of date swatches, so I chose Chocolate leather:

Leather swatches

At first I cut 2 rectangles of leather (I didn't measure them) and tried to sew them together wrong side to wrong side but they moved about too much and looked reeeeeeally bad (to thick to get pins through without bending them - I tried!). At that point I could have given up! Yup, 2 mins in and i had had enough -  I hate it when things don't go how I want them to even though it's usually because I haven't thought things through properly or I'm trying to do things quickly instead of properly as was the case here.
To get over the slidey fabric syndrome I got 2 pieces of leather larger than the size of luggage tag I wanted to make, lay them wrong side to wrong side, traced a rectangle on top using white pencil and then sewed the tag from that, leaving one short end open and holding the whole thing together with clips:

Held together and 3 sides sewn.

Next I trimmed the edges as close to the stitch line as I dared on all four sides (I had to guess where the line would be at the un-sewn end as the pencil had worn off and I didn't think to re-draw it).

Cut as close as possible to the sewn line.

The next step was to decide on a tag for the tag (you know what I mean......right?).
To get a better finish next time I would use bias binding but for now I used ribbon folded in half, ironed and then sewn up the edge. Again I didn't measure the length I just cut what I thought would be enough:

Fold ribbon in half.

Once you've sewn the edge of the ribbon simply stuff both ends into the opening of the leather and then stitch the entire opening closed.

For the pocket that will hold the name and address I used laminate sheeting. Most tutorials online suggest vinyl like the stuff blankets are often cased in but I couldn't find any (until I'd finished - typical) so I used laminate sheeting.
I cut a rectangle of laminate to fit the front of the leather and then stitched another piece of folded ribbon  across the top of the laminate where it will be left open on the leather (this is where you will insert card for name):

Sew the ribbon to the laminate

Finally I positioned the laminate onto the leather tag, used clips to hold it in place as it moves easily and then sewed down both sides and the bottom end leaving the top ribbon end of the laminate open.
That's it, that's all I did!

Finished.
Most online luggage tag tutorials suggest that you use a plastic sewing machine foot to sew the vinyl as it glides easier but I didn't have that problem with the laminate, I used the normal metal foot.
Another tip if using vinyl instead of laminate is to place some tissue down the edges of the vinyl and sew through that instead of directly through the vinyl. You can then tear the tissue away once you've finished sewing, I suspect this is to help the foot glide better but also to help control the holes that the machine makes in the vinyl. Again I did neither of those things with the laminate.
I'm going to make better ones in the summer but if you're looking for a quick and easy luggage tag to make in a hurry then this is the one for you.
Shared at:
Dear creatives
Shabby Nest 
Itsahodgepodgelife 
One Artsy Mama 
Craft Junkie too 
French Country Cottage 
Shabby Art Boutique 
Diana Rambles

Tuesday, 24 April 2012

Beach pebble table re-do

Beach pebble table re-do.

One of the first projects I ever completed for our new house was this coffee table made from an old fish tank, some beach pebbles and some scrap wood.
Over the past year the wood table top has gradually shrunk and separated and has gotten to the stage where it looks horrendous!
This was one of my first ever wood projects and so I never really understood the need to completely dry the wood out before using it, I figured storing it in my husbands shed would be sufficient for drying purposes but in hind sight I can see just how much moisture is in the air in there and with no real sunlight from windows, the wood wasn't as dry as I had thought.
So this is what has happened to every corner and even to the in fills:

scrap wood table

See how much the wood has separated? The tip of the corners have stayed pretty tight but that's due to the screws I used there.

So I finally decided to get a new top made with wood that has been stored in my polytunnel where it has completely dried out.
The top is made from 5" x 2" wood that I have plenty of thanks to hubby saving it for me from a building he demolished.
I never work from plans because I'm pretty good at memorising what I want and as long as I can visualise the finished effect then I'm happy to just go with it - besides, a table top is hardly complicated to do.
Basically I cut the wood to the length I wanted the table to be, glued the edges, butted the sides together and clamped the whole thing together for a couple of days - I omitted the clamping last time which I would never do again.
A couple of days later I sanded the top down with various paper grits and using first a circular sander and then a detail sander - this wood needed alot of sanding! (The last top was sanded entirely by hand - Eek!).
Once it was sanded I gave it a couple of coats of Wickes wood dye in a Medium Oak colour and left it for a further 2 days.
Once this was dry it was evident just how different the wood dye tone was on the old top compared to the new top despite using the same tin of dye on both:

 scrap wood table

Next I gave it a couple of coats of Satin wood varnish.
Once it was dry I simply transferred the base plate from the old top and screwed it to the underside of the new top - this holds the whole thing together and secures it inside the fish tank:


Then it was simply a case of slotting that on to this:


If you look close you should be able to see the lip just inside the top of the fishtank running the length of each side - this is what the wooden battens on the base of the top will sit on, creating this:

fish tank table, pebble table, wood coffee table, scrap wood table,recycled table, easy table

Much better!

Saturday, 17 December 2011

Xmas tree ruffle skirt

With no real projects even remotely finished I thought maybe I would recycle some old ones. This is a mas tree ruffle skirt I made last year and looks just as awesome this year :)


Well I've been absent from the blog for a wee while due to a stinkin cold and a cough, lucky for me though I have a caring hubby that happily made sure I was warm, cooked meals and helped with the housework. Hmmmmm or maybe he did all that out of guilt because it was him that passed the bug on to me! Whatever the reason I was veeery grateful lol.

So, I'm all better now and to make myself feel better about not managing to make quite as many xmas cards as I'd hoped I decided to have a go at one of those gorgeous ruffle xmas tree skirts that are all over blogland at the moment.

This is what the finished project looks like:

Ruffles, ruffles everywhere.

Although there are a few mistakes in the skirt overall it looks quite pretty and I'm chuffed with it.

To cheat and make life easier for me (we're all for that huh!) I used our original tree skirt and just attached the ruffles to it.

Erm......what was I thinking?


Cute when we bought it many moons ago but a bit out dated and gruesome now isn't it!
I'd been looking for a new skirt for the last couple of years but couldn't find anything I liked. I know, I know pretty much anything would have to better than the monstrosity above but still.......

I have quite a bit of fabric stashed away that's come from many places including charity shops, giveaways of old showroom fabric, fabric sample books, old curtains and quite a bit from my mum.
I decided to use some quite thick cream fabric and had intended to use the glue gun to attach the ruffles but as usual I changed my plans!
I didn't want the frayed edge look to my ruffles cos I'd just be at them all the time with scissors to neaten them so once I'd cut enough strips for ruffles I hemmed the bottoms and the edges.
Then I figured that as I had the sewing machine out anyways I may as well just sew the ruffles on as well. I may have worked briefly as an overlock machinist and a bar tack machinist but I am no seamstress. I hate pinning stuff and measuring things just isn't in my vocabulary.
So I pleated the ruffles to the skirt base as I went - not something I would recommend. The end result was OK on the bottom layers because that's where the base is widest but once I got to the shorter areas at the neck of the skirt base I made some real whopper mistakes.
Once I'd readjusted though I just added some ties and that was it. In all it took me about 4 hours, it may have been quicker with a glue gun but I suspect I would now be nursing burnt fingers!

Easy Peasy tree skirt.


Thanks for taking a looksee, pop by again soon.


Linked to:

;Funky Junk Interiors'
'Family ever after' 
'TLHayden' 
'shabbynest' 
'My romantic home' 
'Thirty handmade days'

Saturday, 3 December 2011

Noel

So for the first time in god only knows how many years we have decided to get the tree and decs up now rather that 3 days before xmas day. The reason? Well we're kind of settled in our new home now and have so much more room than we've been used to these past 8 years so we figured it will be nice to make a bit more of the holiday season and spirit. Heck even hubby has done all his shopping! Not only that but he's wrapped everything too! Not bad considering he normally leaves it till xmas eve eh! His wrapping would be rushed and a disaster and if he bothered to put a tag on it it would simply say 'Linda'. Not very inspiring is it! Hence why I am very impressed with him this year, though I do draw the line at putting the pressies under the tree - I'm left alone here far too much to resist that temptation!

Look at that, I've managed to digress from a xmas tree to my pressies!

Anyway like I said I've been putting up the tree and decs today and what would normally have taken me a few hours has so far taken me the best part of a day and they're still not finished.

What I have managed to get finished though are some xmas blocks I recently made. They're not brilliant I'll admit because although I have the lettering down (finally) I'm not too hot on adding embellishments.
Here's the Noel blocks:

 wooden blocks, scrapwood, noel, painted blocks, christmas diy

These were so easy to make. I simply cut out square blocks from any scrap wood, sanded the edges and corners and then lightly sanded the fronts and backs.
2 of the blocks were painted using Laura Ashleys 'Summer Pudding' and the other 2 were painted with Crowns Metallic 'Striking'. All 4 were given a good 2 coats.
Next is the bit I always look forward to and enjoy - the lettering.
I always seem to prefer opening up CS5 (though you could use any word document) and then typing the letters and playing with the fonts.
Once I have the font I want and have stretched it to the size I want I trace them onto paper from the laptop using the backlight as a sort of lightbox. I only do this because I'm having printer problems but I find it pretty easy and quick.
Once I had them on paper I turned the paper over and traced the image on the back from the front and then it's just a case of lining each letter up correctly on the block and scribbling over the letter to produce a vague outline to follow later.
With that done I nicked my daughters Calligraphy ink again (Eek) in Black and using one of her artists brushes I traced over the N & E outlines and filled in where needed.
The O & L were traced and filled in with a gold Pilot pen.
Finally I added a bow (albeit tacky one) and some strands to the N & E, glueing them on using a hot glue gun.
For the O & L I attempted to replicate snow but it kinda went wrong!

Next I finished these blocks:

 noel, wooden blocks, painted blocks, scrapwood diy


These were mega easy to make also, using the exact same method as above.
The only difference is that I traced the letters from a book I have and the Black & Gold are both calligraphy inks and were used with a glass calligraphy pen (it's more of a glass stick TBH).
The top of these ones are simply some fake Holly leaves I found with some fake berries attached, hot glued on with some squirly ribbon.
Like I said, neither are perfect but still look pretty cool!

So thanks for taking a look. I'll be posting wreaths etc I've made soon and I've been enjoying checking out all your own Xmas crafts.
Happy Xmas crafting y'all.


Linked to:

'Finding Fabulous Frugalicious Friday
'Shabby Nest'
'Sassy sites' 
'youngancrafty' 
'I heart Nap Time' 
'Fingerprints on the fridge' 
'Not just a housewife' 
'Cherished Bliss' 
'Sugar Bee Crafts' 
'The Southern Institute' 
'Marvelously Messy' 
'Craft junkie too'

Thursday, 1 December 2011

Family name sign

I started this project ages ago but the busier I got with other projects the more this one was set aside.
Originally I had included our family name within a piece of Typography as wall art, but that piece of wall art bugged the hell out of me because no one could actually read what it said and I got sick of having to clarify it. Plus I really did not like the way it had turned out anyhow, looking back I rushed it because my mum was staying for a while and I wanted it finished.
Every time I came across the thing it really irritated me, not only did people struggle to read it but the letters were all over the place and just didn't look right, also the script was just soo squirly.
OK, here's the link, just please don't judge me, it honestly wasn't my fault. Ok it was my fault but at least I can admit when I've made a complete farce of something.

Anyway where am I leading with this? Weeeeeell basically I redid that awful Typography and it's sooooo much better now (I'll repost it soon) but this time I put more thought into word placement  and omitted the family name part.
So I needed to make a new family name plate didn't I!

I really wanted to use a drawer front as I wanted a smooth finish with chamferred edges but I'd used up all my stash on other crap projects.
I then decided I could use some old wooden fence boards (as ya do) and convinced myself I really didn't mind the sanding involved.
This board was seriously grotty. I mean seeeeeeriously grotty!. It was extremely weathered, green and covered in pretty disgusting moss, plus it smelt a bit funky too!

Very weathered!
This beauty took some serious sanding I can tell you. But I'm too lazy to get out the electric sander so I did it all by hand - the smell was something else!
Once I'd got it looking presentable I gave it one coat of Patio Paints in Wrought Iron Black and then one coat of undercoat purely because I'd ran out of White paint and this undercoat was White (ya gotta learn how to get round these things huh!)
Once it had dried it was then that I decided I didn't want the naff rough look of this wood and that the split that had appeared from the left hand edge meant the project was a disaster.  So I shelved it!
Weeks later I came back to it and figured I'd give it a go, finish it and see what I thought of it then.
So I gave it 2 coats of Cream Emulsion paint and then went at it with the sand paper, sanding just enough to bring the black paint through as well as the White.
Guess what! I loved it! This rough wood gave it a whole different effect from smooth wood and that split just added to the effect - how chuffed was I!
As for the Typography I just did my usual trick - opened up CS5, typed the words, jiggled with fonts, traced from the back lit screen of the laptop, turned the tracing over and copied the front to the back and then  scribbled over the words on the front of the sign.
Then all I had to do was go over the letters with a Sharpie! BUT, I'm sick of Sharpie because they tend not to like this paint and just won't work properly. But I had no Black Pilot pen to hand so I then got stroppy! Once I'd had my hissy fit followed by a Nanny Nap I remembered my daughter storing her inks of many colours in my craft room. Why do that if you don't want to share right?
So I borrowed a bottle of her Black Calligraphy ink and a very thin artist brush too (Eek!) and traced the letters. Sorted!
This is now my favourite way of going over traced letters, it's so easy and so much better than a Sharpie.


Sorry it's a crappy angle but it's not actually situated where I wanted it. It was supposed to be propped up on my newly finished hallway table BUT hubby decided that was stupid! Yes, he did use those words!!! And figured it was better on the wall which I begrudgingly had to admit was probably a better place as it looks quite good there.
However I aint a tall girlie and I'm too lazy to get a chair or something else to stand on so I used the staircase but this meant the angles squiffy!

Thanks for popping by and taking a peek at my projects. have a scout around if you have time, if not then pop by again some time and/or leave a comment - I love getting them and do try to return mail to all.


Linked to:

'I Heart Nap Time'
'Fingerprints on the fridge'

Monday, 31 October 2011

Wooden blocks

Whilst scouring the net for inspiration (as always cos my imagination is non existant) I noticed alot of wooden blocks with lettering or phrases on them - love em!
A while back I had a go at 'these' ones and loved the outcome but I'm really wanting to have a go at the ones that look like childrens building blocks.

So here is what I came up with:


and:


You wouldn't believe how simple these were to make.
Both sets began the same way. For the 'HOME' set I cut 4 blocks from a length of 2"x2" scrap wood and each one was sanded quite alot. To get the curved edges I used a seriously hard core piece of sandpaper (I do have mechanical tools for the job but I luuurve hand sanding) and then I used 2 other grades to smooth it out.

unsanded left, sanded right. But I'm guessing you knew that!

Next I gave it 2 thin coats of Patio Paint, waited for it to dry and then sanded those corners and edges back.
When it came to the lettering I discovered the ink was out in the printer - don't you just love it when that happens! NOT!! - and my Cricut machine blade obviously needs replacing as it just teared anything I put in it - I'm soooo not organised!
Just as I was about to produce a mammoth sulk I remembered a book on lettering my mum gave me a couple of weeks ago which is full of font samples in the back. Saved!!!
So I simply traced the letters the way I did for 'this' project onto paper, traced again on the reverse of the paper, laid it on the block and scribbled over it to trace the letter to the block.
Finally I used my 'stabilo' & 'Sharpie' permanent pens and traced the letters - seemples!

Sitting nicely on an old book on my sideboard.

Finished 'HOME' blocks.

The 'Home Sweet Home' blocks were produced the same way except for longer cuts of the 2"x2" obviously.
Originally I painted them Laura Ashleys 'Duck Egg' but as it dried I decided it wouldn't really look quite right with the other projects it was going to go with so I went over the 'Duck Egg' with Patio paints 'Patio Brick'.
Once dried I sanded those edges and corners again and a little to the fronts as well.
Originally I wanted to do the lettering White but it looked awful. I'm a bit picky when it comes to my lettering and if I feel the control isn't right then I'm not going to like the outcome. Obviously with no White pen (Do those exist?) I had to use paint and an adapted paintbrush - it's so never going to work!
Looked terrible so I started again and traced letters the same way as above and went over it with the trusty 'Stabilo' & 'Sharpie' pens.

'Home Sweet Home' sitting on my 'Shabby Shelf ' which hasn't been put up yet!


I absolutely enjoyed making these. It's always nice when a project takes such a small amount of time especially if you have larger pieces on the go too.
I'm going to make more of these blocks for Christmas decorations so look out for more of em!

Thanks for popping in again. Hope you liked em. Please leave a comment as I read every single one and love to get them. xx


Linked to:

'Keeping it simple'

'The girl creative'


'The Southern Institute'

'C.R.A.F.T'

'Coastal Charm'

'Sew Chatty'

'Three Mango Seeds'

'Not Just a Housewife'

'Reasons to skip the Housework'

'Todays creative blog'

'Delightful Order'

'seven thirty three'

'Funky Junk Interiors'

'Ginger snap crafts'

Monday, 24 October 2011

Sideboard makeover

I think I may need therapy!
Seriously!!
I'll begin here, now.
My name is Linda and I am addicted to Shabby chic!!
There I said it, I feel so much better now. Doubt I'm cured though.

This project started off as a £5 sideboard at the local cahrity shop. So determined to have it and take it home there and then that I insisted that myself, my daughters and their friend could quite easily carry it outside, down the steep alleyway and all the way up to the car park. Never mind that all three girls were in high heels (how stupid to go shopping in shoes you can't carry goodies in!).
"It won't fit in the car mother!!" That's not really a helpful comment is it - who needs reality when a piece of furniture is destined to go home with you?
"It will if you three catch the bus home!" The looks on their faces were classic. I'd like to think that I wouldn't have gone that far but.............
So the bemused shop assistants who kept trying to get me to pull up outside (nah, no need for that I insisted) opened the doors fully wide for us and ushered everyone out the way.
I grabbed the end first and immediately put it back down rather sheepishly. Reality had sunk in a) no way could the girls pick this up. B) No way was it going down the alley without someone suffering a broken leg, and C) No way was it going to fit in the car.
"I'll just leave it here for now and get my husband to pick it up" - note I said that in a tone that would suggest I thought everyone in the shop was stupid for not having thought of that in the first place - don't you just love people like that!

Anyway, hubby said it wouldn't fit in his little van so a friend had to pick it up and keep it in his van. For 3 days! 3 days!! You can imagine can't you, the anger, the impatience and the sulking?

So here is the sideboard as it was


Yep, THAT is what all the fuss was about! Hard to believe eh?

Right from the start I knew what I wanted to do with it.
The glass was to come out, shelves to be repositioned and maybe just one to each side, the top was going to be renewed with 6x2 wood that was to be stained and the unit itself was to be a solid cream colour.
So the glass came out as did the shelves and I sanded it to within an inch of its life.
Then I gave it a coat of spray primer. The stuff I used is actually car primer and it was cheap - £1. I know alot of people recommend NOT using the cheap stuff but this one actually did cover well (though not perfectly) and set very quickly. Soooo much better than painting a primer on.
Then I started on the colour coat. We have tins of 'Classic Cream' paint that we bought for the house but thought it looked too yellow on the walls but I figured I'd give it a go on this.
It covered well but putting it on with a brush (even brand new ones) was doing my head in. I hate even the slightest tiny bit of dust or tiny hair and I found I was having to sand down after every coat.
This was making it take an age to complete.
On the back board I decided to stencil a pattern that matched the feature wall in our front room. You can check out how I made the stencil 'here'.
At first I loved the finished stencil look but the more I looked at it the more I thought "what the hell was I thinking?"


I really do not like it now but I left it simply because I was sick of all the painting by this point.
During the final sanding I kinda got carried away and then decided that the piece would look much better as a shabby piece. It so does!
The shelves were also sanded but despite my original 'plan' they went back in in their original place.
As for the top. Well I decided I didn't want the chunky wood top I wanted to do more sanding - see, told you I need therapy!.

This is the finished piece


>


It really is more sanded than it looks - honestly! I just haven't got the hang of taking decent piccies yet!
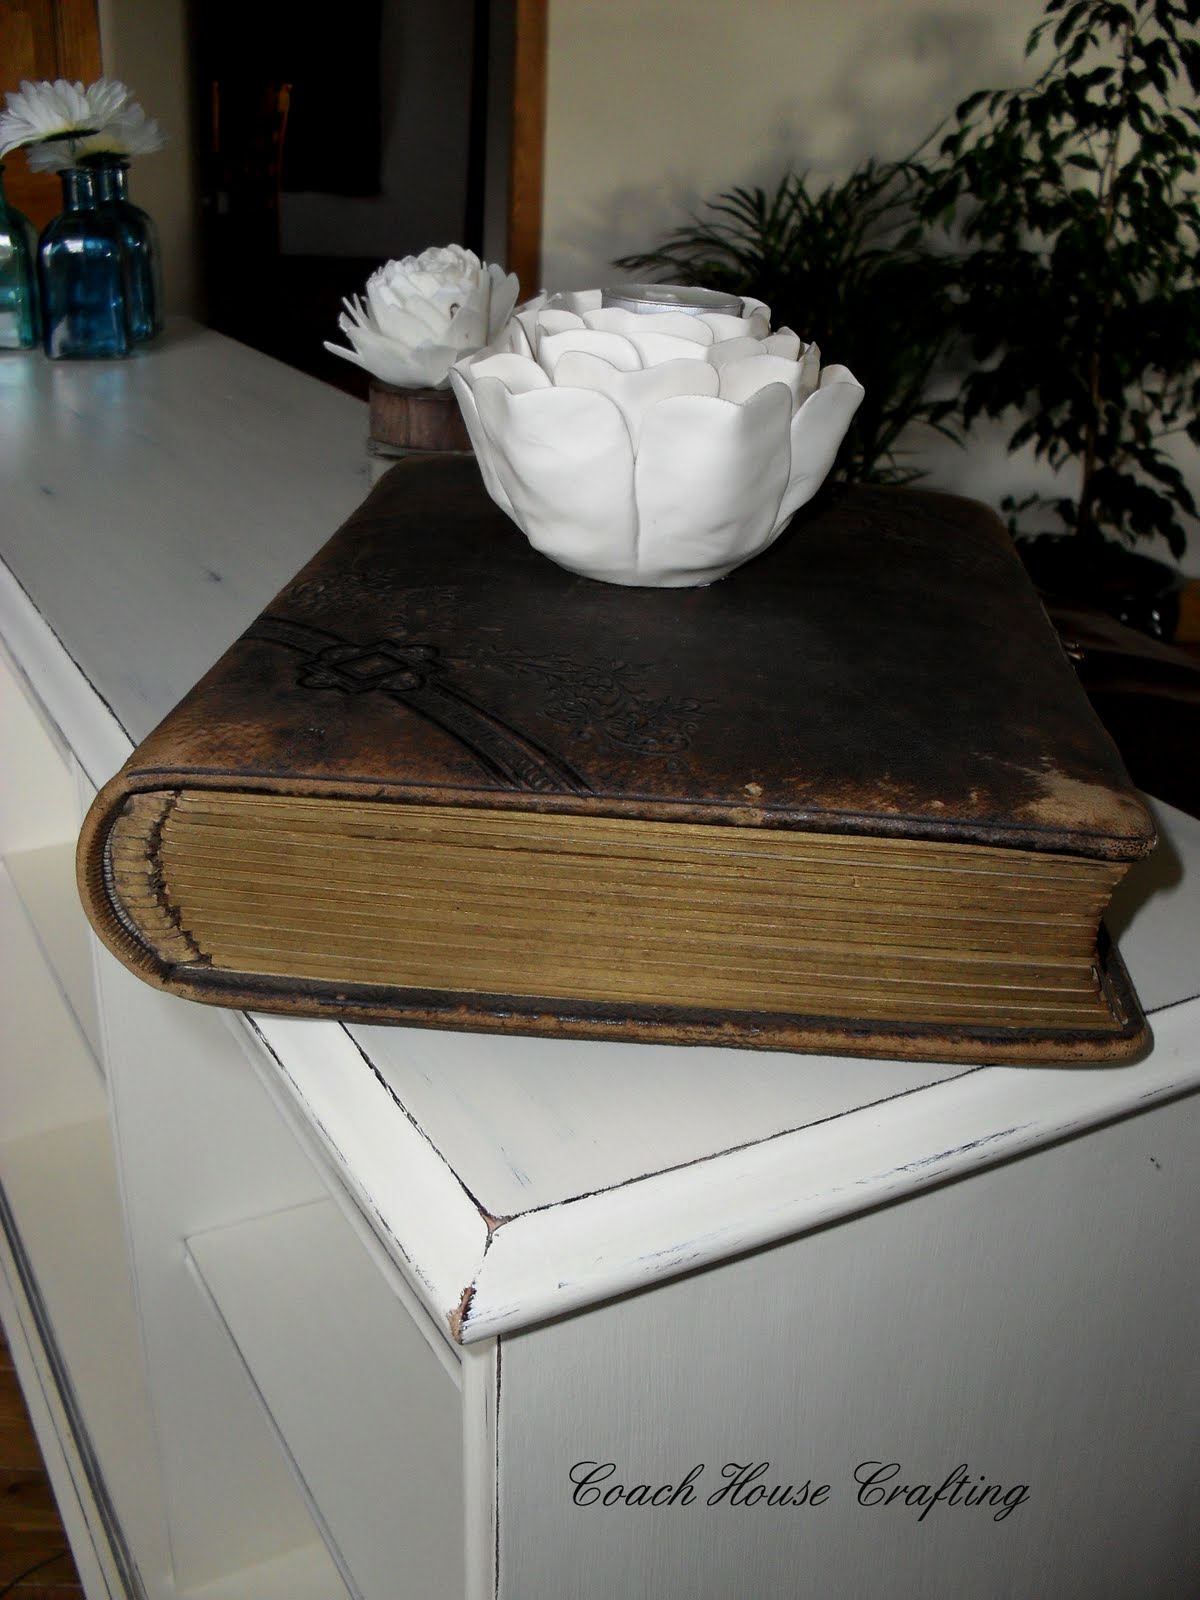
The bottles on the top I got for 79p each from a bargain store when I was in England recently. The flowers in the vases were not what I really wanted but they were all I could find in the bargain shop.
The book on the other end is an old one that my mum gave me.

So thanks for stopping by, pop back anytime.


This post is linked to:

'Craft-O-Maniac'

'Three Boys'
'Restore Interiors'
'Three boys vintage furniture'
'It's a Blog Party'
'Kammys corners' 
'Common ground' 
'Cherished Bliss' 
'Its a hodgepodge life' 
'Domestically speaking'