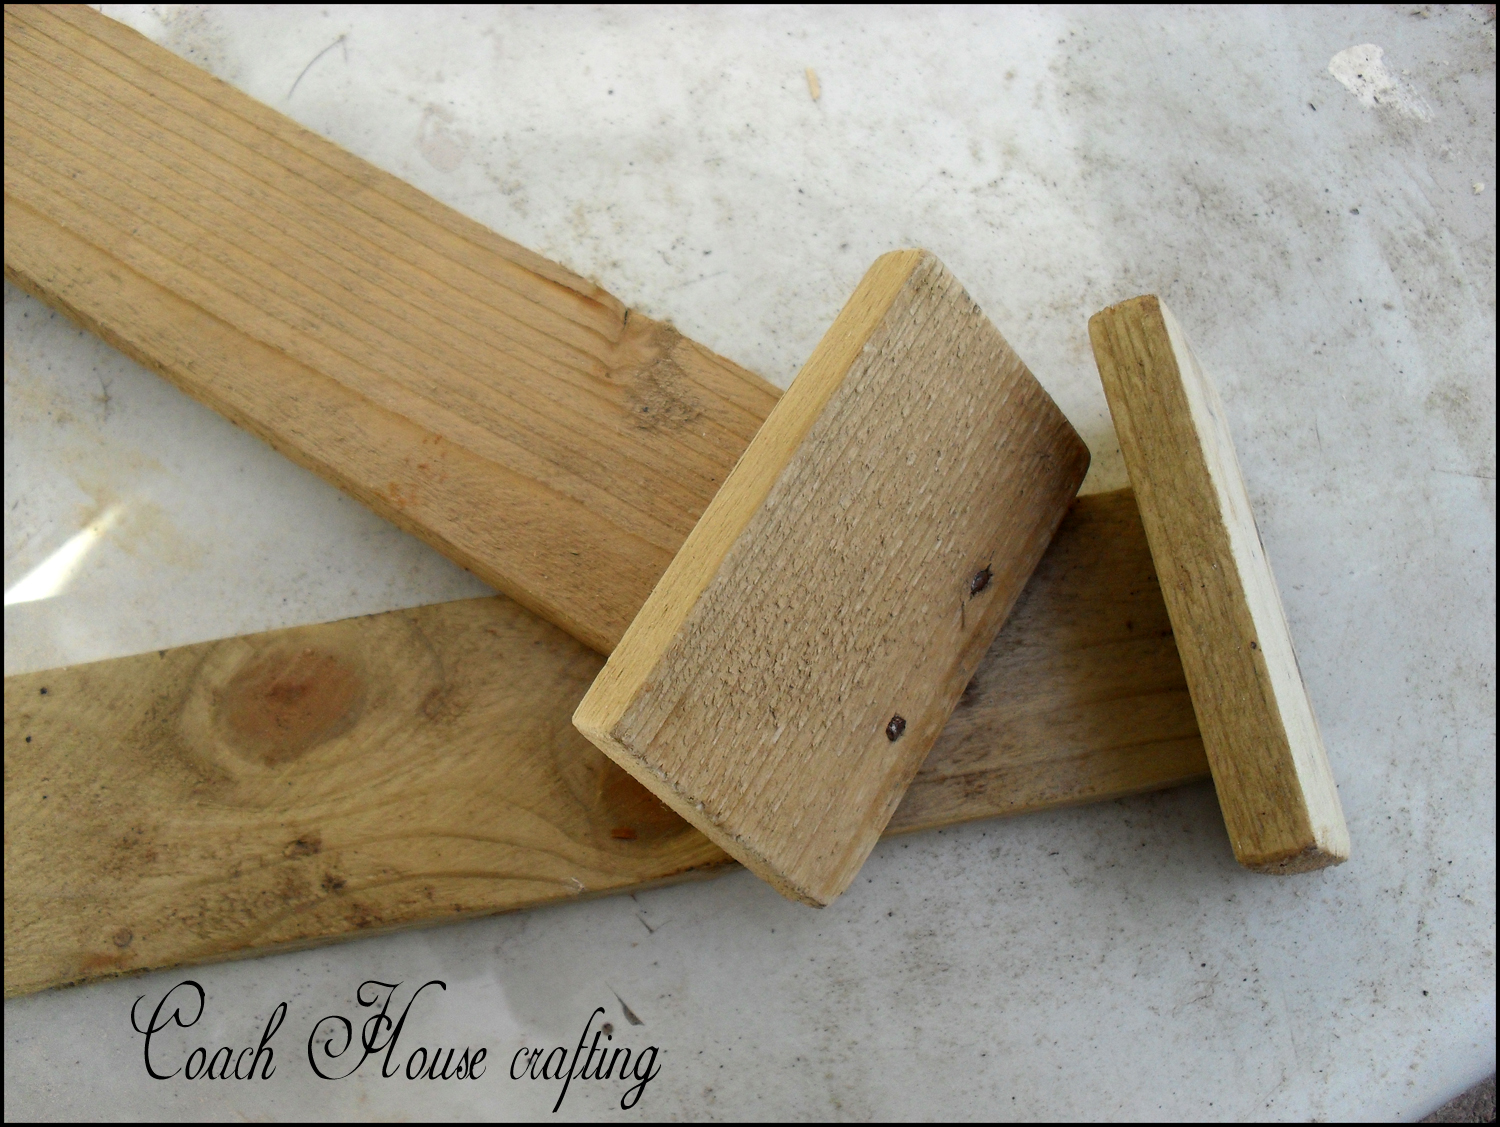
Personally I don't think a garden can ever have too much seating, whether it be stone seats hidden away, huge swing chairs in the middle of a lawn or plenty of comfy Adirondack chairs round a firepit.
A couple of years ago I made 2 Adirondack chairs from plans I found on the 'Ana White' website which proved to be very popular at home and fought over the handful of times we decided to sit out in the garden. So popular that I decided I needed to make a couple more this year just so that I don't have to race the kids to them during the next BBQ.
The ones I made 2 years ago are quite angular, I chose the plan because it was exceedingly simple to follow and I had all the encessary sized wood from pallets that I had taken apart.
Before I remind you of those first chairs let me take a second to remind you of the best pallet breaker to ever be designed - I chose the 4 way bar.
This 4 way pallet bar turned this heap of pallets
into this
and the best bit is that I could do it all by myself. Each pallet took literally seconds to break apart and meant that not only did I get all the long lengths of wood but the spacers also - which is where the chunkier wood came from.
This was my first attempt at the Adirondack chair and literally every piece of wood came from a pallet.
Deciding I wanted to add some colour to the garden I chose to paint them in Cuprinols 'Summer Damson' garden shades.
I've now completed 2 more Adirondack chairs with matching footstools but I didn't use the original plans because I wanted a more rounded chair for the second half of the garden. Again it's all pallet wood except for the main bottom rail which is scrap 6x2.
The chairs has since been painted in Cuprinols 'Fresh Rosemary' garden shades but I've yet to take a photo of them finished.
The plans for these second ones are in my head. I didn't want to make it up as I went along but I really couldn't find exactly what I was loking for on the internet so I conjured these up using 3 different online designs with my own bits added. It wasn't until I'd finished them that I realised the footstool doesn't match 100% - the main leg is angular on the end not rounded to match the chair - oops!
Showing posts with label gardening. Show all posts
Wednesday, 6 May 2015
Tuesday, 21 August 2012
Greenhouse space saver plus milk carton recycle
Wow, I've been absent for a while huh! well apologies for my lack of posting but I'm now back and will have new projects all ready to post on here pretty soon. Until I have them edited though I will repost a couple of my popular back posts and I thought this greenhouse space saver was the perfect post for these glorious gardening days!
I'm hiding indoors at the moment because the wind sounds awful outside. I placated the guilty feeling by convincing myself that I would use the indoor time to make my mums birthday card (it's her birthday in about 6 days) but I made the huge mistake of putting Create & Craft on the TV. Just while I check my emails mind!
Yeah right!
I then logged in to my blog to reply to some emails and comments but we all know what happens then don't we? yup, I'm too engrossed in reading other blogs that heading through to the cold craft room has just lost its appeal.
I could go outside and potter in the poytunnel BUT I figured instead of that I could just blog about a project I completed a couple of years ago before I had the polytunnel and needed some space saving ideas for the greenhouse - those rows of pots with seedling veg and flowers in em were just taking up too much room because I had to put them on just the one layer of staging.
Brainwave people!
I created this space saver (though excuse the dirty holders)
The best bit is that it was easy enough to make with no technical tools needed if you don't have them AND it's all scrap wood AND it recycles those plastic milk containers.
OK so how to make it!
First gather your tools ( I have a habit of looking for what I need when I need it - not a good idea).
You'll need:
Wood - I used roof batten, small scrap bit of plywood, some scrap beading and some scrap pieces of 2"x 2". You can use any size you have though.
Screws (I literally use anything I can find. I used black plasterboard screws for this)
Nails if you don't want to use screws.
Tape measure.
Hammer.
Screwdriver.
Saw (unless you use a cutter as I do)
Pencil.
Milk cartons (I used 30 but you can make the frame and add them as you get them)
Scissors.
I made a basic 4 sided frame using scrap roofing batten and nails or screws or whatever you have, and made corner supports for the top only.
Next I made 2 bottom plates to support the whole thing. I just used whatever cuts of wood we had for this as long as the bottom plate used is wider wood than the top plate.
Screw the two bottom base blocks together then screw the actual square frame to the blocks - remembering to keep the corner supports to the top.
Then I cut some pieces of plywood into a rectangle shape and cut out 2 grooves to each one to hold the cross supports that the bottles attach to.
Those rectangle pieces were then attached to the frame with screws as shown above.
Next I cut some small beading to use as supports for the Milk cartons, making sure the cuts I made in the rectangles kept the supports supported but not so tightly that they were awkward to lift out.
Finally grab some milk cartons (I used either 4 pint or six pint ones) and cut around the carton just about where the label starts. You don't need deep holders if they are for seedling pots.
*TIP - put the lid on the carton before you cut it. This keeps the air in and makes it rigid for that first incision with the scissors - try to pierce it without the cap and it will just collapse*.
Once you have them cut just slot them onto the frame through the milk carton handle. Leave the lid on if you want but you can take the lid off to aid drainage too.
Now you're left with a load of bottoms to milk cartons so lets use em to make plant labels.
Cut down the middle of the leftover bases to the next mark that goes all the way round the container (would have been the bottom of the label) then turn and cut all the way round the circumference of the container so you end up with a large rectangle of plastic.
Finally cut slices off that plastic as wide as you require your labels to be and then cut points on one end od each and voila! Plastic plant labels for free.
I use these labels all the time and because they're free to make I don't worry about cleaning them when they're really bad, I just throw them away and make some more. You can stick them in a container of bleach though as they are easy enough to clean that way.
p.s. Once you've cut the side off the container to make your labels you are left with small pots made from the very bottom, I use these holding the labels or collecting seed etc. So even the bases can be used!
Linked to:
'I heart Nap Time'
'Nifty thrifty things'
'Youngancrafty'
'My romantic home'
'Funky junk interiors'
'Country momma cooks'
'My 1929 charmer'
'Sew can do'
'Keeping it simple'
'diy home sweet home'
'sassy sites'
'ProjectQueen'
'Kammys corner'
'Organiseyourstuffnow'
'Gingersnapcrafts'
'Common ground'
I'm hiding indoors at the moment because the wind sounds awful outside. I placated the guilty feeling by convincing myself that I would use the indoor time to make my mums birthday card (it's her birthday in about 6 days) but I made the huge mistake of putting Create & Craft on the TV. Just while I check my emails mind!
Yeah right!
I then logged in to my blog to reply to some emails and comments but we all know what happens then don't we? yup, I'm too engrossed in reading other blogs that heading through to the cold craft room has just lost its appeal.
I could go outside and potter in the poytunnel BUT I figured instead of that I could just blog about a project I completed a couple of years ago before I had the polytunnel and needed some space saving ideas for the greenhouse - those rows of pots with seedling veg and flowers in em were just taking up too much room because I had to put them on just the one layer of staging.
Brainwave people!
I created this space saver (though excuse the dirty holders)
The best bit is that it was easy enough to make with no technical tools needed if you don't have them AND it's all scrap wood AND it recycles those plastic milk containers.
OK so how to make it!
First gather your tools ( I have a habit of looking for what I need when I need it - not a good idea).
You'll need:
Wood - I used roof batten, small scrap bit of plywood, some scrap beading and some scrap pieces of 2"x 2". You can use any size you have though.
Screws (I literally use anything I can find. I used black plasterboard screws for this)
Nails if you don't want to use screws.
Tape measure.
Hammer.
Screwdriver.
Saw (unless you use a cutter as I do)
Pencil.
Milk cartons (I used 30 but you can make the frame and add them as you get them)
Scissors.
I made a basic 4 sided frame using scrap roofing batten and nails or screws or whatever you have, and made corner supports for the top only.
Next I made 2 bottom plates to support the whole thing. I just used whatever cuts of wood we had for this as long as the bottom plate used is wider wood than the top plate.
Screw the two bottom base blocks together then screw the actual square frame to the blocks - remembering to keep the corner supports to the top.
Then I cut some pieces of plywood into a rectangle shape and cut out 2 grooves to each one to hold the cross supports that the bottles attach to.
Those rectangle pieces were then attached to the frame with screws as shown above.
Next I cut some small beading to use as supports for the Milk cartons, making sure the cuts I made in the rectangles kept the supports supported but not so tightly that they were awkward to lift out.
Finally grab some milk cartons (I used either 4 pint or six pint ones) and cut around the carton just about where the label starts. You don't need deep holders if they are for seedling pots.
*TIP - put the lid on the carton before you cut it. This keeps the air in and makes it rigid for that first incision with the scissors - try to pierce it without the cap and it will just collapse*.
Once you have them cut just slot them onto the frame through the milk carton handle. Leave the lid on if you want but you can take the lid off to aid drainage too.
Now you're left with a load of bottoms to milk cartons so lets use em to make plant labels.
Cut down the middle of the leftover bases to the next mark that goes all the way round the container (would have been the bottom of the label) then turn and cut all the way round the circumference of the container so you end up with a large rectangle of plastic.
Finally cut slices off that plastic as wide as you require your labels to be and then cut points on one end od each and voila! Plastic plant labels for free.
I use these labels all the time and because they're free to make I don't worry about cleaning them when they're really bad, I just throw them away and make some more. You can stick them in a container of bleach though as they are easy enough to clean that way.
p.s. Once you've cut the side off the container to make your labels you are left with small pots made from the very bottom, I use these holding the labels or collecting seed etc. So even the bases can be used!
Linked to:
'I heart Nap Time'
'Nifty thrifty things'
'Youngancrafty'
'My romantic home'
'Funky junk interiors'
'Country momma cooks'
'My 1929 charmer'
'Sew can do'
'Keeping it simple'
'diy home sweet home'
'sassy sites'
'ProjectQueen'
'Kammys corner'
'Organiseyourstuffnow'
'Gingersnapcrafts'
'Common ground'
Labels:
DIY,
Flowers,
Garden,
Garden projects,
gardening,
plant labels
Tuesday, 6 March 2012
Herb planter & Fish food holder
Herb / Tomato planter & Fish food holder.
I have so many projects on the go at the moment and nothing actually finished so what's a girl to do when it comes to writing a post for her blog?
I considered doing nothing but that just felt wrong!
I considered featuring someone elses blog but I've done that so many times that it feels like that's just a lazy cop out!
I even considered posting nothing but some cute pictures of my pets but I figured maybe you guys won't be as gaga at their cuteness as their biased owner is - so what to do?
Well, I scraped the barrel - literally - and decided to show you 2 projects I did way back that may have no interest to you but then again they may.
The first is a Fish food holder.
I know, who needs one of those right? Well we did!
We have a natural mini lake here and just before we moved in we emptied the contents of our teeny weeny pond into this lake.
The fish seemed to dissappear from view and for a couple of years we didn't see them, until one day a huge Golden fish appeared, then another and then a silvery looking one followed by a load of Orange or Black Goldfish (huh, how ironic - Orange & Black Goldfish!!).
those Golden ones and the Silvery one turned out to be Koi and they were thriving in this natural pond so we bought a load more. They too thrived and we had some humongous fish that we loved to sit and watch and feed.
This is where the feed holder came in:
Schlepping about for fish food can be tiresome when you get to the pond and realise you've forgotten to pick it up so that's why I decided to make this holder. It means we can fill the inside container with food and then just close the lid and lock it up, it makes it so much easier to feed those fishies.
(excuse the state of the boat, I forgot to turn it over and now it's full of water - oops)
All made from scrapwood too as usual - yay!
Then I have this herb/flower planter to show ya!
You need a bit of imagination for this but originally this was 2 seperate containers.
In my never ending search for greenhouse spacesavers I came up with this idea for growing my Tomato plants.
Imagine the top container isn't there - got that?
Now imagine a couple of bamboo canes inserted through holes drilled into the upright stakes - kay?
So now we have that bottom container with the two side stakes and 2 horizontal bamboos. Next I would fill it half way up with compost and then sink 2 open bottomed plant pots into the compost. Fill the plant pots with compost and put 1 Tomato plant in each pot - perfect Tomato grower and light enough to move around as needed.
Perfect for Herbs too.
I grow Tomatoes in my PT now and use raised beds hence why I turned 2 of the Tomato grower boxes into one space saving planter.
I'm thinking upright Fuschia for the bottom and trailing Fuschia for the top - I luuuuurve Fuschia!
Linked up to:
JAQS Studio
Threemangoseeds
AthomewithK
TipJunkie
Notjustahousewife
DIYhshp
I have so many projects on the go at the moment and nothing actually finished so what's a girl to do when it comes to writing a post for her blog?
I considered doing nothing but that just felt wrong!
I considered featuring someone elses blog but I've done that so many times that it feels like that's just a lazy cop out!
I even considered posting nothing but some cute pictures of my pets but I figured maybe you guys won't be as gaga at their cuteness as their biased owner is - so what to do?
Well, I scraped the barrel - literally - and decided to show you 2 projects I did way back that may have no interest to you but then again they may.
The first is a Fish food holder.
I know, who needs one of those right? Well we did!
We have a natural mini lake here and just before we moved in we emptied the contents of our teeny weeny pond into this lake.
The fish seemed to dissappear from view and for a couple of years we didn't see them, until one day a huge Golden fish appeared, then another and then a silvery looking one followed by a load of Orange or Black Goldfish (huh, how ironic - Orange & Black Goldfish!!).
those Golden ones and the Silvery one turned out to be Koi and they were thriving in this natural pond so we bought a load more. They too thrived and we had some humongous fish that we loved to sit and watch and feed.
This is where the feed holder came in:
Schlepping about for fish food can be tiresome when you get to the pond and realise you've forgotten to pick it up so that's why I decided to make this holder. It means we can fill the inside container with food and then just close the lid and lock it up, it makes it so much easier to feed those fishies.
(excuse the state of the boat, I forgot to turn it over and now it's full of water - oops)
All made from scrapwood too as usual - yay!
Then I have this herb/flower planter to show ya!
You need a bit of imagination for this but originally this was 2 seperate containers.
In my never ending search for greenhouse spacesavers I came up with this idea for growing my Tomato plants.
Imagine the top container isn't there - got that?
Now imagine a couple of bamboo canes inserted through holes drilled into the upright stakes - kay?
So now we have that bottom container with the two side stakes and 2 horizontal bamboos. Next I would fill it half way up with compost and then sink 2 open bottomed plant pots into the compost. Fill the plant pots with compost and put 1 Tomato plant in each pot - perfect Tomato grower and light enough to move around as needed.
Perfect for Herbs too.
I grow Tomatoes in my PT now and use raised beds hence why I turned 2 of the Tomato grower boxes into one space saving planter.
I'm thinking upright Fuschia for the bottom and trailing Fuschia for the top - I luuuuurve Fuschia!
Linked up to:
JAQS Studio
Threemangoseeds
AthomewithK
TipJunkie
Notjustahousewife
DIYhshp
Friday, 24 February 2012
Scrap wood plant labels
It has dawned on me just how many plant labels I use, whether it be in the garden, in the veg plot or in the polytunnel.
For the most part I'm happy to use my 'recycled milk container labels' as they're durable and can be wiped clean to use over and over again.
But what if you need something a bit more fancy for say, pots? or the front of the border? Somewhere plastic just isn't going to do anything for the aesthetic appeal of the blooms you're trying to showcase.
Well how about these:
These are very easy to make from scrap wood so cost nothing more than your time and they look pretty darned good in those pots you've spent time and energy on with planting design.
Quite simply you cut the desired length of stake, cut one end into a 'V' point and cut a 45degree angle across the width of the other end, this is for a more pleasing visual angle once the top is attached and the plant name is written on.
A smaller piece is then nailed onto the angled end of the stake and voila!
Once you have used a permanent marker to label the labels you should then give the whole thing a coat of sealant or exterior grade varnish. If you need to change the plant name on it at anytime you can sand it down and start again.
Cheap and easy!
Linking up to:
'Ginger snap crafts'
'Craft junkie too'
'Craft envy'
For the most part I'm happy to use my 'recycled milk container labels' as they're durable and can be wiped clean to use over and over again.
But what if you need something a bit more fancy for say, pots? or the front of the border? Somewhere plastic just isn't going to do anything for the aesthetic appeal of the blooms you're trying to showcase.
Well how about these:
![]() |
| Labelled in photoshop just to show what they can look like. |
These are very easy to make from scrap wood so cost nothing more than your time and they look pretty darned good in those pots you've spent time and energy on with planting design.
Quite simply you cut the desired length of stake, cut one end into a 'V' point and cut a 45degree angle across the width of the other end, this is for a more pleasing visual angle once the top is attached and the plant name is written on.
A smaller piece is then nailed onto the angled end of the stake and voila!
Once you have used a permanent marker to label the labels you should then give the whole thing a coat of sealant or exterior grade varnish. If you need to change the plant name on it at anytime you can sand it down and start again.
Cheap and easy!
Linking up to:
'Ginger snap crafts'
'Craft junkie too'
'Craft envy'
Labels:
Flowers,
Garden projects,
gardening,
plant labels,
woodwork
Monday, 30 January 2012
Make your own compost tumbler
I was giving my compost tumbler it’s annual coat of wood protection yesterday and thought it would be a great opportunity to show you guys how I made it so maybe you’ll feel you could have a go yourselves.
I have to say that this tumbler works so much better than the other two plastic box type ones I bought, I think it has something to do with how easy it is to tumble this one and aerate the goodness inside.
I didn’t take photos of each stage because I made it before blogging so I’ll try not to make this too confusing but if you can manage to fathom the steps out from my tutorial, write them down, familiarise yourself with them and you could make this in a day. It took me 2 days but only because I had to work stuff out as I went and I never organise myself beforehand – I looked for tools and materials as I needed them.
Here’s the finished piece – it’s no work of art but it’s efficient and not too difficult to make.

I got inspiration for the design from a web page but unfortunately I didn’t keep a record of that page and cannot find it now – if I do happen to find it though I will of course post it on here.
Basic list of tools:
OK first off, the frame:
As you can see I used substantial wood as it has to hold some weight (that’s not a bow in the wood it’s the camera – honest!).
Using 2 lengths of wood for each side I created 2 crosspoles. The cross points of the two pieces should be high enough that you’re not breaking your back bending when you rotate the tumbler.
Both pieces were bolted together with nuts, bolts and washers (I used an electric drill to pre drill the holes). I made it so that my pole sat snugly in those top crosspoles so that when I turn it it’s the tumbler that turns and not the actual poles as the poles may end up moving off the cross poles.
Then I added 1 piece of scrap wood to the bottom of each X to help retain the shape and to just help support it. If you look at the above image you’ll see that these bottom pieces of wood are screwed from outside to inside of the X frame.
Next I screwed on two scrap pieces of wood across the back to hold the X pieces upright and in the right position – you need to measure your plastic drum and add clearance either side of it when deciding how far apart to place the ‘X’ posts. There’s no scientific rule though on how much clearance, just go with what you think.
Give the whole frame a protective coat of creosote substitute.
Now onto the tumbler itself.
I managed to get hold of 2 of these containers. I looked up on Google what they contained (chemical signs make no sense to me) and found them to just hold detergents so after a good scrub (once the door was cut obviously) they were good to go.
First off I turned the container onto its long side and marked in pencil a square opening in the centre - this square needs to be comfortable enough to get the compost out of.
I then drilled a hole in the corner of the pencil square big enough to get my jigsaw blade in to then cut the square out – keep the square, it’s the door!
Next I turned the container back up on its end and drilled out a hole in the centre of the top the same size as the circumference of a scaffold pole (or other metal pole). I then turned it over to the other end and did the same thing. At this point just insert the pole to make sure the hole is correct in size and place, then take it out again and set the pole aside.
Next we need an air vent so turn the drum back onto its long side and drill a hole in the centre just above the door opening you made. This hole needs to be the same size as a piece of plastic tubing so measure the circumference of your tubing first.
Roll the drum over to it’s other side and drill the same hole again. Check that your plastic tube fits straight through the top hole and the bottom hole you just made, then remove the tube.
This tubing now needs to have several small holes drilled into it along it’s entire length – these holes will help aerate inside the tumbler. To fix this now holey pipe in its place, slide it back into the tumbler through your drilled holes – it needs about 1 – 2” clearance on both ends.
To stop this tube simply slipping back out insert a bolt and nut through a drilled hole on it where the tube enters and exits the drum (on the outside of the drum obviously). This then prevents it moving.
Next we need to make a rake for inside the drum to help mix the stuff we put in there. For this I used a piece of scrap batten and hammered long nails all the way along the length of the batten. This batten is then secured inside the drum by screwing it in place from the outside of the drum. Although my rake fits the entire length of the inside of the drum, you have to make it in 2 shorter lengths because one long one will not go through the door opening.
We also need to drill a drainage hole in the bottom of the drum. I drilled a fairly big hole and then simply cut a piece of wire gauze and secured it over the top of the hole (from the inside) just so the hole didn’t block up with compost. You can see my drainage hole in the above photo – it’s the black gauze just below the rake.
Now go back to those holes we drilled top and bottom of the drum for the scaffold pipe - We need to reinforce the outside of these holes so that the turning of the drum doesn’t just wear them away or split the plastic drum.
I used scrap wood and cut out 2 blocks for each side, these were then secured together and a hole drilled through them the same size as the scaffold pole. These were then secured to the drum using bolts and nuts – I kept nuts on the inside but the preference is yours.
Finally go back to that door you cut out and set aside and attach one side of your hinges to it with bolts and the other side of the hinges on to the drum just above the square opening you cut, again using bolts.
To keep the door closed I found a couple of clasps that I attached to the door and the drum but you can use whatever you find or whatever works.
I also added a couple of metal handles - 1 just above the door and 1 further round, this is how you turn the drum.
Finally slide that scaffold pole (or whatever pole you have) straight through its holes which are top and bottom of the drum (and which now becomes the sides of the drum), and lift each end onto the cross poles of the frame you made.
All you have to do now is make sure your site it on level ground – I didn’t at first and the drum moved to one end – and then start filling it with all those composting goodies. Turn it as often as you remember.
I’m sorry if this tutorial was a little confusing, I’ve tried to make the steps as simple as they are but as long as you get the basic concept you should be able to produce it.
Thanks for staying this far, hopefully you're not too confuddled and will come back for more!
Linked to:
'Skip to my Lou'
'Easypeasy Grandma'
'The girl creative'
'Sumo's sweet stuff'
'Momma to binks'
'Not just a housewife'
'Sassysites'
'Cherished Bliss'
'Craft Junkie Too'
'Its a hodgepodge life'
'Under the table and dreaming'
'Sew chatty'
I have to say that this tumbler works so much better than the other two plastic box type ones I bought, I think it has something to do with how easy it is to tumble this one and aerate the goodness inside.
I didn’t take photos of each stage because I made it before blogging so I’ll try not to make this too confusing but if you can manage to fathom the steps out from my tutorial, write them down, familiarise yourself with them and you could make this in a day. It took me 2 days but only because I had to work stuff out as I went and I never organise myself beforehand – I looked for tools and materials as I needed them.
Here’s the finished piece – it’s no work of art but it’s efficient and not too difficult to make.
I got inspiration for the design from a web page but unfortunately I didn’t keep a record of that page and cannot find it now – if I do happen to find it though I will of course post it on here.
Basic list of tools:
- Scrap wood – 3x2” for frame, batten for frame plus scrap boarding for drum sides.
- Plastic drum – cleaned of it’s contents.
- Scaffold pole or some other pole about 2ft longer than the length of the drum.
- Length of plastic pipe / tubing, about 4-5” wider than the width of the drum.
- Hinges, nuts/bolts, screws, door clasps, handles (I used scrap kitchen unit handles)
- Piece of metal gauze or even a piece of that green netting used for fences will do.
OK first off, the frame:
| Finished frame |
Using 2 lengths of wood for each side I created 2 crosspoles. The cross points of the two pieces should be high enough that you’re not breaking your back bending when you rotate the tumbler.
Both pieces were bolted together with nuts, bolts and washers (I used an electric drill to pre drill the holes). I made it so that my pole sat snugly in those top crosspoles so that when I turn it it’s the tumbler that turns and not the actual poles as the poles may end up moving off the cross poles.
Then I added 1 piece of scrap wood to the bottom of each X to help retain the shape and to just help support it. If you look at the above image you’ll see that these bottom pieces of wood are screwed from outside to inside of the X frame.
Next I screwed on two scrap pieces of wood across the back to hold the X pieces upright and in the right position – you need to measure your plastic drum and add clearance either side of it when deciding how far apart to place the ‘X’ posts. There’s no scientific rule though on how much clearance, just go with what you think.
| Cross poles bolted together |
Now onto the tumbler itself.
I managed to get hold of 2 of these containers. I looked up on Google what they contained (chemical signs make no sense to me) and found them to just hold detergents so after a good scrub (once the door was cut obviously) they were good to go.
First off I turned the container onto its long side and marked in pencil a square opening in the centre - this square needs to be comfortable enough to get the compost out of.
I then drilled a hole in the corner of the pencil square big enough to get my jigsaw blade in to then cut the square out – keep the square, it’s the door!
| Tumbler door |
Next I turned the container back up on its end and drilled out a hole in the centre of the top the same size as the circumference of a scaffold pole (or other metal pole). I then turned it over to the other end and did the same thing. At this point just insert the pole to make sure the hole is correct in size and place, then take it out again and set the pole aside.
Next we need an air vent so turn the drum back onto its long side and drill a hole in the centre just above the door opening you made. This hole needs to be the same size as a piece of plastic tubing so measure the circumference of your tubing first.
Roll the drum over to it’s other side and drill the same hole again. Check that your plastic tube fits straight through the top hole and the bottom hole you just made, then remove the tube.
This tubing now needs to have several small holes drilled into it along it’s entire length – these holes will help aerate inside the tumbler. To fix this now holey pipe in its place, slide it back into the tumbler through your drilled holes – it needs about 1 – 2” clearance on both ends.
To stop this tube simply slipping back out insert a bolt and nut through a drilled hole on it where the tube enters and exits the drum (on the outside of the drum obviously). This then prevents it moving.
Next we need to make a rake for inside the drum to help mix the stuff we put in there. For this I used a piece of scrap batten and hammered long nails all the way along the length of the batten. This batten is then secured inside the drum by screwing it in place from the outside of the drum. Although my rake fits the entire length of the inside of the drum, you have to make it in 2 shorter lengths because one long one will not go through the door opening.
| This shows the rake at bottom, drain hole at bottom, main scaffold pole left to right & air tube top to bottom. |
Now go back to those holes we drilled top and bottom of the drum for the scaffold pipe - We need to reinforce the outside of these holes so that the turning of the drum doesn’t just wear them away or split the plastic drum.
I used scrap wood and cut out 2 blocks for each side, these were then secured together and a hole drilled through them the same size as the scaffold pole. These were then secured to the drum using bolts and nuts – I kept nuts on the inside but the preference is yours.
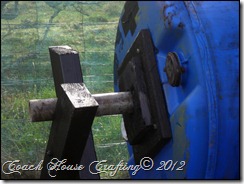
| Reinforced ends. |
To keep the door closed I found a couple of clasps that I attached to the door and the drum but you can use whatever you find or whatever works.
I also added a couple of metal handles - 1 just above the door and 1 further round, this is how you turn the drum.
Finally slide that scaffold pole (or whatever pole you have) straight through its holes which are top and bottom of the drum (and which now becomes the sides of the drum), and lift each end onto the cross poles of the frame you made.
All you have to do now is make sure your site it on level ground – I didn’t at first and the drum moved to one end – and then start filling it with all those composting goodies. Turn it as often as you remember.
I’m sorry if this tutorial was a little confusing, I’ve tried to make the steps as simple as they are but as long as you get the basic concept you should be able to produce it.
Thanks for staying this far, hopefully you're not too confuddled and will come back for more!
Linked to:
'Skip to my Lou'
'Easypeasy Grandma'
'The girl creative'
'Sumo's sweet stuff'
'Momma to binks'
'Not just a housewife'
'Sassysites'
'Cherished Bliss'
'Craft Junkie Too'
'Its a hodgepodge life'
'Under the table and dreaming'
'Sew chatty'
Saturday, 28 January 2012
Scrap wood gardening helpers
I'm loving being able to get out into the garden lately. The weather is cold but as long as that ruddy awful wind stays at bay then I'll be outside renovating the garden.
At the moment I'm building a stone wall in front of a new fence so that I can then back fill it and fill it with scented plants. I can't wait for it to be finished but as is always the way with me it won't be totally complete until we've gotten around to finishing the length of the fence and subsequently the rest of the stone wall.
This is the sort of wall I lurve but am too lazy to get the hang of all that cement work
So this is more the look I'm going for
I'm managing to get a lot of it done with what is there though and am getting quite a workout with the stone collecting and earth moving - both jobs entail walking back and forth a looooong way.
Won't be a professional finish but hey, I'm doing it all myself and am chuffed with it so far!
I've also been wanting to build a compost holder for my polytunnel for a while now - ever since I first saw Monty Dons wooden ones on Gardeners World - but just never got round to it, so I decided to just get on with it this week - it took a couple of hours only and used up scrap wood leftover from a computer table. I figured the Melamine finish would help protect the wood somewhat.
Here's Montys potting shed with those seedmix containers
Heres what I started with:
A heap o Melamine with metal bits all over.
Once I'd got rid of all the metal parts I cut a base and then decided what height I wanted the back edge and the front rim and cut 2 sides to those dimensions. I have to say at this point that I did this entire project with no tape measure - despite hubby being a builder and despite the fact that I should have loads of my own I could not find one tape measure anywhere, I think we have a tape measure elf thief!
My measuring consisted of using bits of wood for marking and edges of wood for straight lines, soooo not the way to go!
This is the base and sides complete
Next I marked the back sizes on a piece of wood and cut it with my Jigsaw.
Same goes for the front.
I added the strips to the top of the side edges purely because the edges were raw and not protected.
That's it done and here it is in it's final position.
Now I can make my own mix of compost in bulk much more easily than just adding the ingredients to the staging and mixing, which always meant quite a loss of the black stuff!
So easy to make too which is always good because I like to see results the day I start a project - I'm just so impatient!
Linked to:
'Fingerprints on the fridge'
'A world of crafts'
'Cherished Bliss'
'Project queen'
At the moment I'm building a stone wall in front of a new fence so that I can then back fill it and fill it with scented plants. I can't wait for it to be finished but as is always the way with me it won't be totally complete until we've gotten around to finishing the length of the fence and subsequently the rest of the stone wall.
This is the sort of wall I lurve but am too lazy to get the hang of all that cement work
| Stone Art |
![]() |
| Retaining wall |
I'm managing to get a lot of it done with what is there though and am getting quite a workout with the stone collecting and earth moving - both jobs entail walking back and forth a looooong way.
Won't be a professional finish but hey, I'm doing it all myself and am chuffed with it so far!
I've also been wanting to build a compost holder for my polytunnel for a while now - ever since I first saw Monty Dons wooden ones on Gardeners World - but just never got round to it, so I decided to just get on with it this week - it took a couple of hours only and used up scrap wood leftover from a computer table. I figured the Melamine finish would help protect the wood somewhat.
Here's Montys potting shed with those seedmix containers
Heres what I started with:
A heap o Melamine with metal bits all over.
Once I'd got rid of all the metal parts I cut a base and then decided what height I wanted the back edge and the front rim and cut 2 sides to those dimensions. I have to say at this point that I did this entire project with no tape measure - despite hubby being a builder and despite the fact that I should have loads of my own I could not find one tape measure anywhere, I think we have a tape measure elf thief!
My measuring consisted of using bits of wood for marking and edges of wood for straight lines, soooo not the way to go!
This is the base and sides complete
Next I marked the back sizes on a piece of wood and cut it with my Jigsaw.
Same goes for the front.
I added the strips to the top of the side edges purely because the edges were raw and not protected.
That's it done and here it is in it's final position.
Now I can make my own mix of compost in bulk much more easily than just adding the ingredients to the staging and mixing, which always meant quite a loss of the black stuff!
So easy to make too which is always good because I like to see results the day I start a project - I'm just so impatient!
Linked to:
'Fingerprints on the fridge'
'A world of crafts'
'Cherished Bliss'
'Project queen'
Subscribe to:
Posts (Atom)