Showing posts with label Garden furniture. Show all posts

Wednesday, 6 May 2015

Easy DIY Pallet wood Adirondack chairs

Personally I don't think a garden can ever have too much seating, whether it be stone seats hidden away, huge swing chairs in the middle of a lawn or plenty of comfy Adirondack chairs round a firepit.
A couple of years ago I made 2 Adirondack chairs from plans I found on the 'Ana White' website which proved to be very popular at home and fought over the handful of times we decided to sit out in the garden. So popular that I decided I needed to make a couple more this year just so that I don't have to race the kids to them during the next BBQ.
The ones I made 2 years ago are quite angular, I chose the plan because it was exceedingly simple to follow and I had all the encessary sized wood from pallets that I had taken apart.
Before I remind you of those first chairs let me take a second to remind you of the best pallet breaker to ever be designed - I chose the 4 way bar.


This 4 way pallet bar turned this heap of pallets

into this

and the best bit is that I could do it all by myself. Each pallet took literally seconds to break apart and meant that not only did I get all the long lengths of wood but the spacers also - which is where the chunkier wood came from.
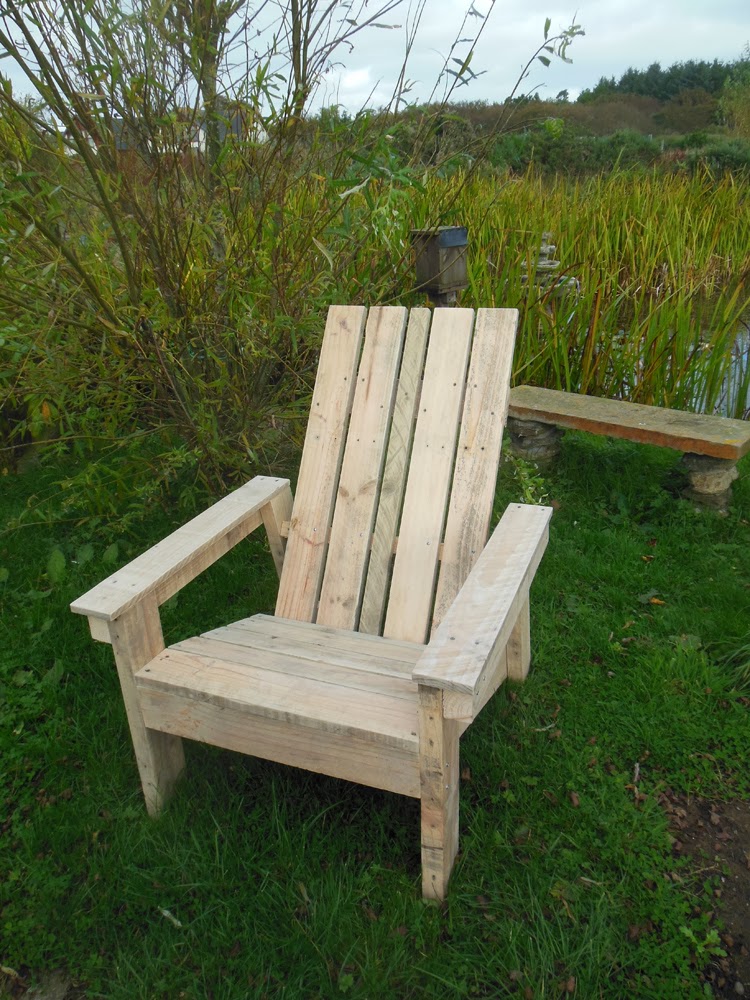
This was my first attempt at the Adirondack chair and literally every piece of wood came from a pallet.


Deciding I wanted to add some colour to the garden I chose to paint them in Cuprinols 'Summer Damson' garden shades.


I've now completed 2 more Adirondack chairs with matching footstools but I didn't use the original plans because I wanted a more rounded chair for the second half of the garden. Again it's all pallet wood except for the main bottom rail which is scrap 6x2.


The chairs has since been painted in Cuprinols 'Fresh Rosemary' garden shades but I've yet to take a photo of them finished.
The plans for these second ones are in my head. I didn't want to make it up as I went along but I really couldn't find exactly what I was loking for on the internet so I conjured these up using 3 different online designs with my own bits added. It wasn't until I'd finished them that I realised the footstool doesn't match 100% - the main leg is angular on the end not rounded to match the chair - oops!

Sunday, 25 January 2015

DIY Easy pallet wood planter

It's the time of year when I'm looking for new planters for the garden but being the tight fisted so and so that I am I simply refuse to buy them so out came the pallet wood and a bit of ingenuity. I need several planters for Roses that will eventually be going out into the garden ground but for this year they need a home while the garden is finished. The planters had to be exceptionally easy to make (because I get bored easily), use as little wood as possible but still look like more than just a square box.
The first one I made looked ok but I'd cut corners such as not pre drilling so the finished effect wasn't as good as it could have been - I decided that one would be the prototype and set about making another one but took my time to do it properly. The finished planter still only took one day to make so I'll definitely be making several more.

This is the finished look - no painting just a light sand and a coat of outdoor varnish for protection.


There are probably many tutorials online much better than anything I can give but I'll show step by step how I made this and maybe it will encourage someone to give it a go.

Assemble all your wood pieces once you have decided the size you want. This may sound obvious but on the prototype I made each panel up before cutting and making the next one and I ran out of wood the right size half way through. I managed to source some eventually but I would have saved myself so much aggravation just doing it properly from the start.
I decided to make my planter 20" high by whatever width the pallet wood ended up being. As it turned out I used wood that was a little over 3.5".
I cut 16 pieces @ 20" and 4 pieces the width of the boards joined together (I actually need 8 width pieces but we'll come to that later).

First I lay 4 of the pieces down and used the cool set square I attached to my workbench as something to straighten them against, this saved me so much time and effort in trying to hold all the pieces level and together.

Loving my set square as it helps keep it all together.

Next I attached a scrap piece of wood across the middle to hold it all together while I mark out for the arch in the bottom - I forgot to take a photo though.

For the arches at the top and bottom I made a mark 2" in from either end at the bottom and used a plate to mark out a circle from those marks. I repeated this at the top and bottom of all 4 sides.


Marks for arches.

Next I used the Jigsaw to cut out those marks.
TIP: Once you have cut those arches out do not remove the scrap wood from the middle until you have secured one of the fixing battens. I made this mistake and it took me ages to get that arch to look right again because the wood dropped.

See the scrap wood - don't remove it yet.
Next secure the fixing batten top and bottom - I fixed them 3" up from the bottom and 3" down from the top. Once they are secure it's safe to move the scrap wood from the middle. Then turn the pieces over and screw into the fixing battens to make it super secure - don't forget to pre drill.

Top & bottom arches cut

You need to make 2 exactly like that and then make 2 more but the fixing battens will need to be a different width allowing for the sides you just made to sit snug against the new sides.
I held the two finished sides up to the one I was now making and marked out where the battens sat so I could use that width for the fixing battens for the next 2 sides - does that make sense?
In this photo you can see what I mean. The 2 sides are held against the one I'm making - the pencil shows you the width I'm measuring.

Pencil showing width to measure.

With that done you fix the shorter battens to the next 2 sides and you should have 2 of each of these

Finished pieces ready for joining

Next I simply built the box and screwed the sides in together - pre drilling the holes first and using a screw head sinker like this, the effect is so much more pleasing and prevents splitting of wood.

Drill bit and screw head sinker.

Looking inside this is what the planter looks like screwed together. It's perfectly solid by this point.

Add caption

Next I cut 3 pieces of scrap wood to fix to the bottom making sure the slats had enough gap to allow for water drainage.

Slats fixed to the bottom inside.

Then I needed to lay a liner in it, usually I use some of hubbys thick DPM but I was feeling especially lazy and know the DPM can be a hassle to fix so I literally used a super thick bin liner which fit perfectly and fixed it to the top batten supports with my nail gun.
To hide the plastic and make it look a bit nicer I cut some odds and ends of really thin finishing wood I found and attached it to the top of the plastic using the nail gun again into the batten.


Finishing wood over plastic on left.

Finally, a quick sand down with 60 grit and a quick sand with 240 grit -I usually go all the way from 60, 80, 120 etc but I wanted to keep the rustic look.
One coat of external varnish and it's good to go.

Finished look

Sharing at:
SewcanDo
Niftythriftysunday 
Artisbeauty

Tuesday, 3 June 2014

Diy pallet wood decking

Pallet wood decking is hardly an original idea nowadays is it, there seem to be many people jumped on that band wagon and the internet is full of different designs and ideas.
I have to admit Mr CH was hardly thrilled at the prospect of a pallet wood deck when I first stated that I would be making one but he humoured me none the less and helped me lay the finished boards once I had levelled and squared up the pallet base.

It didn't look much to behold at this point and I actually did consider giving up


But with a little bit ofpatience and loads of nails we were able to create this with more pallet wood and pallets to act as steps to the french doors


I know alot of peoplewould prefer proper decking and maybe some fancy fandangled rails around it but the cost of this decking was the price of a tub or two of Ronseals decking stain - that makes me very happy.
As for the rails - watch this space.
Incidentally those Purple Adirondack style chairs were pretty easy to make too and guess what - yup, all from pallet wood also.


Linked to:

Show me what you got 
Kammys Korner 
I Gotta Create

Saturday, 12 October 2013

DIY Adirondack chair.

Usually when I build something I devise a plan in my head of what I want the finished item to look like and then I pretty much make it up as I go along, it's just the way I've always been - I've never built anything from plans! Until now that is.

I've wanted to build an Adirondack chair for ages but just haven't had enough scrap wood to even make a start so when hubby had all those pallets delivered I was adding up the projects I could do as I was ripping them apart.
My pallet wood pile is precious to me though so I made the decision to make the chair following plans I found online on the Anna White website.
I have mixed feelings about these plans because while it helped immensely to have the guesswork taken out of dimensions and angles etc I found alot of the measurements inaccurate for the size of wood that was suggested to use. Most of the issues were easy enough to work round but the finished look isn't as per the diagram because I had to use a 2" piece of wood as a back slat instead of the 4" the plans stated - this is because the width of the back support is 19.5" yet the plans tell you to use five 4" slats and secure them to the 19.5" batten leaving a 0.5" gap in between, this totals 21" NOT the 19.5" that the plans state. There were a couple more discrepancies like this and had I been more experienced I would have noticed this before starting but I didn't! The finished chair still looks awesome though especially when you take into account that the wood cost me nothing more than time taking the pallets apart - all I have to do now is decide on a colour.

Adirondack chair, DIY, Pallet wood, Adirondack, Garden furniture

 Garden furniture, DIY garden, adirondack furniture, chair


 adirondack chair, garden DIY, pallet wood

I'm currently making the matching footstool via the same website but I'm having the same issue with inaccurate measurements. The length of the footstool is 23.5" and yet the plans require you to use six 4" slats with the 0.5" gap in between - this totals 27.5" NOT 23.5" so I'm yet again left with a 2" slat at the bottom.
I've checked the website and everyone else that has made the same chair appears to have been able to use the stated amount and sizes of wood so maybe I am doing something wrong, I just can't igure out what.