Showing posts with label makeover. Show all posts

Monday, 24 October 2011

Sideboard makeover

I think I may need therapy!
Seriously!!
I'll begin here, now.
My name is Linda and I am addicted to Shabby chic!!
There I said it, I feel so much better now. Doubt I'm cured though.

This project started off as a £5 sideboard at the local cahrity shop. So determined to have it and take it home there and then that I insisted that myself, my daughters and their friend could quite easily carry it outside, down the steep alleyway and all the way up to the car park. Never mind that all three girls were in high heels (how stupid to go shopping in shoes you can't carry goodies in!).
"It won't fit in the car mother!!" That's not really a helpful comment is it - who needs reality when a piece of furniture is destined to go home with you?
"It will if you three catch the bus home!" The looks on their faces were classic. I'd like to think that I wouldn't have gone that far but.............
So the bemused shop assistants who kept trying to get me to pull up outside (nah, no need for that I insisted) opened the doors fully wide for us and ushered everyone out the way.
I grabbed the end first and immediately put it back down rather sheepishly. Reality had sunk in a) no way could the girls pick this up. B) No way was it going down the alley without someone suffering a broken leg, and C) No way was it going to fit in the car.
"I'll just leave it here for now and get my husband to pick it up" - note I said that in a tone that would suggest I thought everyone in the shop was stupid for not having thought of that in the first place - don't you just love people like that!

Anyway, hubby said it wouldn't fit in his little van so a friend had to pick it up and keep it in his van. For 3 days! 3 days!! You can imagine can't you, the anger, the impatience and the sulking?

So here is the sideboard as it was


Yep, THAT is what all the fuss was about! Hard to believe eh?

Right from the start I knew what I wanted to do with it.
The glass was to come out, shelves to be repositioned and maybe just one to each side, the top was going to be renewed with 6x2 wood that was to be stained and the unit itself was to be a solid cream colour.
So the glass came out as did the shelves and I sanded it to within an inch of its life.
Then I gave it a coat of spray primer. The stuff I used is actually car primer and it was cheap - £1. I know alot of people recommend NOT using the cheap stuff but this one actually did cover well (though not perfectly) and set very quickly. Soooo much better than painting a primer on.
Then I started on the colour coat. We have tins of 'Classic Cream' paint that we bought for the house but thought it looked too yellow on the walls but I figured I'd give it a go on this.
It covered well but putting it on with a brush (even brand new ones) was doing my head in. I hate even the slightest tiny bit of dust or tiny hair and I found I was having to sand down after every coat.
This was making it take an age to complete.
On the back board I decided to stencil a pattern that matched the feature wall in our front room. You can check out how I made the stencil 'here'.
At first I loved the finished stencil look but the more I looked at it the more I thought "what the hell was I thinking?"


I really do not like it now but I left it simply because I was sick of all the painting by this point.
During the final sanding I kinda got carried away and then decided that the piece would look much better as a shabby piece. It so does!
The shelves were also sanded but despite my original 'plan' they went back in in their original place.
As for the top. Well I decided I didn't want the chunky wood top I wanted to do more sanding - see, told you I need therapy!.

This is the finished piece


>


It really is more sanded than it looks - honestly! I just haven't got the hang of taking decent piccies yet!
The bottles on the top I got for 79p each from a bargain store when I was in England recently. The flowers in the vases were not what I really wanted but they were all I could find in the bargain shop.
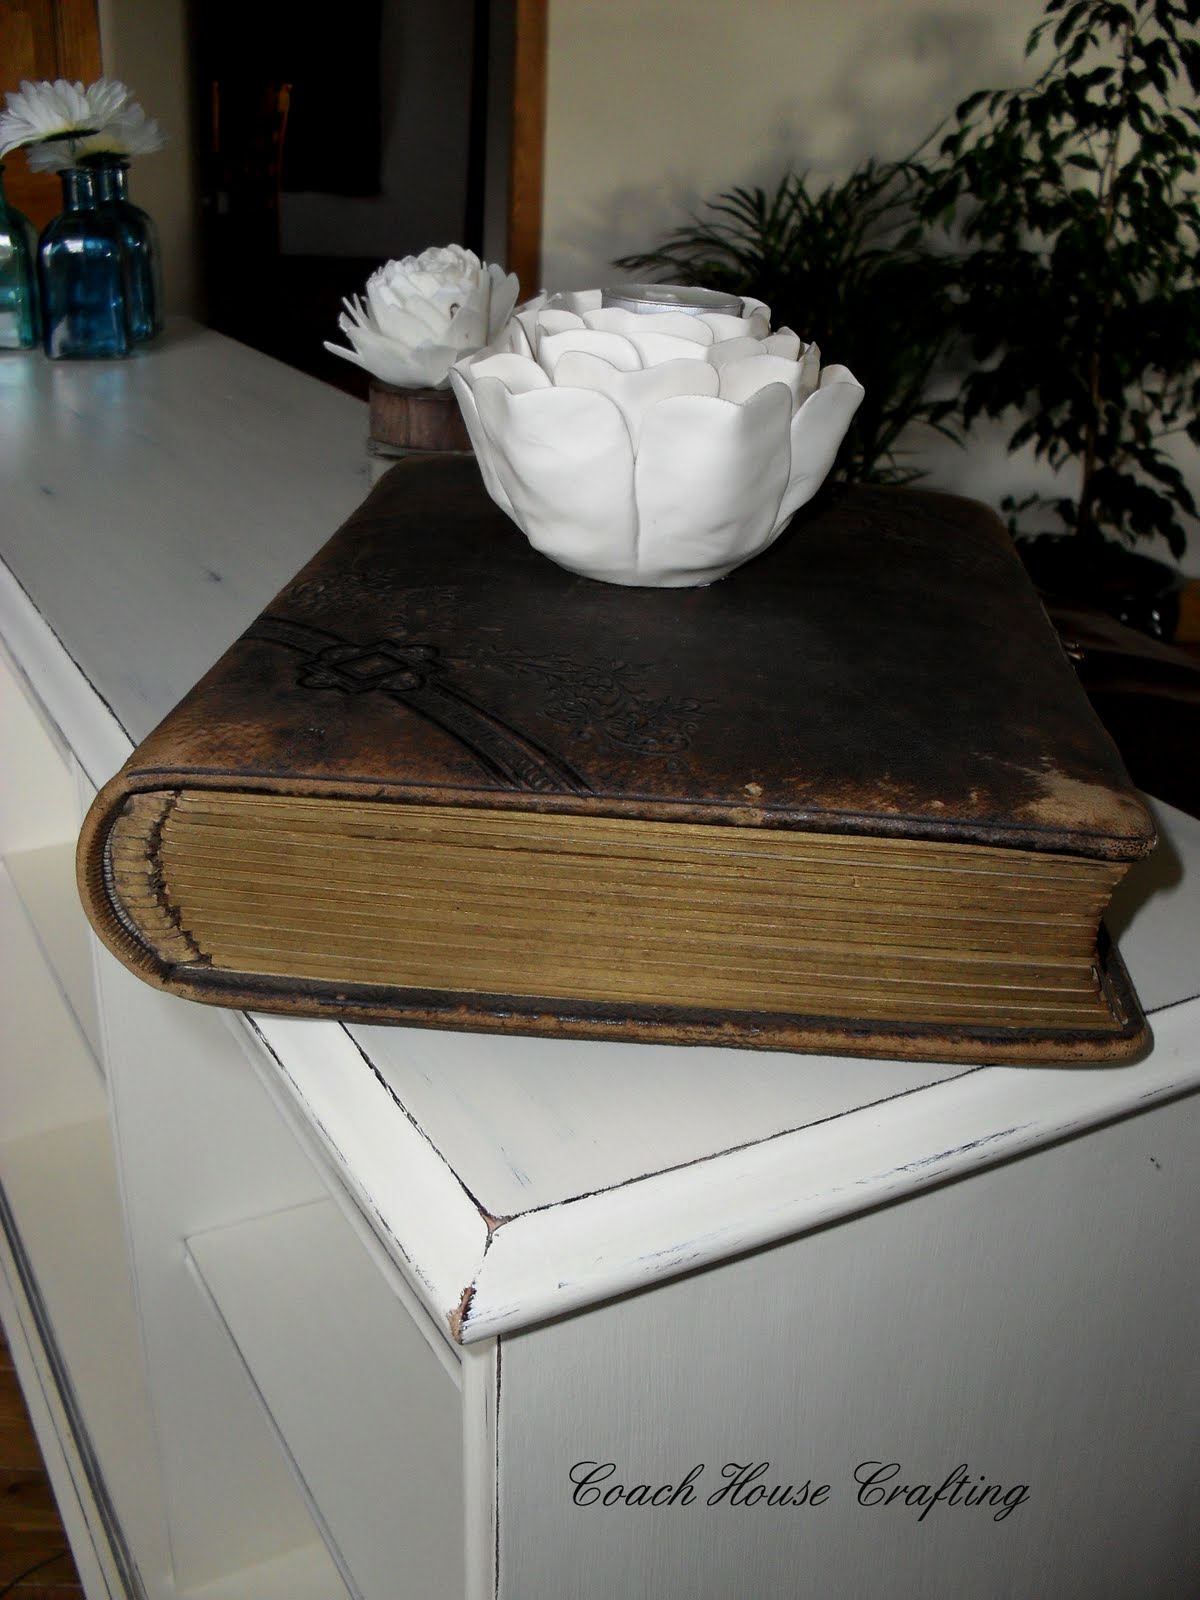
The book on the other end is an old one that my mum gave me.

So thanks for stopping by, pop back anytime.


This post is linked to:

'Craft-O-Maniac'

'Three Boys'
'Restore Interiors'
'Three boys vintage furniture'
'It's a Blog Party'
'Kammys corners' 
'Common ground' 
'Cherished Bliss' 
'Its a hodgepodge life' 
'Domestically speaking'

Friday, 21 October 2011

Shabby Shelf

Projects have been a tad slow for me over the last wee while. I have loads of ideas and inspiration jingling around in my head but it tends to get to the point where I have so many projects going on that none of them actually get finished - how many others suffer from this infliction I wonder?

Anyways I've had a project for the hallway planned for ages. I wanted to make a pinboard from an old frame, a shabby shelf with hooks and some kind of table for underneath.
The pinboard idea has changed numerous times and is now nothing like a pinboard nor is it finished.
The table for underneath the shelf is still sitting in the shed and still looks exactly like what it is - a pine chest of drawers.

The Shabby shelf however is complete - Tada!


This entire shelf started out in life as a drawer - yep a drawer! A drawer that came from the pine chest I was given and the remainder of which will make a nice little table for below the shelf.

Basically I took 2 drawers apart, took the pine knobs off the front and used the fronts as the shelf ledge.
The first one I did I painted 'Patio Brick' and then went over with 'Oyster' from Laura Ashley paints (I picked up a tester pot for 50p).
Unfortunately when I sanded it down for that shabby look it ended up looking pink - so not the look I was going for. I'm not sure if it was the sanding down that created the Pink hint or the Laura Ashley paint having a pinkish tinge to it, either way - Urghhhh!
So I sidelined that shelf and then made another one, this time painting it 'Cloud White' and 'Oyster' and then sanded it down for that shabby look.

For the corbels I got the idea from a fabulous website called 'Not just a Housewife'. I'd bookmarked those corbels intending to make them just like Stacy but for the life of me I could not get one to resemble the other and lost patience. In the end I decided to use them as end brackets instead.
I cut these corbels from scrap wood with my trusty Dewalt jigsaw after I made a template by drawing the shape on paper first, cutting it out and using these to draw round.  They then got the same treatment and paint colours as the shelf top.


The back board was the back board from the drawer I took apart and made the shelf with.

Next I painted 3 of the pine knobs from the drawers in 'Patio Brick' and sanded them back a tad before fitting them to the back board.
During this process I came up with a simple idea for holding the knobs while painting them. Up until now I would awkwardly hold them, drop them more often than not and have to paint or spray them in sections.
So I drilled 3 extra long screws all the way through a piece of scrap wood (the sides of the drawers) and then screwed the knobs on making it super duper easy to paint and not having to sit on anything while they dried. Seemples!


Remember the shelf I first did that turned out Pink?  Well I didn't want to just waste it so I joined it back to back with the new shelf top and it gave the ledge that chunkier look - score!


So there you have it, my new shabby shelf.

Thanks for taking a look.


This post is linked to:

'Finding Fabulous'

'The Shabby Nest'
'Miss Mustard Seed'
'Craft Junkie Too'
'Thirty Handmade Days'
'Remodelaholic'
'Craft Envy'
'Nifty Thrifty Things'
'My 1929 Charmer'
'A world of crafts'
'Craftomaniac'
'Keeping it simple'
'The southern institute'
'Ginger Snaps Craft'
'DIY by Design'
'Under the table and dreaming'
'Not Just a Housewife'
'Sassy Sites'
'Funky Junk Interiors'

Monday, 10 October 2011

Shabby racks & home made stencils

I'm right in the middle of making over a sideboard I picked up from the charity shop for a fiver a while ago but in true crafty person style I can't resist doing the odd small project alongside the larger ones while the larger ones are drying.

I recently showed you 'these' coat racks that I made and made mention in that post of a rack that was still undergoing some work.
Well it's finished and here it is:

 shabby racks, shabby chic, coat rack, wood coat rack


I followed the same method as the previous coat rack regarding 'Patio Paint' colours but I then fixed this rack to another length of wood that had had the same 'shabby' treatment.
Before giving the coat of varnish though I added the text 'May every Journey Bring you Home'.

The last text I added to a 'shabby' project were 'these' letters for the bathroom but that time I used a paintbrush to do the text. This time though I needed more flexibility due to all the squirls so decided to risk the 'sharpie' pen. I much prefer to use 'sharpie' for text but it doesn't flow very well on these paints for some reason and I had to keep scribbling on paper to get the flow back - very annoying and very time consuming. I couldn't have done this sort of flourishy text with a brush though - well I could, but it probably would have looked naff!

Once the whole thing  had dried I gave it one coat of satin floor varnish and took extra care not to spend too much time brushing over the text because in my experience 'sharpie' tends to bleed.


HOMEMADE STENCILS:

I've also had to do some stencilling for that cheap sideboard that I'm revamping. I looked everywhere on the net but couldn't find a stencil that I felt would look right and then remembered some wallpaper that I had bought for 50p to line the inside of a wardrobe I was vamping. (another finished project for another day)
The pattern was exactly what I wanted so I traced the image and was half way though cutting it out when I realised it wouldn't make a stencil. Duh!!! The positive and negative parts weren't compatible and I ended up with a just a big gap and  couldn't for the life of me figure out how to alter the pattern to make a stencil. So I sulked instead!
It was during this sulk that I had one of my rare 'lightbulb moments'. I was sat staring at the wallpaper on the feature wall in our front room (It's one of those wallpapers that looked better on the roll than it does on the wall) and I realised the whispy flower would make a great stencil.
So to make the stencil I traced the flower with greaseproof paper and then traced that tracing using a 'sharpie' onto one of the flimsy plastic office file holders you can buy dirt cheap. I bought one for 40p at Tesco and cut it in half to give me two stencils.
Once that was done I used a craft knife to cut it all out. This took an age and 2 days later I have still got a numb forefinger from the pressure.
You could use a stanley knife (exacto knife) but I found it really difficult to get the curves correct with one of those.
I have a craft knife that has many different blades and I found a very narrow one worked best.
*A little tip: move the stencil as you cut as much as you can, it makes life so much easier than trying to trace it with a knife and you're less likely to run off the edge.


That's the finished stencils all cut out.

Next I masking taped it to the internal back of the sideboard. Alot of people recommend spraying it with repositionable adhesive first but I hate the stuff and refuse to use it - I can just imagine the mess I'd make with it.
I actually made two stencils for this flower, 1 was the actual petals and the other was the stem. If I'd tried to make this with one stencil then I would have ended up with a lot of flimsy areas and would definitely have had to use the spray adhesive to get a decent fix.


This image shows  the  second stencil attached over the top of the dried flower pattern.
I didn't use a proper stencil brush for this project as I didn't have one, I just used a stiff bristled 'Harris' brush.
*Top tip: If you're doing it the way I did then be extra careful with the brush. Make sure you stipple accurately and don't press too hard or the bristles could go under the stencil. Also do not overload the brush - when you first dip it in paint stipple it out on waste paper to remove the excess before hitting the stencil. Finally, when you peel the stencil back check the underneath for any bleeding and clean it if need be before repositioning.


That's the final dried stencil.
The colours I used are Laura Ashleys 'Duckegg' matt for the flower and Laura Ashleys 'Apple' matt for the stems. Both paints were tester pots I picked up for 50p - bargain!


Thanks for popping in.


Linked to:

'Skip to my lou'
'Boogie Board Cottage'
'Sugar Bee Crafts'
'Sassy Sites'
'Tip Junkie'
'Not just a Housewife'
'Ginger snap crafts'
'Night Owl Crafting'
'Bear rabbit bear'
'Kristens junk Drawer'
'Ask Anna'
'Making the world cuter'
'Sew can do'

Saturday, 8 October 2011

Age that coat rack

I officially love the shabby chic look now, it's taken me an age to appreciate it but I got there eventually.
I've only done a couple of small projects so far, the first one being 'these' letters for the bathroom and my latest finished one being these coat hooks.

 shabbychic coat rack, hanmade, homemade, home diy

I bought these coat hooks a few weeks back because they were only 99p each otherwise I wouldn't have bothered as they're not really the style I was looking for. But, can't pass up a bargain right!

So next I had to figure out what I was going to do to them - enter my new found passion of all things shabby!
Basically I aged them the way I did with the bathroom letters i.e 1 coat of 'Patio Paint' in Wrought Iron Black, 1 coat of Cloud White and 1 coat of Daisy Cream.
I then had at them with sandpaper until I achieved the look I wanted.

This is how they turned out

 handmade, shabby rack, patio paints

Sorry there's no picture of them in their final positions but one of them isn't finished yet as I'm going to mount it onto another piece of wood and add some lettering.
The actual finished one is on the bathroom door but TBH I'm not 100% happy with how it looks in position, hence no picture.

Thanks for stopping by and taking a quick looksee.


Linked to:

'Craft Junkie Too'
'Crafts keep me sane'
'Craft-o-maniac'
'The Southern Institute'
'A world of crafts'
'EasyPeasy Grandma'
Funky Junk Interiors' 
'Craft Envy'

Tuesday, 4 October 2011

Old aged letters

I never really got the 'shabby chic' look, it all seemed such a waste of time to me. After all why would anyone want to go to all that trouble of lovingly painting furniture to then just rough it up, sand it down and make it look old again?
It just seemed so ... well....pointless!

But then during one of my 'visit as many random blogs as possible' moments I happened across the most amazing gorgeous 'shabby' 'aged' 'distressed' (whatever you wanna call it) project on an amazingly inspirational blog and I was hooked.
The project in question was a wall sign and the blog I was loving was 'eleven-o-one creations' Not just fabulous signs either, just check out the 'Furniture Portfolio' of 'eleven-o-one creations', it's Amazing.
Once I'd seen the signs that Fran had created I was determined to create my own however no matter how much I searched the net I just couldn't find a tutorial that seemed to result in the same look as Frans' creations and as I've never done these paint effects before I wasn't confident that I could pull it off without some form of guidance (I'm not patient enough to spend days practising till I figure it all out).
So I contacted Fran to ask if she knew of a decent tutorial and I was so chuffed when Fran took the time to get right back to me with a tutorial all of her own. Thank you Fran.

Although ultimately I want a couple of signs for my upstairs bathroom I decided I would learn the technique on some wooden blocks that I wanted to letter for the same bathroom. I wanted to create the word 'Relax' in wooden blocks.
One of the reasons I wanted to start there was because I have recently updated my craft stamps and have unmounted them from their wooden blocks, mounted them on UMount and filed them away in files to save on storage.
But I was left with numerous blocks like these


I knew they'd come in handy for something though and figured they'd be great for the bathroom letters.
That is some super tacky glue they use to mount the stamps to the blocks though and it took me a fair while to scrape it all off. The sanding down was a breeze however and I kinda didn't want to stop!


That's them all sanded and ready to go.
Usually I like symmetry and wouldn't go for the different sizes but I decided to be adventurous here.

Fran had told me in her tutorial the paints she would normally use but me being the most impatient person alive I couldn't wait for a paint supply to arrive and so I figured I'd try using 'Patio Paints' and see how they worked.
While I'd been researching the 'Milk Paint' that Fran mentioned I noticed on their website a series of colour layers that resulted is a finish similar to Frans so I used the 'Patio Paints' as close to those colours as I could.
The first 2 layers were 'Wrought Iron Black' followed by 1 layer of 'Cloud White' and finally 1 coat of 'Daisy cream'.
The hardest part of the project was the drying time for each layer, like I said I'm not terribly patient!
While they were drying though I opened up 'Photoshop' on the puter, created the letters I needed in a calligraphy font and printed them out onto regular paper.
Next I went back to the now dried out blocks and went at them with P80 electro coated sandpaper. This was a real fun part but be warned, you have to know when to stop! It's sooooooo easy to get carried away and then you end with something that just looks wrong!
At this stage I stopped the 'roughing up' just short of finished as I figured there'd be more to do once the letters were on, after all solid, new looking letters would look a bit naff on a weathered piece of wood.
The look I wanted was Black edges with the corners and a few other areas sanded down to the bare wood. I also like the White showing through before the Black, it gives it a more weathered look.
Next I transferred those letters to each block by tracing the letter on the reverse of the paper before laying it on the block (original side up obviously) and tracing - ok scribbling - over the top.


 wooden blocks, relax, patio paints, shabby chic, handmade

You're then left with a fine outline on the actual block which you need to go over with your choice of pen or paint.
On my first attempt I used a 'sharpie' pen. The 'Sharpie' is much easier to use than a paintbrush and the edges are much more defined

 wooden blocks, relax, patio paints, shabby chic, handmade

However 'Sharpie' has a tendency to smudge or bleed with some varnishes so if you intend to varnish the project use a paint - I learned that one the hard way and I ended up having to sand the whole lot down, front and back and start again.
Next time round I used the 'Wrought Iron Black' 'Patio Paints' and cut down an artist brush so it was small enough to use - this is not ideal though and TBH I'm not 100% pleased with the result.
Once the lettering was dry I gave it another sand down and then gave it just the 1 coat of floor varnish.

The finished result

 wooden blocks, shabby chic, handmade, patio paints


 shabby chic, wood blocks, relax, handmade, homemade

They are a bit mored weathered and aged than is showing on the photo.
I'm actually quite chuffed with them and am loving this look now. I can see many many future projects being lovingly painted just to be roughed up and sanded down to look old again. lol.

I'm dedicating this post to fran of 'eleven-o-one creations'. Thank you Fran for taking the time to help me out and for your inspirational blog.


Linked to:

'Today's Creative Blog'
'Reasons to skip the Housework'
'Ginger snap crafts'
'Nightowl Crafting'
'Lil Luna'
'Delightful Order'
'Bear rabbit bear'
'Not just a housewife'
'Happy Hour Projects'
'Miss Mustard seed - Furniture Feature Friday'
'The Shabby Nest'
'You had me at craft'
'Restore Interiors'
'sew can do'
'Delightful Order'
'My1929charmer'

Sunday, 25 September 2011

From yuk to Plum

So, I've been working on revamping old furniture for our new bedroom and I've just finished the second to last piece - just one more piece to go.
The colour theme is cream and Plum but you'll  have to take my word for that as the photos are showing more of a White/Purple theme.
This last piece was a dodgy old set of drawers I happened upon in a charity shop for £20. I loved it straight away but dithered about paying £20 and so walked away from it. All that night I regretted it and so the next day my very patient husband took me back to the town so I could snap it up - a well made six drawer set for £20, what was I thinking of walking away!
So this is the drawer set as it was


Yup, typical old fashioned grotty brown set of drawers straight from the sixties. The handles were bad enough (plasticky by the way) but just look at those awful ball feet and they weren't easy to get off either.
But get em off I did followed quickly by those awful handles *TOP TIP - number the drawers in sequence as you remove them, it makes replacing them sooooooo much easier * and then I set about sanding the whole thing down mainly to get a decent surface for the paint to key to.
The surface was in a good condition considering its age and the fact that it's probably seen alot of movement over time, just a few surface scratches that needed a bit of filler.
During that process I decided I didn't like the legs of this piece - even without the ugly ball feet - and so I   added a plinth to  the front. I wasn't too worried about the sides having a plinth because once it's in its final position (an alcove) it won't be seen.
Enter the Dewalt cutter - yes, the fun part!
I drew the pattern I wanted on some paper and then transferred it to the MDF and cut it out.
Gave it a really good sand down and then screwed it to the bottom of the drawers (using good old countersunk plasterboard screws). Next I filled over the top of the screws with wood filler and once dry sanded it all down till smooth.
BUT I then decided I didn't like the pattern I had just cut out. These drawers are very rectangular and the new handles I'd chosen were square so why on earth did I do such a poncy curved pattern! Oh well, I left it and just hoped it would grow on me - it hasn't!


I wasn't about to change it now though so I'm stuck with it!
Next the whole thing was primed as were the drawer fronts and sides followed by a light sand ready for painting.
And so to the painting: On the last piece I redesigned I 'discovered' painting with a sponge as opposed to a brush. I like the sponge finish because there are no annoying brush strokes, however this time I ran out of patience with it, it was taking too many coats just to get a cover so after 2 sponge coats I did a decent brush coat, lightly sanded between coats and then gave it  a final sponge coat.
I then gave everything 3 sponged coats of floor varnish because it'll probably get alot of knocks.
The drawers had the same treatment except for a different colour of paint obviously.
I then added the drawer pulls to the front - I had to buy these pulls though because I couldn't find 8 matching in my box of goodies (need 8 because I'm currently doing the matching wardrobe) and I managed to pick these up for 0.99 each. As they were silver coloured I had to  prime, spray and laquer them with the same colour car paint spray I had used on the other pieces of furniture.
I have to say that these pulls were really awkward to fix on. Underneath them they have a couple of pins that dig into the wood as they're screwed on from inside the drawer - a fab idea but it meant that I couldn't make adjustments to them to make them straight at the point of them being tight but loose enough to move (if you get me). I had to be spot on from the start which is difficult on your own.
Once that was sorted though I just had to get it indoors and put it all together.
*small problem* Despite me checking the running of the drawers at certain stages, when I got them indoors 2 of them wouldn't close (see the piccie). I was tempted to take it straight back out and sand them down but I suspect the wood has drawn in moisture from the air in the workshop - it's happened before- and therefore I've decided to leave it a week or so indoors and see if they shrink as they dry out.
Fingers crossed!
Anyways this is the finished deal:


Thanks for stopping by and taking a look.


This post is linked to

'Under the table and Dreaming' 
'The Shabby Nest'
'The Southern Institute'
'Chic on a shoestring decorating'
'Tip Junkie'
'Delightful order'
'Happy Hour Projects'


Tuesday, 20 September 2011

Love 'n' handmade silk flowers

It's the middle of September guys, where has this year gone? Did I sleep through the summer cos I sure as hell missed it!
Seriously we've hardly been able to string together one week of nice warm days over the last few months here in the Highlands. I am desperate for some warmth and with Xmas only round the corner I don't fancy my chances of getting any  - there's only so much these coastal views make up for - I need a holiday somewhere warm, preferably the Carribbean!

Anyway with the weather being so damp it's taking my furniture much longer to dry and cure. Unfortunately my workshop has but one piddly window and that faces North so we get no sun in there and the wind has blown in every direction except the one I need - typical.
I simply refuse to give up on the outdoor projects and stay indoors doing all manner of crafty goodness (remind me exactly why I am refusing this), I'm just having to learn a bit of patience (and 'a bit' is as far as I've gotten) and let nature take its course -though I am considering giving it a helping hand by wheeling a big dryer into the workshop. There's no way I can work like this for much longer.

Righto I must stop this whining.
I have at least managed to finish one project! yay! A tad small though and really should only have taken a day or so but with the damp air......... there I go whining again.

I found this cute 'Love' sign at our local  factory shop (local to me is 20 miles away) and whipped it up for £3 bargain!


The first thing I did was trace the letters onto some MDF, never know when I may need another one!
Initially I had planned to paint the back and decoupage the front of the letters in something to match our bedroom. In fact this was one of the rare times that I actually did  'plan', but in typical 'me' fashion I  changed my mind mid paint and completely deviated from the plan. And that is why I don't usually plan!
I painted it cream as per 'plan' and then sponged the edges as per' plan' ready to let it dry and decoupage it.
However, it looked like this


Yuk! This is the first thing I've ever sponged the edges of and so I wasn't really brave doing it but even so........
I them decided to paint it the purply plum colour I've used on other furniture for the bedroom and see what that looked like.
Once it had dried though I didn't like seeing the brush strokes in the paint so I started to gently sand it down - I say 'gently sand it' however when the sand paper you use is high grit it kinda defeats the purpose, but oh well.
As the edges became worn with the sanding I found I really liked the effect so decided to keep it that way.
This is what it looks like now


Not everyones cup of tea but I 'love' it!


Most of you know that we recently moved into a brand new home, every bit of it built by my husband with as much help as myself, Stacey & Leanne could muster and I really wanted as much of the inside to be hand made or renovated by myself as possible - my contribution if you like!
When it came to our bedroom I had bought the bed linen months in advance - a range called 'Rosina' by Catherine Lansfield - I fell in love with this range for 2 reasons - 1), it's sooooooo pweety and 2),Rosina is my middle name.
Anyway when it came to the curtains I wanted to stay within the same design range because there are too many variations of 'Plum' and I wanted to ensure the curtains matched. Problem was that for full lengths curtains I was looking at alot of money for two windows, so I decided I'd buy one set of curtains at 90" x 90" giving me the full length I wanted but would also be able to halve each curtain therefore giving me two pairs of full length, lined curtains (and saving a packet).
But I was halfway through sewing up the final curtain when I realised I'd only have one set of tiebacks - duh!
Having never made tiebacks before I was dubious about trying but I had some cream fabric that matched the cream in the curtains beautifully and actually managed to produce 4 tiebacks.
This left me  looking at the lovely Plum satin type material that the  original tiebacks were made of and trying to come up with something I could make that would enhance the new tie backs I'd made.

Ta da!

Fiddly but definitely doable and worth it.
I cut each tie back into 4 strips and singed one of the raw edges over a candle. This not only seals the raw edge from fraying but gives it that darker edge too, plus singeing with candles is reeeeally therapuetic.
I then ran the other edge of each piece up the sewing machine on a long straight stitch and then gathered the strip by pulling on the end of the thread, as each flower uses two strips I gathered the one to be used first a little tighter as it would form the centre of the flower.
I wrapped the first strip round a piece of wire, gathering it as I went and added pleats or folds as necessary and then the second strip was added much more loosely. Once at the end I wrapped it tightly with masking tape and took it off the wire. I then added another strip of cream in the same fashion as the others because I wanted a bigger flower than I was getting with just the Plum strips.
Once I had fluffed each flower to my liking I attached them to the tiebacks  by cutting a slit in the top piece of fabric (these tiebacks are 2 layered) next to the hook and inserted the taped end of the flower and set it in there using 'Fixsal' glue.


These tiebacks really do look lovely and for a first attempt I'm really chuffed with them.

Now I shall give you a little peek at what I'm working on at the moment:
I fell in love with this chest of drawers at a charity shop in town. Going for £20 I was too tight fisted to buy it at the time but soon regreted it and talked hubby into taking me back the next day to buy it.
I spent the entire journey there praying no one had bought it and kicking myself for not snapping up in the first place.


Don't like the handles or those plastic feet but it's well built and is going to look fabulous with a transformation.

A few days later in the same charity shop (a rarity for me as I hardly ever go out let alone into town) I spotted a side unit. Bit funky looking and I hate the sliding glass doors but I know exactly what I want to do with it and where it's going to go. well actually I bought it for the dining room but it's now going in the living room - once it's been transformed of course!


And only £5!

I've been wanting to make a couple of coat hooks for a while now and what I really wanted was some Iron hooks mounted onto wood but the cost of iron hooks is ridiculous, especially for a back hallway never to be seen. So for £1 each I got these


Ugly huh? Have some faith though, they're gonna look great!

I'm also working on a really old wardrobe which has so far in this current makeover changed colour 4 times - no wonder it's taking so long. But there's been good reason for it and I will share the whole sorry saga with you once it's finished.
Plus I'll introduce you to Lita - be prepared to be cutified by her cutiness.

Thanks for popping by and come back soon.


xx

This post is linked to

'Tip Junkie - Tip Me Tusday'
'not just a housewife'
'Ginger Snap Crafts'
'I'm Topsy Turvy'
'Funky Polka Dot Giraffe'
'Nifty Thrifty things' 
'The Creative Institute' 
'JAQS studio'

Saturday, 10 September 2011

Cube seat all covered and matching - just how I like it!

Remember the dressing table I made from the old computer station - 'this one'?
And remember the matching seat I promised was on its way?

Well here it is, a cube seat:-


The best bit is that it was so easy to make and cost me nothing more than my time.

So if you'd like to find out how I did it then continue reading, if not then feel free to check out my other posts, links or leave a comment or two, I love to get them and always try to reply.

Alrighty, the cube seat was made from a small chest of drawers I had kept when moving from the old place into our new home. The drawers and the runners had already been salvaged and used in the 'Computer desk to dressing table' project so the basic skeleton was all that was left of it and I have to say that for a cheap piece of old Argos furniture it was suprisingly well made, though very beaten up:-


Originally I was going to take those awful Grey plastic feet off the bottom but then I decided they'd make less of an indent on the bedroom carpet than the wood frame would so they stayed on.
The frame as it stood was too tall for what I needed so I took it apart, cleaned each piece and then measured the height I wanted on the long side pieces and went at them with my Dewalt Jigsaw (Ladies, if you don't already use power tools make a point of trying them out. My OH has always encouraged me to use them and I wouldn't be without them now).


The top and bottom pieces of wood had a bowed effect to them so I had to cut them both straight with the Dewalt Jigsaw to give me straight edges.
I then reassembled the pieces using all the original fixings. As I said this was suprisingly well made. It was easy to dismantle and easy to put back together.
Finally I cut the backboard to fit the new dimensions (only the height of the piece had changed) and used the original tacks to fix it back on.


That's how simple the construction was. I wasn't worried about sanding the piece or painting it because it's going to be covered.
Next to get it indoors and get out my fabulous sewing machine:-


I love this sewing machine. My OH bought it for me after I'd watched it for several months on 'Ideal world'. It'a Silver Viscount 9300e and to me it's the bee's knees. I've never spent quite so much on a sewing machine but this bit of kit is well worth every penny!

Anyway, I digress, I didn't have to hunt around searching for and choosing fabric because I knew exactly which fabric I was going to use.
The base cover was a simple cotton fabric in a very pale Cream colour and the cushion cover would be a lovely Plum Satin type fabric I had purchased from EBay to make these 'Roman Blinds' for my bedroom.

As much as I love sewing I am not the most patient of sewers. If I know a project is going to take a few days then I can take my time no probs but if I know a project is a quickie then I tend to not be as careful as I should be and my biggest, biggest downfall is that I hardly ever pre plan (a condition I must rid myself of).
I basically measured the top (yep, actually used a tape measure ) and cut a square to fit making sure to add a 1/2" seam allowance to all sides.
Then I measured the sides, cut the squares and added 1/2" seam allowance. For some reason it has dawned on me literally while writing this blog that I didn't need to cut and sew individual squares for the sides - DUH!!!!! It would have been so much easier to have sewn one entire piece to the top fabric! I can't believe I did it the way I did!!

Anyway I did it the hard way but after adding a hem to the side pieces (something I didn't allow for in the measurement because I didn't preplan), I sewed it to the top piece and voila - a cover for the cube seat.
Now for the cushion: Well I used what was left of a body pillow for the cushion itself (I say what was left because I've gradually stripped it over time) and made an envelope cover for it.
I have to admit that this part included no measuring, I simply placed the cushion on the fabric and kind of guessed where to sew - didn't even use a pin!
I'm guessing that sewing a double hem to the envelope parts without pinning and/or ironing first is not the way to go however I folded as I went and hey ho, it's ruddy straight if I do say so myself!
So that's it, my cube seat and cushion made from the skeleton of an old set of drawers:-


This is it all tucked away. Just to prove it fits! and those drawers on the dresser, they're the ones salvaged from the piece I made this cube seat from. Cool eh!

And here's Oakley my 'Charlie Bear' posing and checking it out:


I heart Charlie Bears!

I have linked this post to:-

It's a Blog Party


”DearCreatives”

http://sumossweetstuff.blogspot.com/


Photobucket


Photobucket