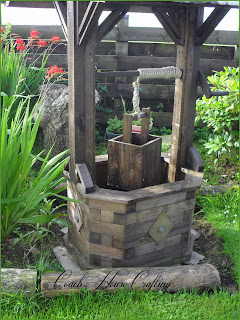
I made this wishing well a couple of years ago on a whim. I literally decided one day to make it with whatever scrap wood I could round up, but because I had absolutely no plan to work with I had to make it up as I went along using whatever wood I had managed to find.
The shape of the base probably caused me the most angst because I didn't want a bog standard square or round one. I'm not sure what this shape would be called but cutting all those little pieces to the exact right size and then nailing em all together was not as easy as I thought - 6" nails are not the easiest to hammer in, and back then I was too lazy to re-drill.
Once the base was made I then found scrap ply to line the inside and then the sides and the wood structure to the roof was made up bit by bit with whatever size wood I had enough of that I thought would be strong enough to hold a slated roof.
I used an old broom handle to make the rope pulley and created a fake handle out of wood scraps. Then I made a square bucket from wood scraps and pinched hubbys tow rope to wind round the pulley.
I am proud to say that every inch of this was cut, nailed, screwed and designed by myself. The only part that hubby had was to slate it and attach a lead ridge tile to it.
The final part was cut some diamonds out of ply, nail em to the base and then attach some little Lead Tudor Roses that hubby had had laying around for years.
Lead Tudor Rose:
Wishing well:
Bucket with rope pulley:
The only problem we have found with the well so far is that it was supposed to be moveable - it's not!
We had to move it 50 yards or so and literally had to take it apart and re-roof it - it weighs a freaking tonne.
Since moving it I have decided that I'm not keen on the base now and am thinking about creating a stone one around it!
Linked to:
Delightful Order
Bear rabbit Bear Crafts


No comments:
Post a Comment