Showing posts with label furniture. Show all posts

Wednesday, 6 May 2015

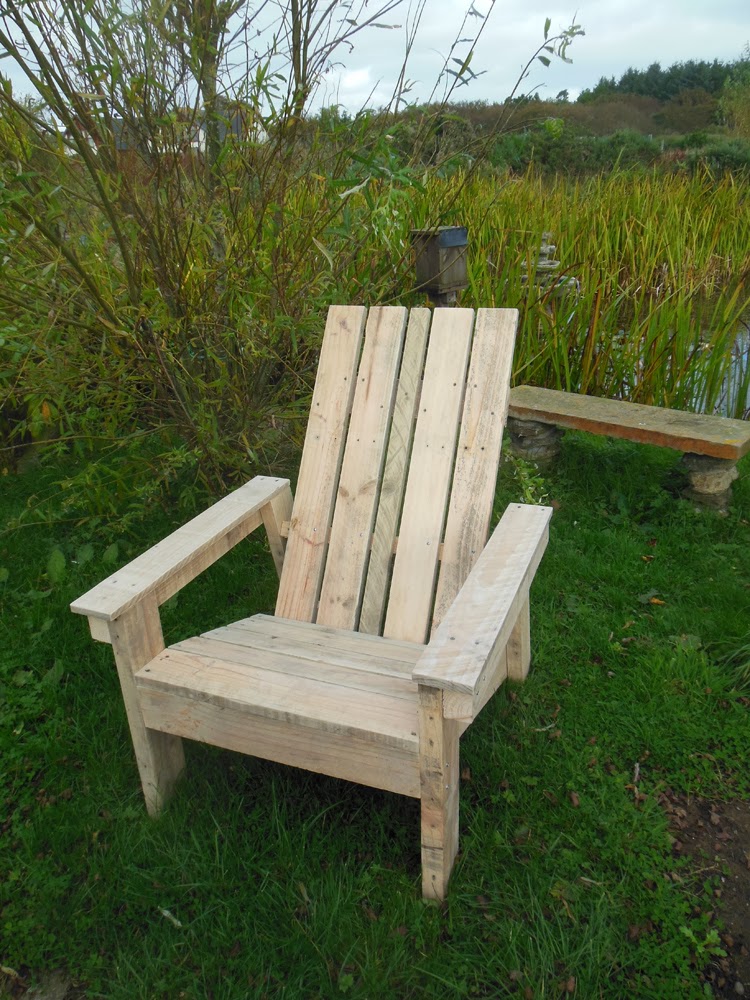
Easy DIY Pallet wood Adirondack chairs

Personally I don't think a garden can ever have too much seating, whether it be stone seats hidden away, huge swing chairs in the middle of a lawn or plenty of comfy Adirondack chairs round a firepit.
A couple of years ago I made 2 Adirondack chairs from plans I found on the 'Ana White' website which proved to be very popular at home and fought over the handful of times we decided to sit out in the garden. So popular that I decided I needed to make a couple more this year just so that I don't have to race the kids to them during the next BBQ.
The ones I made 2 years ago are quite angular, I chose the plan because it was exceedingly simple to follow and I had all the encessary sized wood from pallets that I had taken apart.
Before I remind you of those first chairs let me take a second to remind you of the best pallet breaker to ever be designed - I chose the 4 way bar.


This 4 way pallet bar turned this heap of pallets

into this

and the best bit is that I could do it all by myself. Each pallet took literally seconds to break apart and meant that not only did I get all the long lengths of wood but the spacers also - which is where the chunkier wood came from.
This was my first attempt at the Adirondack chair and literally every piece of wood came from a pallet.


Deciding I wanted to add some colour to the garden I chose to paint them in Cuprinols 'Summer Damson' garden shades.


I've now completed 2 more Adirondack chairs with matching footstools but I didn't use the original plans because I wanted a more rounded chair for the second half of the garden. Again it's all pallet wood except for the main bottom rail which is scrap 6x2.


The chairs has since been painted in Cuprinols 'Fresh Rosemary' garden shades but I've yet to take a photo of them finished.
The plans for these second ones are in my head. I didn't want to make it up as I went along but I really couldn't find exactly what I was loking for on the internet so I conjured these up using 3 different online designs with my own bits added. It wasn't until I'd finished them that I realised the footstool doesn't match 100% - the main leg is angular on the end not rounded to match the chair - oops!

Saturday, 12 October 2013

DIY Adirondack chair.

Usually when I build something I devise a plan in my head of what I want the finished item to look like and then I pretty much make it up as I go along, it's just the way I've always been - I've never built anything from plans! Until now that is.

I've wanted to build an Adirondack chair for ages but just haven't had enough scrap wood to even make a start so when hubby had all those pallets delivered I was adding up the projects I could do as I was ripping them apart.
My pallet wood pile is precious to me though so I made the decision to make the chair following plans I found online on the Anna White website.
I have mixed feelings about these plans because while it helped immensely to have the guesswork taken out of dimensions and angles etc I found alot of the measurements inaccurate for the size of wood that was suggested to use. Most of the issues were easy enough to work round but the finished look isn't as per the diagram because I had to use a 2" piece of wood as a back slat instead of the 4" the plans stated - this is because the width of the back support is 19.5" yet the plans tell you to use five 4" slats and secure them to the 19.5" batten leaving a 0.5" gap in between, this totals 21" NOT the 19.5" that the plans state. There were a couple more discrepancies like this and had I been more experienced I would have noticed this before starting but I didn't! The finished chair still looks awesome though especially when you take into account that the wood cost me nothing more than time taking the pallets apart - all I have to do now is decide on a colour.

Adirondack chair, DIY, Pallet wood, Adirondack, Garden furniture

 Garden furniture, DIY garden, adirondack furniture, chair


 adirondack chair, garden DIY, pallet wood

I'm currently making the matching footstool via the same website but I'm having the same issue with inaccurate measurements. The length of the footstool is 23.5" and yet the plans require you to use six 4" slats with the 0.5" gap in between - this totals 27.5" NOT 23.5" so I'm yet again left with a 2" slat at the bottom.
I've checked the website and everyone else that has made the same chair appears to have been able to use the stated amount and sizes of wood so maybe I am doing something wrong, I just can't igure out what.

Tuesday, 5 March 2013

Feature showcase

Well this is a tad awkward! I'm so busy outside while the weather is so mild that I haven't had a chance to get my crafty on (insert sad face). So what's a girl to do when she has followers that she wants to keep but has no crafty goodness to offer? Should I recycle an old post? Well initially it did sound like a good thought but then that just feels naughty and like I'm making no effort. So instead I am going to showcase some crafty goodies that are floating around the blogosphere at the moment that I think are inspirational or just down right dandy.


First up is Julie from 'belle maison'. Julies blog is full of inspirational DIY & furniture makeovers ranging from some fabulous chic red chairs to an entertainment armour transformed to a home office.
Seriously Julies blog is full of inspiration and with plenty of giveaways thrown into the mix, however if there is one item that I am totally and utterly head over heels for it has to be the headboard and footboard she transformed into a loveseat - this is so not my usual 'thing' but I want this


How gorgeous is that!  Take a trip over to 'belle maison' you will not be disappointed.


Kristen over at 'Farmstyle studio'  describes herself as "completely self taught and constantly striving to implement new techniques and looks to keep with current design trends" and her furniture revivals are completely up my street.
Take a look at this Beechwood dresser


I adore this and this is exactly what I wish I had the imagination to achieve. But basically I don't!


Finally I just had to include 'How to recycle'.
'How to recycle' state that their mission is "to assure safe and sanitary disposal of solid waste in every community and to reduce reusable or renewable wastes from entering landfills."
This is what initially caught my eye 
How cool is that - a wine cork chair! certainly better than going to landfill.
They also have recycled vehicles, paper and egg cartons. Go take a look and be inspired to recycle some weird stuff! 


I promise there will be some crafty goodies of my very own on here soon but for now I hope those were tantalising enough for you guys.


Tuesday, 24 April 2012

Beach pebble table re-do

Beach pebble table re-do.

One of the first projects I ever completed for our new house was this coffee table made from an old fish tank, some beach pebbles and some scrap wood.
Over the past year the wood table top has gradually shrunk and separated and has gotten to the stage where it looks horrendous!
This was one of my first ever wood projects and so I never really understood the need to completely dry the wood out before using it, I figured storing it in my husbands shed would be sufficient for drying purposes but in hind sight I can see just how much moisture is in the air in there and with no real sunlight from windows, the wood wasn't as dry as I had thought.
So this is what has happened to every corner and even to the in fills:

scrap wood table

See how much the wood has separated? The tip of the corners have stayed pretty tight but that's due to the screws I used there.

So I finally decided to get a new top made with wood that has been stored in my polytunnel where it has completely dried out.
The top is made from 5" x 2" wood that I have plenty of thanks to hubby saving it for me from a building he demolished.
I never work from plans because I'm pretty good at memorising what I want and as long as I can visualise the finished effect then I'm happy to just go with it - besides, a table top is hardly complicated to do.
Basically I cut the wood to the length I wanted the table to be, glued the edges, butted the sides together and clamped the whole thing together for a couple of days - I omitted the clamping last time which I would never do again.
A couple of days later I sanded the top down with various paper grits and using first a circular sander and then a detail sander - this wood needed alot of sanding! (The last top was sanded entirely by hand - Eek!).
Once it was sanded I gave it a couple of coats of Wickes wood dye in a Medium Oak colour and left it for a further 2 days.
Once this was dry it was evident just how different the wood dye tone was on the old top compared to the new top despite using the same tin of dye on both:

 scrap wood table

Next I gave it a couple of coats of Satin wood varnish.
Once it was dry I simply transferred the base plate from the old top and screwed it to the underside of the new top - this holds the whole thing together and secures it inside the fish tank:


Then it was simply a case of slotting that on to this:


If you look close you should be able to see the lip just inside the top of the fishtank running the length of each side - this is what the wooden battens on the base of the top will sit on, creating this:

fish tank table, pebble table, wood coffee table, scrap wood table,recycled table, easy table

Much better!

Thursday, 1 December 2011

Family name sign

I started this project ages ago but the busier I got with other projects the more this one was set aside.
Originally I had included our family name within a piece of Typography as wall art, but that piece of wall art bugged the hell out of me because no one could actually read what it said and I got sick of having to clarify it. Plus I really did not like the way it had turned out anyhow, looking back I rushed it because my mum was staying for a while and I wanted it finished.
Every time I came across the thing it really irritated me, not only did people struggle to read it but the letters were all over the place and just didn't look right, also the script was just soo squirly.
OK, here's the link, just please don't judge me, it honestly wasn't my fault. Ok it was my fault but at least I can admit when I've made a complete farce of something.

Anyway where am I leading with this? Weeeeeell basically I redid that awful Typography and it's sooooo much better now (I'll repost it soon) but this time I put more thought into word placement  and omitted the family name part.
So I needed to make a new family name plate didn't I!

I really wanted to use a drawer front as I wanted a smooth finish with chamferred edges but I'd used up all my stash on other crap projects.
I then decided I could use some old wooden fence boards (as ya do) and convinced myself I really didn't mind the sanding involved.
This board was seriously grotty. I mean seeeeeeriously grotty!. It was extremely weathered, green and covered in pretty disgusting moss, plus it smelt a bit funky too!

Very weathered!
This beauty took some serious sanding I can tell you. But I'm too lazy to get out the electric sander so I did it all by hand - the smell was something else!
Once I'd got it looking presentable I gave it one coat of Patio Paints in Wrought Iron Black and then one coat of undercoat purely because I'd ran out of White paint and this undercoat was White (ya gotta learn how to get round these things huh!)
Once it had dried it was then that I decided I didn't want the naff rough look of this wood and that the split that had appeared from the left hand edge meant the project was a disaster.  So I shelved it!
Weeks later I came back to it and figured I'd give it a go, finish it and see what I thought of it then.
So I gave it 2 coats of Cream Emulsion paint and then went at it with the sand paper, sanding just enough to bring the black paint through as well as the White.
Guess what! I loved it! This rough wood gave it a whole different effect from smooth wood and that split just added to the effect - how chuffed was I!
As for the Typography I just did my usual trick - opened up CS5, typed the words, jiggled with fonts, traced from the back lit screen of the laptop, turned the tracing over and copied the front to the back and then  scribbled over the words on the front of the sign.
Then all I had to do was go over the letters with a Sharpie! BUT, I'm sick of Sharpie because they tend not to like this paint and just won't work properly. But I had no Black Pilot pen to hand so I then got stroppy! Once I'd had my hissy fit followed by a Nanny Nap I remembered my daughter storing her inks of many colours in my craft room. Why do that if you don't want to share right?
So I borrowed a bottle of her Black Calligraphy ink and a very thin artist brush too (Eek!) and traced the letters. Sorted!
This is now my favourite way of going over traced letters, it's so easy and so much better than a Sharpie.


Sorry it's a crappy angle but it's not actually situated where I wanted it. It was supposed to be propped up on my newly finished hallway table BUT hubby decided that was stupid! Yes, he did use those words!!! And figured it was better on the wall which I begrudgingly had to admit was probably a better place as it looks quite good there.
However I aint a tall girlie and I'm too lazy to get a chair or something else to stand on so I used the staircase but this meant the angles squiffy!

Thanks for popping by and taking a peek at my projects. have a scout around if you have time, if not then pop by again some time and/or leave a comment - I love getting them and do try to return mail to all.


Linked to:

'I Heart Nap Time'
'Fingerprints on the fridge'

Friday, 25 November 2011

Bon Appetit!

I've finally managed to finish one of my smaller projects yay!
I'm not sure where the inspiration for this piece came from because originally I wanted to use 'Bon Appetit!' in vinyl letters above a shelf with my cookbooks in the kitchen.
But me being me changed things as I went along and I decided to mount the words on a board. I was a bit concerned that vinyl letters may not adhere very well on silk Kitchen wall paint and had the same concerns about a Sharpie going directly on to the wall. Plus, I figured something moveable would be better because the kitchen is still a work in progress and knowing me I'd put it exactly where I don't want it. I'm clever like that!

So here's the finished product:
Least the towel is new!

Excuse the staging. A ruddy Yellow TeaTowel and a Tin of Biscuits! Most people would probably have staged it with fresh rolls and herbs but not me, I go for a Yellow towel and a tin of Biscuits - hmmmm wonder what Freud would say about that!

Anyway to make this little piece I cut myself a few pieces (4 to be exact) of scrap timber and attached them to a smaller piece of hardboard - glued and nailed on of course!

The back.

The front.

Then it had a good sand to get rid of rough edges and to reduce any varnish.
Then comes the best part - painting!
I used one coat of primer / undercoat mix but only because I have no other white paint left.
Once dried it was followed by a nice Red by Laura Ashley - I bought a tester pot for £3 (rip off I know). The Red was to match the Red accessories in my kitchen as much as possible.
Next I sanded it down to let the White colour through and to age the corners and edges etc - I looooove sanding!
Next came the real exciting part - the lettering. I used my laptop again as I did in 'THIS' post to trace the lettering because my printer is playing up and I keep having to heat the cartridge up before getting ink from it - so annoying!
I traced the letters on as usual by scribbling over the letters onto the board and then used a white 'Pilot' pen to trace over the lettering.
I have to say at this point that the Pilot pen was amazing, so much easier than the Sharpie and didn't fail on me once (unlike the Sharpie). The only downside is that the fluid is slightly thin so you may need to go over it a couple of times if you'rre wanting a solid letter.
I, on the other hand would be sanding it anyway so wasn't too bothered:

Cool Pilot pen

Sanded edges

Then one coat of varnish using a brush as thick as each board to help reduce brush strokes and voila!

The finished look.

It's not even in its final resting place yet because I haven't quite decided where it's going to go.
I know it looks like a Coca Cola advert and the Bon looks like Ben but I like it anyway!
Thanks for taking a look, hope you enjoy.


Linked to:

'The Shabby Nest'
'Craft Junkie Too' 
'Sassy Sites' 
'Chic on a Shoestring Decorating' 
'Joyful Stamper' 
'The Shabby Creek Cottage' 
'Organise and Decorate Everything' 
'Funky Junk Interiors'
'Over the big moon' 
'Ginger snap crafts' 
'Crafts keep me sane' 
'You had me at crafts' 
'Making the world cuter' 
 'My daily photo journey'
'Cherished Bliss'

Monday, 31 October 2011

Wooden blocks

Whilst scouring the net for inspiration (as always cos my imagination is non existant) I noticed alot of wooden blocks with lettering or phrases on them - love em!
A while back I had a go at 'these' ones and loved the outcome but I'm really wanting to have a go at the ones that look like childrens building blocks.

So here is what I came up with:


and:


You wouldn't believe how simple these were to make.
Both sets began the same way. For the 'HOME' set I cut 4 blocks from a length of 2"x2" scrap wood and each one was sanded quite alot. To get the curved edges I used a seriously hard core piece of sandpaper (I do have mechanical tools for the job but I luuurve hand sanding) and then I used 2 other grades to smooth it out.

unsanded left, sanded right. But I'm guessing you knew that!

Next I gave it 2 thin coats of Patio Paint, waited for it to dry and then sanded those corners and edges back.
When it came to the lettering I discovered the ink was out in the printer - don't you just love it when that happens! NOT!! - and my Cricut machine blade obviously needs replacing as it just teared anything I put in it - I'm soooo not organised!
Just as I was about to produce a mammoth sulk I remembered a book on lettering my mum gave me a couple of weeks ago which is full of font samples in the back. Saved!!!
So I simply traced the letters the way I did for 'this' project onto paper, traced again on the reverse of the paper, laid it on the block and scribbled over it to trace the letter to the block.
Finally I used my 'stabilo' & 'Sharpie' permanent pens and traced the letters - seemples!

Sitting nicely on an old book on my sideboard.

Finished 'HOME' blocks.

The 'Home Sweet Home' blocks were produced the same way except for longer cuts of the 2"x2" obviously.
Originally I painted them Laura Ashleys 'Duck Egg' but as it dried I decided it wouldn't really look quite right with the other projects it was going to go with so I went over the 'Duck Egg' with Patio paints 'Patio Brick'.
Once dried I sanded those edges and corners again and a little to the fronts as well.
Originally I wanted to do the lettering White but it looked awful. I'm a bit picky when it comes to my lettering and if I feel the control isn't right then I'm not going to like the outcome. Obviously with no White pen (Do those exist?) I had to use paint and an adapted paintbrush - it's so never going to work!
Looked terrible so I started again and traced letters the same way as above and went over it with the trusty 'Stabilo' & 'Sharpie' pens.

'Home Sweet Home' sitting on my 'Shabby Shelf ' which hasn't been put up yet!


I absolutely enjoyed making these. It's always nice when a project takes such a small amount of time especially if you have larger pieces on the go too.
I'm going to make more of these blocks for Christmas decorations so look out for more of em!

Thanks for popping in again. Hope you liked em. Please leave a comment as I read every single one and love to get them. xx


Linked to:

'Keeping it simple'

'The girl creative'


'The Southern Institute'

'C.R.A.F.T'

'Coastal Charm'

'Sew Chatty'

'Three Mango Seeds'

'Not Just a Housewife'

'Reasons to skip the Housework'

'Todays creative blog'

'Delightful Order'

'seven thirty three'

'Funky Junk Interiors'

'Ginger snap crafts'

Wednesday, 26 October 2011

Family motto

This project was one I'd had on my mind for ages. It's actually 1 part of what will be 3 sections - the first section, 'a shabby shelf', is finished already, the second part is this frame and the third part is a table that is currently in the workshop.

This started off its life as a picture that had been on our walls for years - in the bathroom!!???!!, however originally it was my sister in laws so it's been around a while:

Seriously faded. The colours are all Blue.

We used to love the picture, in fact hubby still does but once I'd actually taken the picture out of the frame is was sooooo obvious how much it had faded.
Once I'd taken it all apart I gave it a good sand down making sure the awful gold flake area was done extra well.
Then I gave it a coat of Patio Paints in 'Patio Brick'. Originally I had intended to then go over it with a cream paint and sand it back but I changed my mind - I kept it in the Brick colour.
It was also intended to be a pin/memo board with areas for letters ready for posting and also an area for a calender but I changed my mind about that as well...
Then it was just going to be a pin/memo board but guess what? Changed my mind about that too.... see, this is why I don't plan my projects - I always change them.

Finally I decided I would make it into a board with a quote. As it would be hanging in the hallway I figured it would be a cute thing to have.
I spent an age trying to find something to use that I could paint onto that would fit the frame and then I had a brain wave ..... yep me....
I used the backboard that originally held the picture in place - cool idea eh!
It took a bit of sanding back because I had to use the back of to write on  because the front was too rough and had a weird texture. The back however had had years of tape stuck to it so the sanding took a wee while.
Once it was sanded down I painted it with Patio Paints 'Cloud White' and then a couple of coats of 'Contemporary' emulsion paint.
Once dry I sanded it back to reveal the White and also the dark board beneath:

It is actually more sanded than this piccie shows plus this piccie needs turning CCW - Oops!

Next was the frustrating bit.
I knew what phrase I wanted to use - "Life isn't about waiting for the storm to pass, it's about learning to dance in the rain" - BUT I'd ran out of computer ink and was waiting for new ink to arrive.
Could I wait a few days for the ink? Could I eckers like! I had to come up with something else.
So I opened CS5 on my laptop and opened a load of new pages in A4 size. On each one I wrote part of the quote and just hoped and prayed I'd managed to do each one in the same size as I had to enlarge them past the maximum font size.
The best thing about laptops is that the screen is backlit - makes a perfect lightbox.
To copy the letters from the laptop onto paper I turned the laptop round so that the screen was sitting on my knee and simply traced them onto paper:

Look at that for backlighting!

Once I had the image on paper I simply turned it over and traced that image on the back so that I could then put it to the board, scribble over it and have the letters imprinted where I needed them. *HINT: Use a pencil that is dark - these are usually the softer ones. It makes a big difference when tracing the letter to the board. A finer, lighter pencil just won't show enough on the piece you've traced to.
Once the letters were on in pencil I grabbed my permanent pen (a Stabilo & a Sharpie), lay on the floor and went over all those letters.
I always find 'Sharpie' bleeds when you varnish so I try not to use it too much but I've always found that any permanent pen struggles to work on paint and I am constantly (every few strokes) having to get the pen to run again on waste paper - very annoying!!! So if anyone knows of a permanent pen that actually works well on paint pleeeeease let me know.

Once the pen had dried I then gave it another sand down to age it a little.


I'm quite chuffed with how it's turned out. I maybe would change the font next time - This one is 'Before the Rain' and I would prefer the words to cover more of the area.
Overall though it's gonna look great with the 'shabby shelf' and the table.

Thanks for taking a peek, hope you enjoyed it.


This post is linked to
'Ginger Snap Crafts'
'Someday Crafts'
'Night Owl crafting'
'The Girl Creative'
'Delightful order'
'Bear rabbit bear'
'The DIY showoff'
'Flamingo Toes'
'The Shabby Nest'
'Miss mustard Seed'
'Finding Fabulous for Less'

Monday, 24 October 2011

Sideboard makeover

I think I may need therapy!
Seriously!!
I'll begin here, now.
My name is Linda and I am addicted to Shabby chic!!
There I said it, I feel so much better now. Doubt I'm cured though.

This project started off as a £5 sideboard at the local cahrity shop. So determined to have it and take it home there and then that I insisted that myself, my daughters and their friend could quite easily carry it outside, down the steep alleyway and all the way up to the car park. Never mind that all three girls were in high heels (how stupid to go shopping in shoes you can't carry goodies in!).
"It won't fit in the car mother!!" That's not really a helpful comment is it - who needs reality when a piece of furniture is destined to go home with you?
"It will if you three catch the bus home!" The looks on their faces were classic. I'd like to think that I wouldn't have gone that far but.............
So the bemused shop assistants who kept trying to get me to pull up outside (nah, no need for that I insisted) opened the doors fully wide for us and ushered everyone out the way.
I grabbed the end first and immediately put it back down rather sheepishly. Reality had sunk in a) no way could the girls pick this up. B) No way was it going down the alley without someone suffering a broken leg, and C) No way was it going to fit in the car.
"I'll just leave it here for now and get my husband to pick it up" - note I said that in a tone that would suggest I thought everyone in the shop was stupid for not having thought of that in the first place - don't you just love people like that!

Anyway, hubby said it wouldn't fit in his little van so a friend had to pick it up and keep it in his van. For 3 days! 3 days!! You can imagine can't you, the anger, the impatience and the sulking?

So here is the sideboard as it was


Yep, THAT is what all the fuss was about! Hard to believe eh?

Right from the start I knew what I wanted to do with it.
The glass was to come out, shelves to be repositioned and maybe just one to each side, the top was going to be renewed with 6x2 wood that was to be stained and the unit itself was to be a solid cream colour.
So the glass came out as did the shelves and I sanded it to within an inch of its life.
Then I gave it a coat of spray primer. The stuff I used is actually car primer and it was cheap - £1. I know alot of people recommend NOT using the cheap stuff but this one actually did cover well (though not perfectly) and set very quickly. Soooo much better than painting a primer on.
Then I started on the colour coat. We have tins of 'Classic Cream' paint that we bought for the house but thought it looked too yellow on the walls but I figured I'd give it a go on this.
It covered well but putting it on with a brush (even brand new ones) was doing my head in. I hate even the slightest tiny bit of dust or tiny hair and I found I was having to sand down after every coat.
This was making it take an age to complete.
On the back board I decided to stencil a pattern that matched the feature wall in our front room. You can check out how I made the stencil 'here'.
At first I loved the finished stencil look but the more I looked at it the more I thought "what the hell was I thinking?"


I really do not like it now but I left it simply because I was sick of all the painting by this point.
During the final sanding I kinda got carried away and then decided that the piece would look much better as a shabby piece. It so does!
The shelves were also sanded but despite my original 'plan' they went back in in their original place.
As for the top. Well I decided I didn't want the chunky wood top I wanted to do more sanding - see, told you I need therapy!.

This is the finished piece


>


It really is more sanded than it looks - honestly! I just haven't got the hang of taking decent piccies yet!
The bottles on the top I got for 79p each from a bargain store when I was in England recently. The flowers in the vases were not what I really wanted but they were all I could find in the bargain shop.
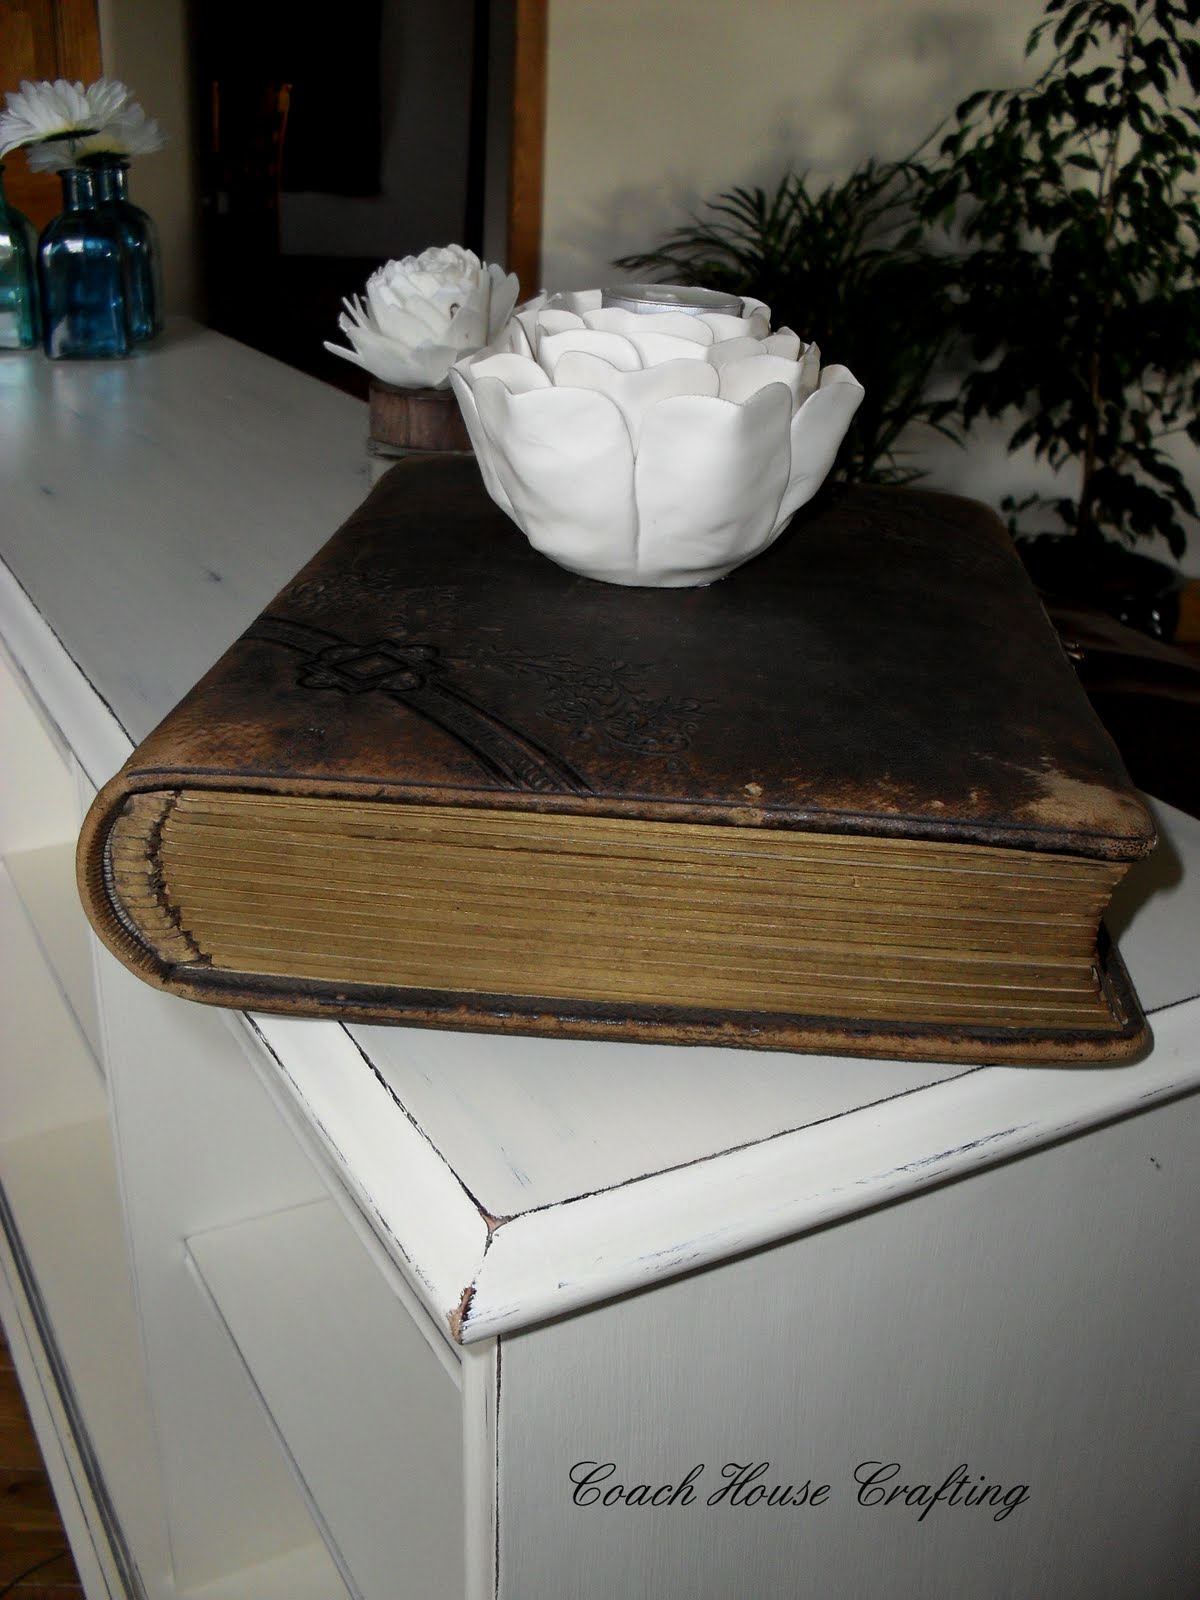
The book on the other end is an old one that my mum gave me.

So thanks for stopping by, pop back anytime.


This post is linked to:

'Craft-O-Maniac'

'Three Boys'
'Restore Interiors'
'Three boys vintage furniture'
'It's a Blog Party'
'Kammys corners' 
'Common ground' 
'Cherished Bliss' 
'Its a hodgepodge life' 
'Domestically speaking'