Showing posts with label Flowers. Show all posts

Tuesday, 21 August 2012

Greenhouse space saver plus milk carton recycle

Wow, I've been absent for a while huh! well apologies for my lack of posting but I'm now back and will have new projects all ready to post on here pretty soon. Until I have them edited though I will repost a couple of my popular back posts and I thought this greenhouse space saver was the perfect post for these glorious gardening days!


I'm hiding indoors at the moment because the wind sounds awful outside. I placated the guilty feeling by convincing myself that I would use the indoor time to make my mums birthday card (it's her birthday in about 6 days) but I made the huge mistake of putting Create & Craft on the TV.  Just while I check my emails mind!
Yeah right!
I then logged in to my blog  to reply to some emails and comments but we all know what happens then don't we?  yup, I'm too engrossed in reading other blogs  that heading through to the cold craft room has just lost its appeal.
I could go outside and potter in the poytunnel BUT I figured instead of that I could just blog about a project I completed a couple of years ago before I had the polytunnel and needed some space saving ideas for the greenhouse - those rows of pots with seedling veg and flowers in em were just taking up too much room because I had to put them on just the one layer of staging.

Brainwave people!

I created this space saver (though excuse the dirty holders)

space saver, pot holder, DIY, garden diy, garden woodwork

The best bit is that it was easy enough to make with no technical tools needed if you don't have them AND it's all scrap wood AND it recycles those plastic milk containers.

OK so how to make it!
First gather your tools ( I have a habit of looking for what I need when I need it - not a good idea).
You'll need:
Wood - I used roof batten, small scrap bit of plywood, some scrap beading and some scrap pieces of  2"x 2". You can use any size you have though.
Screws (I literally use anything I can find. I used black plasterboard screws for this)
Nails if you don't want to use screws.
Tape measure.
Hammer.
Screwdriver.
Saw (unless you use a cutter as I do)
Pencil.
Milk cartons (I used 30 but you can make the frame and add them as you get them)
Scissors.

I made a basic 4 sided frame using scrap roofing batten and  nails or screws or whatever you have, and made corner supports for the top only.

 garden project, garden diy, garden space saver, seedling holder


Next I made 2 bottom plates to support the whole thing. I just used whatever cuts of wood we had for this as long as the bottom plate used is wider wood than the  top plate.

 garden diy, garden woodwork, seedling holder, greenhouse space saver, milk carton recycle

Screw the two bottom base blocks together then screw the actual square frame to the blocks - remembering to keep the corner supports to the top.

Then I cut some pieces of plywood into a rectangle shape and cut out 2 grooves to each one to hold the cross supports that the bottles attach to.


Those rectangle pieces were then attached to the frame with screws as shown above.
Next I cut some small beading to use as supports for the Milk cartons, making sure the cuts I made in the rectangles kept the supports supported but not so tightly that they were awkward to lift out.

Finally grab some milk cartons (I used either 4 pint or six pint ones) and cut around the carton just about where the label starts. You don't need deep holders if they are for seedling pots.
*TIP - put the lid on the carton before you cut it. This keeps the air in and makes it rigid for that first incision with the scissors - try to pierce it without the cap and it will just collapse*.
Once you have them cut just slot them onto the frame through the milk carton handle. Leave the lid on if you want but you can take the lid off to aid drainage too.

Now you're left with a load of bottoms to milk cartons so lets use em to make plant labels.

Cut down the middle of the leftover bases to the next mark that goes all the way round the container (would have been the bottom of the label) then turn and cut all the way round the circumference of the container so you end up with a large rectangle of plastic.
Finally cut slices off that plastic as wide as you require your labels to be and then cut points on one end od each and voila! Plastic plant labels for free.

 milk carton recycle, garden diy, seedling holder, garden woodwork, scrapwood diy

I use these labels all the time and because they're free to make I don't worry about cleaning them when they're really bad, I just throw them away and make some more. You can stick them in a container of bleach though as they are easy enough to clean that way.
p.s. Once you've cut the side off the container to make your labels you are left with small pots made from the very bottom, I use these holding the labels or collecting seed etc. So even the bases can be used!


Linked to:


'I heart Nap Time'
'Nifty thrifty things' 
'Youngancrafty' 
'My romantic home' 
'Funky junk interiors' 
'Country momma cooks' 
'My 1929 charmer' 
'Sew can do' 
'Keeping it simple' 
'diy home sweet home' 
'sassy sites' 
'ProjectQueen' 
'Kammys corner' 
'Organiseyourstuffnow' 
'Gingersnapcrafts'
'Common ground'

Monday, 26 March 2012

Garden Planter & sewing table

Wow, have we had some scorching weather this week!
It's pretty darned unheard of for us to be hitting the 20's at this time of year, especially living smack next to the coast. What's been even nicer is that we have had no wind here either, maybe a little breeze every now and again but nothing really.
But in good old UK tradition the weatherman talked of snow by the beginning of April!!!

Anyway, I thought I'd show y'all a couple of my latest projects.
This is my new from old sewing table


It looks better in person honestly!
The room it's in isn't finished yet. It's an office slash craft room and isn't on our list of priorities at the moment - it still needs skirting, painted walls, curtains, pretty much everything really.
I'd hoped to add a bit of colour in this room and have been hankering over Duck Egg but hubby happened to mention he hated the colour and seeing as the Office is his part of the room then I spose I better take his opinions into account - see how nice I can be!
Then I decided on Sage instead. Sage! A weird choice I know but as I was dithering about the perfect colour I happened to notice a photo frame in a Buffy the vampire slayer re-run. It was Sage and I thought it was gorgeous!
Yes I did just admit to watching Buffy re-runs! I watch Angel too - is that just sad?
However, at the store buying the paint (my only purchase for the table) my daughter hated my choice in colour and she and my hubby insisted 'Morrocan red' would be the perfect colour to warm the room. So I gave in..................and hate it!
The drawers are a set that was gonna be thrown out so I grabbed them and the table top is lengths of wood I have stashed away in my Polytunnel (to dry out) so other than the paint this project cost me nothing.
You'll notice the lack of drawers handles. The old ones were awful and I can't find some I like that don't cost the earth so until I do find some.................................

Next is my latest garden planter


Excuse the garish green surround but the garden is a mess at the moment and if I'd left the image as was then you're eyes would have been drawn entirely to the mess surrounding the planter.
This planter was made completely from scrap wood I had around the place and the legs have lead coverings top and bottom to prevent rotting. I pinched borrowed the lead from hubby who always have some laying around and then pinched borrowed his lead cutters to cut the stuff to fit - not easy!
Anyway I build these things adhoc and have no clue as to what I intend to put in them. This one will house a Rhus tree (staghorns sumach) but it's only a tiddly sapling that I grew from seed a couple of years ago so I've chucked in a few Peacock Orchid bulbs and heuchera plants to give it some Oomph until the tree looks, well, like a tree!


And because the last few days have been so lovely I snapped away at a couple of the Spring bulbs shooting up


While Daffs are not necessarily my most favourite of Spring flowers I do love their scent and  I love that they brighten up a room, though I do feel terrible for picking them - I guess that comes from being told off for picking them as a kid!


Muscari, how beautiful! These are bulbs that are planted in a tub containing a Fig. Lovely scent!


Linked up to:
Under the Table and Dreaming
Keeping it simple 
White Wolf Summit Farmgirl 
Niftythriftythings 
JAQS studio 
Primitive & Proper 
Not just a housewife

Sunday, 18 March 2012

Happy Mothers Day

Happy Mothers Day!

OK, I know it's almost over already but for now, here in the UK, it's still Mothers Day and I've just spent an hour or so looking over some photos I took recently, adding watermarks and borders, downsizing them and now I'm putting them up here - all 4 of em!

I've done a couple of posts lately on a fabulous ebook by Katie Evans called 'The key to taking pictures like a professional photographer' and so I put some of that 'newfound knowledge' to the test with these piccies.


This first one is my daughters Buzzard, Darla (yep, she went through a Buffy stage many years ago lol). This poor bird was a rescue case and had been kept in a small razorwire cage, this resulted in her looking more like a chicken than a Buzzard when she got to us.


These next two are of the Camelias that are blooming in my polytunnel. I would so love to get this shrub outside where we can see it from the house but sadly it won't survive and I don't want to risk losing it, especially as this is its first year of flowering.


This next one is Huntly my Great Dane, he just luuuuurves his teddy bears. (I played around to make this one more of a HDR effect).


Thanks for looking and Happy rest of Mothers Day!

Friday, 24 February 2012

Scrap wood plant labels

It has dawned on me just how many plant labels I use, whether it be in the garden,  in the veg plot or in  the polytunnel.
For the most part I'm happy to use my 'recycled milk container labels' as they're durable and can be wiped clean to use over and over again.
But what if you need something a bit more fancy for say, pots? or the front of the border? Somewhere  plastic just isn't going to do anything for the aesthetic appeal of the blooms you're trying to showcase.

Well how about these:
 wooden plant labels, scrapwood plant labels, plant pot labels
Labelled in photoshop just to show what they can look like.


These are very easy to make from scrap wood so cost nothing more than your time and they look pretty darned good in those pots you've spent time and energy on with planting design.

Quite simply you cut the desired length of stake, cut one end into a 'V' point and cut  a 45degree angle  across the width of the other end, this is for a more pleasing visual angle once the top is attached and the plant name is written on.
A smaller piece is then nailed onto the angled end of the stake and voila!

plant pot labels, wooden labels, wood garden labels

wood garden labels, wooden plant labels, diy garden stakes


Once you have used a permanent marker to label the labels you should then give the whole thing  a coat of sealant or exterior grade varnish. If you need to change the plant name on it at anytime you can sand it down and start again.
Cheap and easy!


Linking up to:
'Ginger snap crafts' 
'Craft junkie too'
'Craft envy'

Monday, 6 February 2012

More colour and splashes.

So there I am editing photographs so that I can upload some of the projects I've been tinkering with and share them with all you guys and what happens?
I open an image to test out how some Photoshop brushes I uploaded might go with a colour splash and I end up getting so engrossed in it that nothing else gets done - typical! Although I did play around on Pinterest for a while, it's kinda addictive!

So what's a colour splash you may ask.
Well until last week I had no idea either, figured it must be splashes of tester colours stuck all over a wall or something but no it's way more groovy than that.
'Leavesnbloom studio' introduced me to this satisfying photo playabout and basically you open a photo in your image editing software, colour pick a colour and then stamp it using a groovy brush onto a sideboard or any other area you choose. It makes for a very pretty image.
Now I'm new to this so you'll have to forgive the lack of imagination (I'm a straight line kinda gal) but if you check out Rosies blog you'll see loads of imaginative ways of going with this.
You can see my attempt last week 'here'.
Anyway here's my colour splash:


Nifty huh? And there are soooooo many ways you can go with this.
All this was done in CS5 but I think you can do it in pretty  much any editing software.
The brushes I downloaded FREE from 'here'.

Enjoy!

 
Linked to:

'Ask Anna Mosely'
'You are talking too much'


Tuesday, 10 January 2012

Bad Blogger award!

And the bad blogger award goes to......................................ME!
New into 2012 and I'm already lapsing on the blogging. It's not on purpose though, I just don't have a project finished and edited ready for sharing with y'all yet!
So I figured that instead I would treat you all to a couple of goodies I recently found whilst foraging in the deep dark depths of my husbands shed but first I am going to share some other pictures with you.

I recently discovered that I tend to moan a fair bit about the cold weather here in the Highlands. The lack of amenities here(this means literally everything) and the barrenness of the area is usually top of the list of my rantings, however, I was recently looking through some of the piccies I have taken in the locality and was reminded that while we may not have perfect hammock weather (though I do have one cos you never know...) or a cinema or fast food places or decent shops or even a decent bus service (think I'm losing the point here) we DO have this:

Mountains and rugged landscape.

The beaches are amazingly clean, pure sand and Blue waters. (though the weather is always too crap to go in it)

Mountains galore! they're covered in snow all winter.

And that's just the start of it. Next time I'll show you the harbours, the lighthouses and the sunsets.
I'm lucky really aren't I!

And just to brighten up these gloomy, cold winter days here's a couple of lovely bright flowers to cheer us all up.

Tulips.

Lily.

See, brighter and cheerier already huh!
Now for those couple of goodies I found in the hubbys shed:


OK it's a tad crappy and beaten up and well..........knackered looking but surely there's some life left in it?
I haven't a clue how to go about restoring it but I'm thinking Cream colours for the outside and some gorgeous contrasting colour inside.
Any ideas where to start? And what the heck do I do to all that rusty metalwork?
Unfortunately one snap lock is missing and although I found the twin to this in another part of the dungeon shed it was even more beaten up and had no locks intact at all.
So let me know what you think as I've not got a clue where to start.

Now look at this beauty


Maybe "beauty" isn't the most accurate of descriptions but it could be couldn't it?
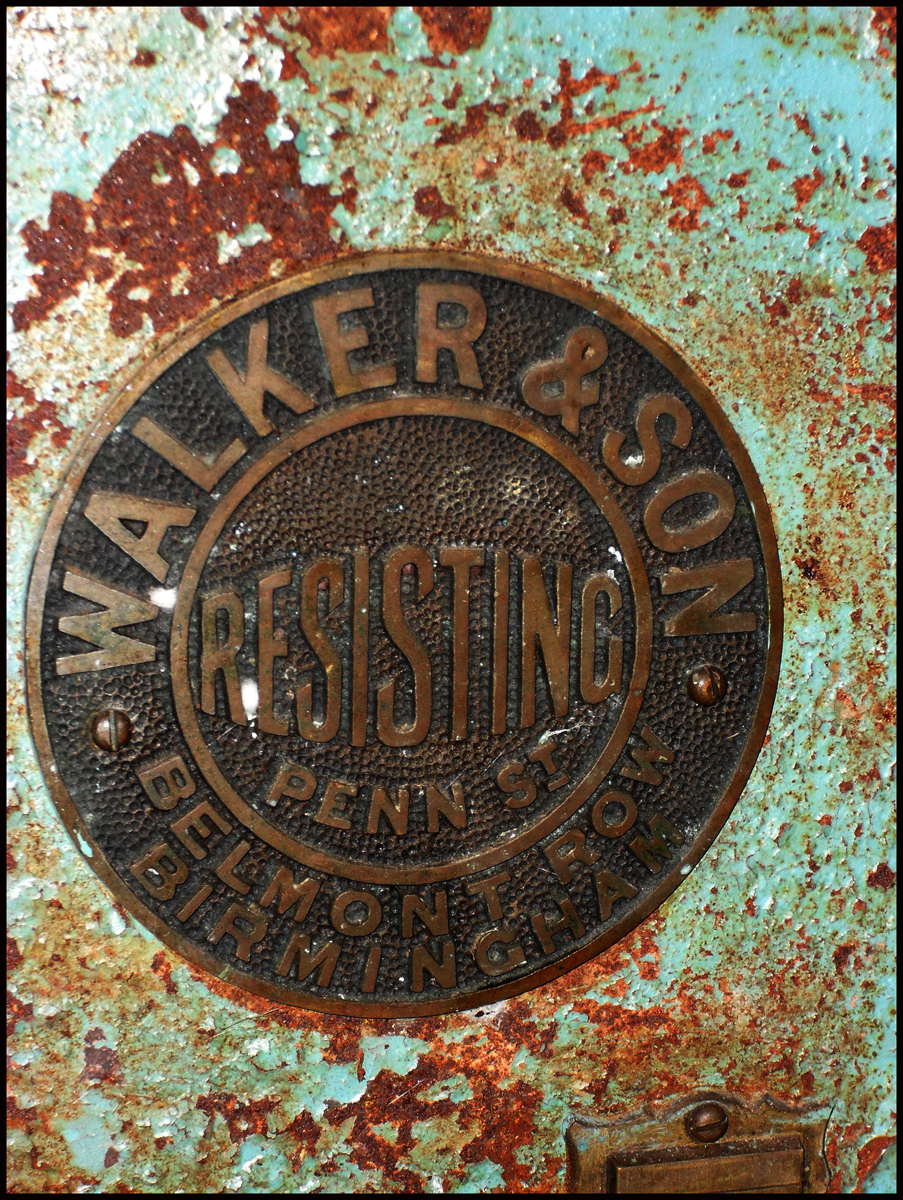
This is an exceptionally heavy old safe that my husband was given while working for a post office. We hauled this thing across country determined it was going to get a makeover and then was going to get pride of place under the stairs in our new home. 8 years later we move into our new home, get ready for the makeover and ...........................lose the ruddy key!
This fabulous safe is now destined to sit in the depths of the abyss forever. I've tried everything I can think of to trace the makers of the safe but nada, nothing!
Not even sure a locksmith could do much with it without rendering it useless.
Still, I've not given up all hope just yet. One day.............

So thanks for stopping by, hope you enjoyed looking. Pop back again soon, I promise I'll try to be a better blogger from now on.


Monday, 21 November 2011

Such gorgeous weather!

This calm weather is getting a tad eerie now. Is it the calm before the storm?
We rarely seem to get a day here without wind of some description and I'm not talking the smelly kind! We live smack bang next to the coast and as we haven't gotten round to surrounding ourselves with trees yet, the wind can be biting!
However the last couple of weeks have seen some rather calm, wind free conditions and as much as we're enjoying it while it lasts it's hard to not think we're sitting in the eye of a storm and we're gonna get battered by the other side any time now!

Still, today was lovely again and again I found myself sitting and listening to the birds. I made another half hearted attempt at photographing them again but just as I got myself set up the battery died on the camera. Typical!
By the time I'd got another one sorted the birds had done a flit so I decided to photograph a lone Blue flower instead (least it can't fly off)

Cranesbill (Geranium) Johnsons Blue

How gorgeous is that! I was drawn to it because it was smack bang in the middle of the rest of the plant that had died off for the winter. This little gem is still clinging on determined to show off!

Next we have another Cranesbill that is still in full flower and even full leaf. All the others of this species that this would have been grown from have long since died off. Not this one though!

Cranesbill

Pretty huh!

I couldn't resist this one too. A Fuchsia in my polytunnel.
Fuchsia

I have loads of various Fuchsia outside that are still in full flower and full leaf. I'm guessing the cold summer followed by this mild winter has confused them.
Even my Daffodils are a good 7" out the ground and I NEVER see that before about February.

Anyway, as always, thank you for popping in and looking. I promise there'll be more crafts up soon as I have plenty nearing completion and don't forget 'Wotcha Wednesday' when I'll be featuring some of my followers.
PLUS, I'm going to be hosting a linky party in the very near future. Yay! So keep those Eagle eyes open!


Linked to

'Craft-O-Maniac'
'Keeping it Simple'
'Creative me Monday'
'The Girl creative'
'Not Just a Housewife'

Monday, 10 October 2011

Shabby racks & home made stencils

I'm right in the middle of making over a sideboard I picked up from the charity shop for a fiver a while ago but in true crafty person style I can't resist doing the odd small project alongside the larger ones while the larger ones are drying.

I recently showed you 'these' coat racks that I made and made mention in that post of a rack that was still undergoing some work.
Well it's finished and here it is:

 shabby racks, shabby chic, coat rack, wood coat rack


I followed the same method as the previous coat rack regarding 'Patio Paint' colours but I then fixed this rack to another length of wood that had had the same 'shabby' treatment.
Before giving the coat of varnish though I added the text 'May every Journey Bring you Home'.

The last text I added to a 'shabby' project were 'these' letters for the bathroom but that time I used a paintbrush to do the text. This time though I needed more flexibility due to all the squirls so decided to risk the 'sharpie' pen. I much prefer to use 'sharpie' for text but it doesn't flow very well on these paints for some reason and I had to keep scribbling on paper to get the flow back - very annoying and very time consuming. I couldn't have done this sort of flourishy text with a brush though - well I could, but it probably would have looked naff!

Once the whole thing  had dried I gave it one coat of satin floor varnish and took extra care not to spend too much time brushing over the text because in my experience 'sharpie' tends to bleed.


HOMEMADE STENCILS:

I've also had to do some stencilling for that cheap sideboard that I'm revamping. I looked everywhere on the net but couldn't find a stencil that I felt would look right and then remembered some wallpaper that I had bought for 50p to line the inside of a wardrobe I was vamping. (another finished project for another day)
The pattern was exactly what I wanted so I traced the image and was half way though cutting it out when I realised it wouldn't make a stencil. Duh!!! The positive and negative parts weren't compatible and I ended up with a just a big gap and  couldn't for the life of me figure out how to alter the pattern to make a stencil. So I sulked instead!
It was during this sulk that I had one of my rare 'lightbulb moments'. I was sat staring at the wallpaper on the feature wall in our front room (It's one of those wallpapers that looked better on the roll than it does on the wall) and I realised the whispy flower would make a great stencil.
So to make the stencil I traced the flower with greaseproof paper and then traced that tracing using a 'sharpie' onto one of the flimsy plastic office file holders you can buy dirt cheap. I bought one for 40p at Tesco and cut it in half to give me two stencils.
Once that was done I used a craft knife to cut it all out. This took an age and 2 days later I have still got a numb forefinger from the pressure.
You could use a stanley knife (exacto knife) but I found it really difficult to get the curves correct with one of those.
I have a craft knife that has many different blades and I found a very narrow one worked best.
*A little tip: move the stencil as you cut as much as you can, it makes life so much easier than trying to trace it with a knife and you're less likely to run off the edge.


That's the finished stencils all cut out.

Next I masking taped it to the internal back of the sideboard. Alot of people recommend spraying it with repositionable adhesive first but I hate the stuff and refuse to use it - I can just imagine the mess I'd make with it.
I actually made two stencils for this flower, 1 was the actual petals and the other was the stem. If I'd tried to make this with one stencil then I would have ended up with a lot of flimsy areas and would definitely have had to use the spray adhesive to get a decent fix.


This image shows  the  second stencil attached over the top of the dried flower pattern.
I didn't use a proper stencil brush for this project as I didn't have one, I just used a stiff bristled 'Harris' brush.
*Top tip: If you're doing it the way I did then be extra careful with the brush. Make sure you stipple accurately and don't press too hard or the bristles could go under the stencil. Also do not overload the brush - when you first dip it in paint stipple it out on waste paper to remove the excess before hitting the stencil. Finally, when you peel the stencil back check the underneath for any bleeding and clean it if need be before repositioning.


That's the final dried stencil.
The colours I used are Laura Ashleys 'Duckegg' matt for the flower and Laura Ashleys 'Apple' matt for the stems. Both paints were tester pots I picked up for 50p - bargain!


Thanks for popping in.


Linked to:

'Skip to my lou'
'Boogie Board Cottage'
'Sugar Bee Crafts'
'Sassy Sites'
'Tip Junkie'
'Not just a Housewife'
'Ginger snap crafts'
'Night Owl Crafting'
'Bear rabbit bear'
'Kristens junk Drawer'
'Ask Anna'
'Making the world cuter'
'Sew can do'

Tuesday, 20 September 2011

Love 'n' handmade silk flowers

It's the middle of September guys, where has this year gone? Did I sleep through the summer cos I sure as hell missed it!
Seriously we've hardly been able to string together one week of nice warm days over the last few months here in the Highlands. I am desperate for some warmth and with Xmas only round the corner I don't fancy my chances of getting any  - there's only so much these coastal views make up for - I need a holiday somewhere warm, preferably the Carribbean!

Anyway with the weather being so damp it's taking my furniture much longer to dry and cure. Unfortunately my workshop has but one piddly window and that faces North so we get no sun in there and the wind has blown in every direction except the one I need - typical.
I simply refuse to give up on the outdoor projects and stay indoors doing all manner of crafty goodness (remind me exactly why I am refusing this), I'm just having to learn a bit of patience (and 'a bit' is as far as I've gotten) and let nature take its course -though I am considering giving it a helping hand by wheeling a big dryer into the workshop. There's no way I can work like this for much longer.

Righto I must stop this whining.
I have at least managed to finish one project! yay! A tad small though and really should only have taken a day or so but with the damp air......... there I go whining again.

I found this cute 'Love' sign at our local  factory shop (local to me is 20 miles away) and whipped it up for £3 bargain!


The first thing I did was trace the letters onto some MDF, never know when I may need another one!
Initially I had planned to paint the back and decoupage the front of the letters in something to match our bedroom. In fact this was one of the rare times that I actually did  'plan', but in typical 'me' fashion I  changed my mind mid paint and completely deviated from the plan. And that is why I don't usually plan!
I painted it cream as per 'plan' and then sponged the edges as per' plan' ready to let it dry and decoupage it.
However, it looked like this


Yuk! This is the first thing I've ever sponged the edges of and so I wasn't really brave doing it but even so........
I them decided to paint it the purply plum colour I've used on other furniture for the bedroom and see what that looked like.
Once it had dried though I didn't like seeing the brush strokes in the paint so I started to gently sand it down - I say 'gently sand it' however when the sand paper you use is high grit it kinda defeats the purpose, but oh well.
As the edges became worn with the sanding I found I really liked the effect so decided to keep it that way.
This is what it looks like now


Not everyones cup of tea but I 'love' it!


Most of you know that we recently moved into a brand new home, every bit of it built by my husband with as much help as myself, Stacey & Leanne could muster and I really wanted as much of the inside to be hand made or renovated by myself as possible - my contribution if you like!
When it came to our bedroom I had bought the bed linen months in advance - a range called 'Rosina' by Catherine Lansfield - I fell in love with this range for 2 reasons - 1), it's sooooooo pweety and 2),Rosina is my middle name.
Anyway when it came to the curtains I wanted to stay within the same design range because there are too many variations of 'Plum' and I wanted to ensure the curtains matched. Problem was that for full lengths curtains I was looking at alot of money for two windows, so I decided I'd buy one set of curtains at 90" x 90" giving me the full length I wanted but would also be able to halve each curtain therefore giving me two pairs of full length, lined curtains (and saving a packet).
But I was halfway through sewing up the final curtain when I realised I'd only have one set of tiebacks - duh!
Having never made tiebacks before I was dubious about trying but I had some cream fabric that matched the cream in the curtains beautifully and actually managed to produce 4 tiebacks.
This left me  looking at the lovely Plum satin type material that the  original tiebacks were made of and trying to come up with something I could make that would enhance the new tie backs I'd made.

Ta da!

Fiddly but definitely doable and worth it.
I cut each tie back into 4 strips and singed one of the raw edges over a candle. This not only seals the raw edge from fraying but gives it that darker edge too, plus singeing with candles is reeeeally therapuetic.
I then ran the other edge of each piece up the sewing machine on a long straight stitch and then gathered the strip by pulling on the end of the thread, as each flower uses two strips I gathered the one to be used first a little tighter as it would form the centre of the flower.
I wrapped the first strip round a piece of wire, gathering it as I went and added pleats or folds as necessary and then the second strip was added much more loosely. Once at the end I wrapped it tightly with masking tape and took it off the wire. I then added another strip of cream in the same fashion as the others because I wanted a bigger flower than I was getting with just the Plum strips.
Once I had fluffed each flower to my liking I attached them to the tiebacks  by cutting a slit in the top piece of fabric (these tiebacks are 2 layered) next to the hook and inserted the taped end of the flower and set it in there using 'Fixsal' glue.


These tiebacks really do look lovely and for a first attempt I'm really chuffed with them.

Now I shall give you a little peek at what I'm working on at the moment:
I fell in love with this chest of drawers at a charity shop in town. Going for £20 I was too tight fisted to buy it at the time but soon regreted it and talked hubby into taking me back the next day to buy it.
I spent the entire journey there praying no one had bought it and kicking myself for not snapping up in the first place.


Don't like the handles or those plastic feet but it's well built and is going to look fabulous with a transformation.

A few days later in the same charity shop (a rarity for me as I hardly ever go out let alone into town) I spotted a side unit. Bit funky looking and I hate the sliding glass doors but I know exactly what I want to do with it and where it's going to go. well actually I bought it for the dining room but it's now going in the living room - once it's been transformed of course!


And only £5!

I've been wanting to make a couple of coat hooks for a while now and what I really wanted was some Iron hooks mounted onto wood but the cost of iron hooks is ridiculous, especially for a back hallway never to be seen. So for £1 each I got these


Ugly huh? Have some faith though, they're gonna look great!

I'm also working on a really old wardrobe which has so far in this current makeover changed colour 4 times - no wonder it's taking so long. But there's been good reason for it and I will share the whole sorry saga with you once it's finished.
Plus I'll introduce you to Lita - be prepared to be cutified by her cutiness.

Thanks for popping by and come back soon.


xx

This post is linked to

'Tip Junkie - Tip Me Tusday'
'not just a housewife'
'Ginger Snap Crafts'
'I'm Topsy Turvy'
'Funky Polka Dot Giraffe'
'Nifty Thrifty things' 
'The Creative Institute' 
'JAQS studio'